« January 2017 »
S M T W T F S
1 2 3 4 5 6 7
8 9 10 11 12 13 14
15 16 17 18 19 20 21
22 23 24 25 26 27 28
29 30 31
You are not logged in. Log in
Entries by Topic
All topics
3D paperwork
A - Z challenge 5
A - Z challenge 7
A - Z challenge round 4
A to Z challenge round 3
A to Z round 2
A to Z round 6
A-Z round 1
Around the House
Art Challenges
Artist Trading Cards
Backgrounds
Beads
Bible Journaling
Books
Boxes
Collage
Color Challenge
Coloring
cookbook
Die Cuts
Digital Projects
Digital Stamps
Drawing
Dry Embossing
Fabric Stuff
Fantastic Folds
Field Trip
Home Decor
How Does Your Garden Grow?
Hymnal Art
In The Kitchen
In the studio
Jewelry
Lettering
Links
Multi-Technique
Music to Work By
Musings
Nail Art
New Work
Online Class
Other Hobbies
Other Projects
Painting
Paper Embroidery
Paper Piecing
Photo
Pretty Paper
Quilting  «
Random
reading
Scrap Recovery
scrapbooking
Sewing
Sketch Challenge
Some Backlog
Stamping
Stencils
Stickers
Supplies
Teabag Folding
Techniques
Testing
tips and tricks
Tutorial
Web resources
Welcome to my Blog
Work By My Friends
workflow
Writing
Blog Tools
Edit your Blog
Build a Blog
RSS Feed
View Profile
Group One
In & Out of Studio 3D
Sunday, 29 January 2017
A Walk In the Woods
Topic: Quilting

I signed up for a mystery quilt for New Year's Day.

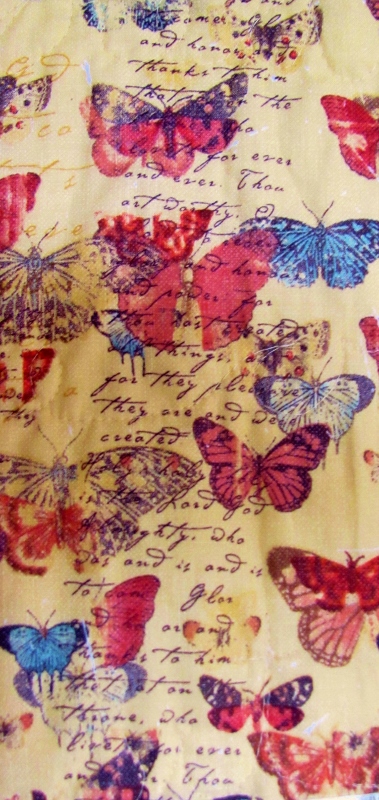
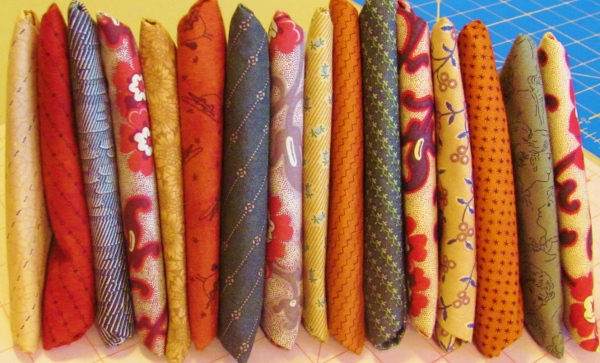
Prior to the day of, we were provided with guidelines on selecting 6 fabrics that would contrast and blend well in the pattern and how much of each to have on hand.

Then, over several days we were given cutting instructions for various colors and instructed on labeling them.

On New Year's Day the designer released instructions every few hours - 'stitch A1 squares to B2 triangles to create X number of usits that look like this' (for example).

Of course, nobody could actually sew as fast as the instructions were published as many steps were time-consuming or complicated.

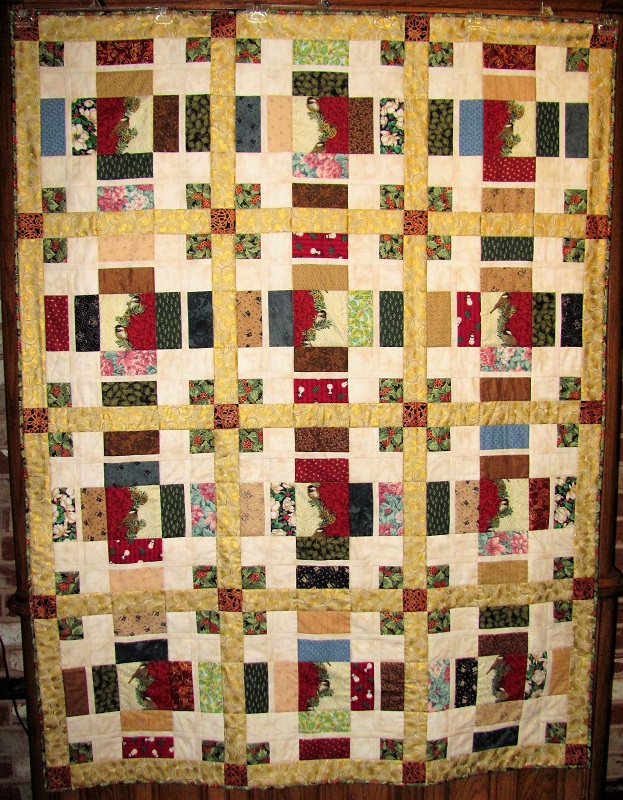
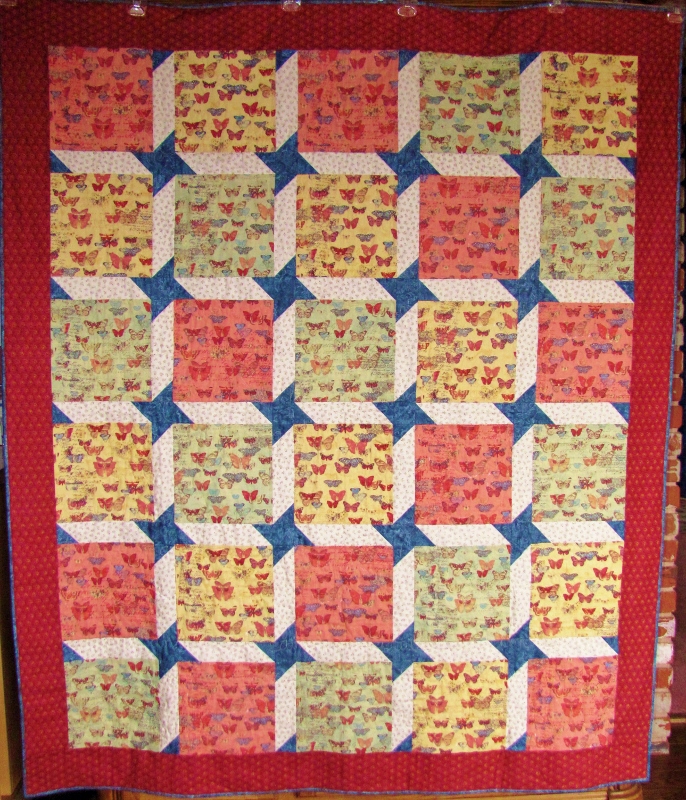
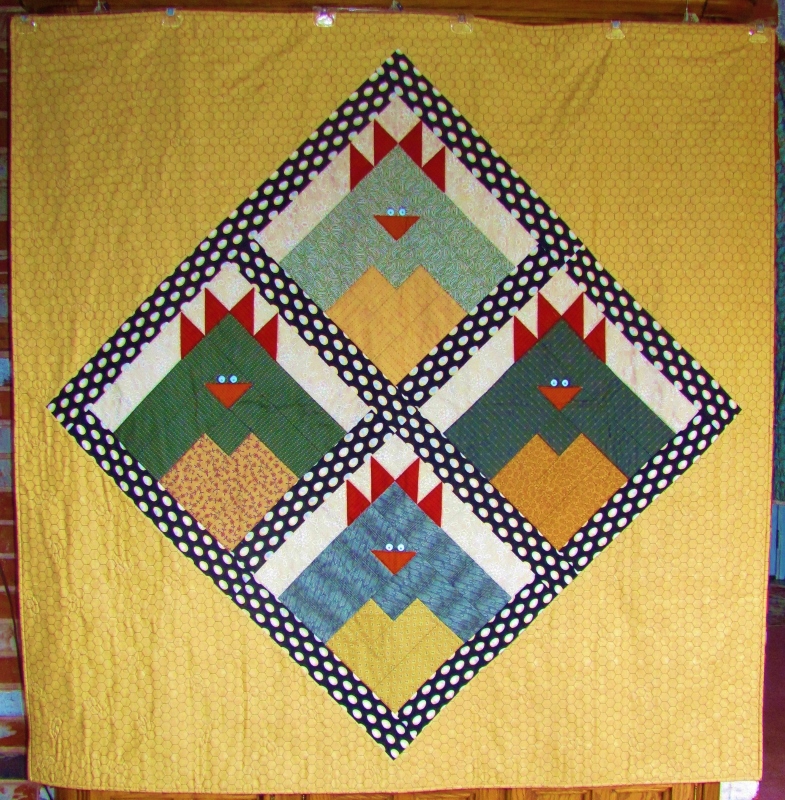
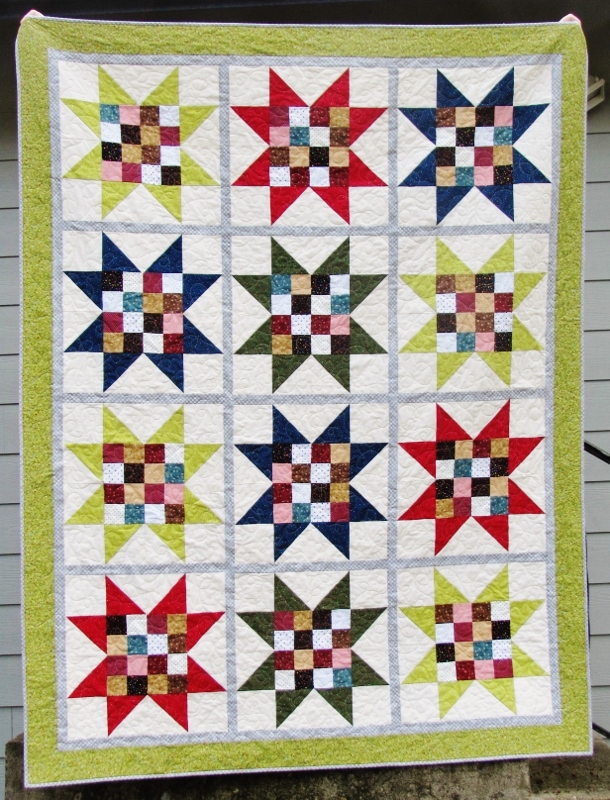
It took me about a week to finish, including layout and assembly of the quilt top. I then had to wait for the next quilting get-together at the church to use the big tables to sandwich the quilt. That caused another delay as bad winter weather cancelled the first scheduled session.

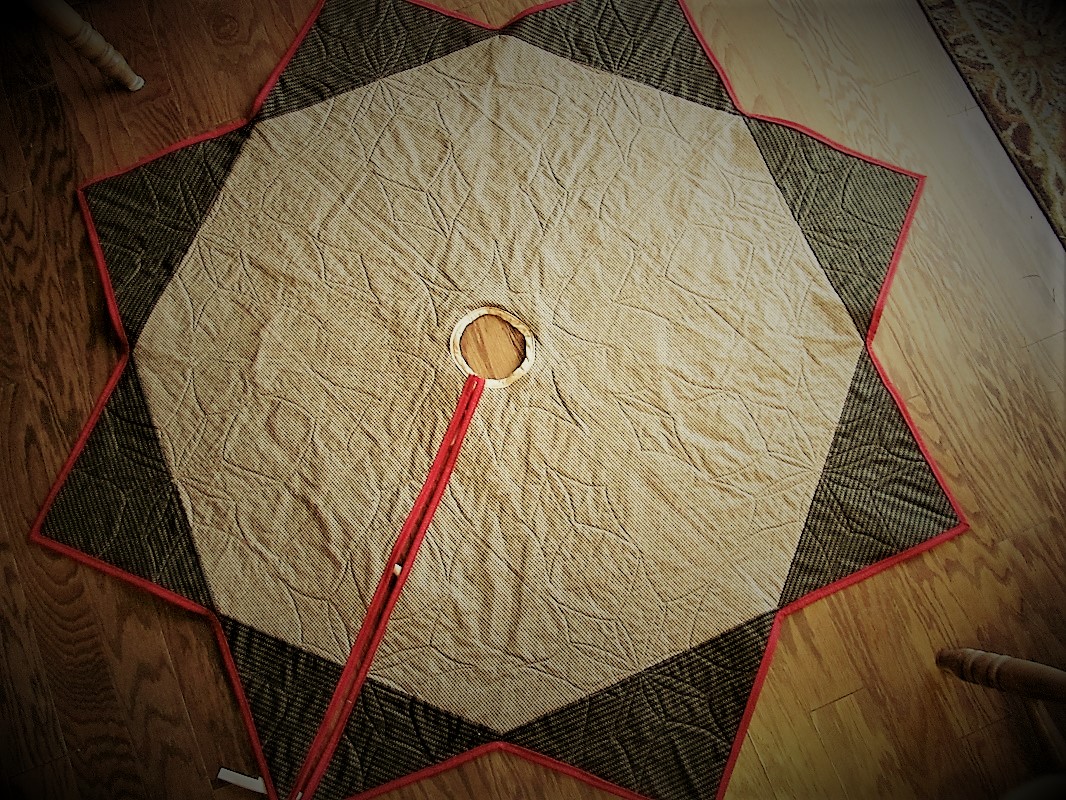
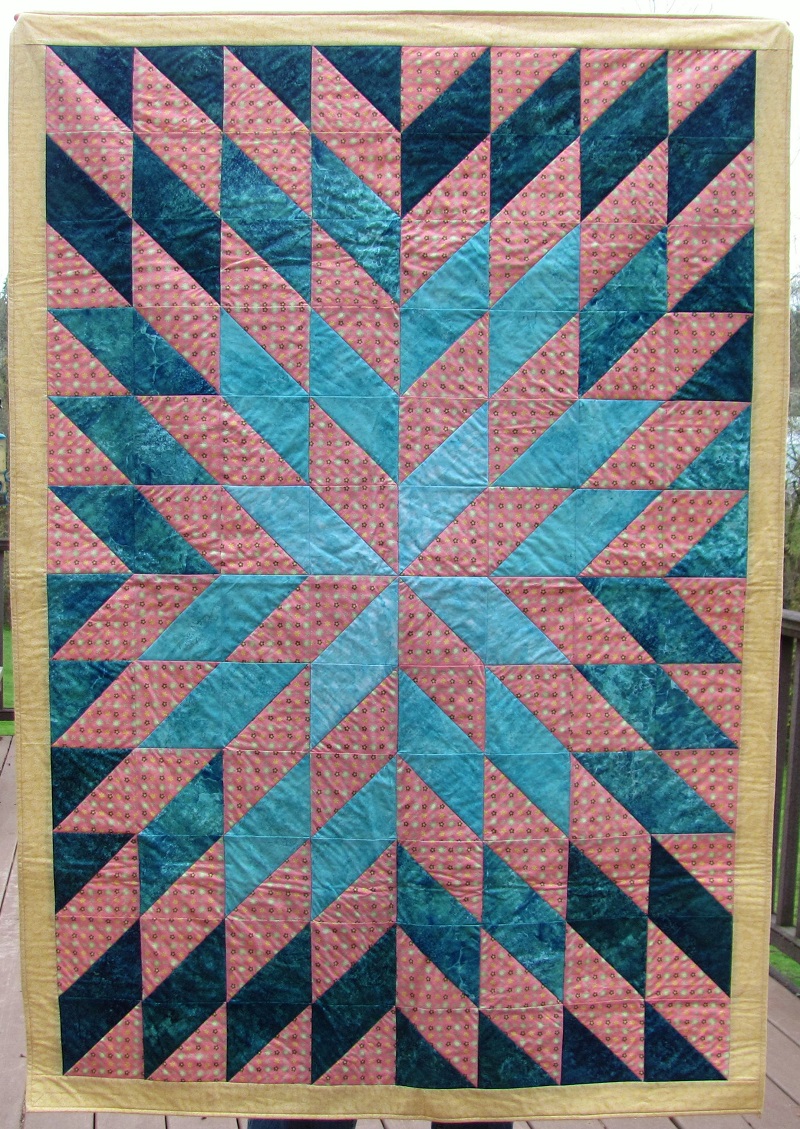
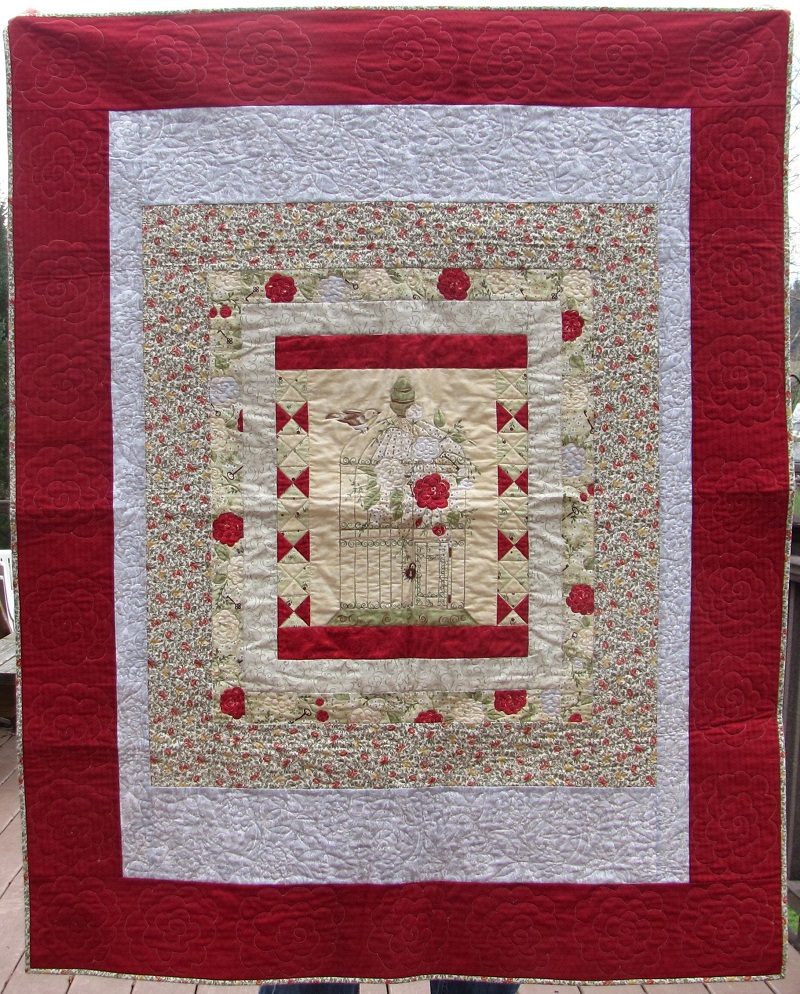
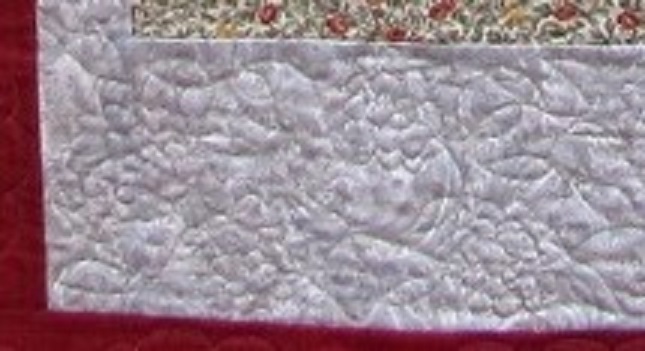
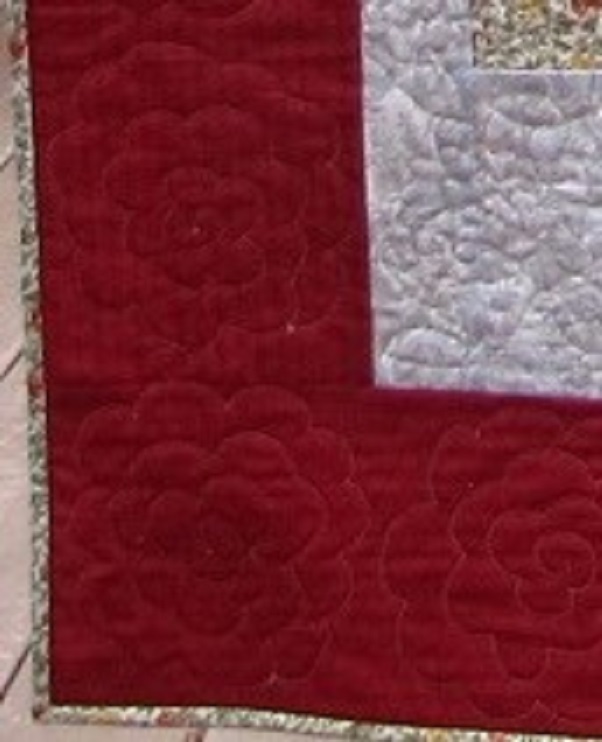
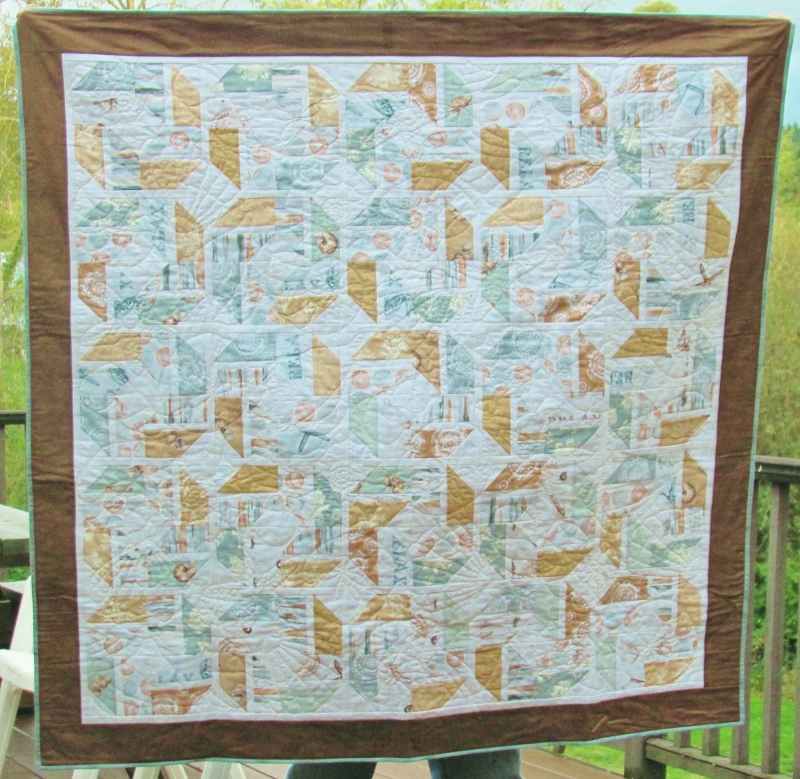
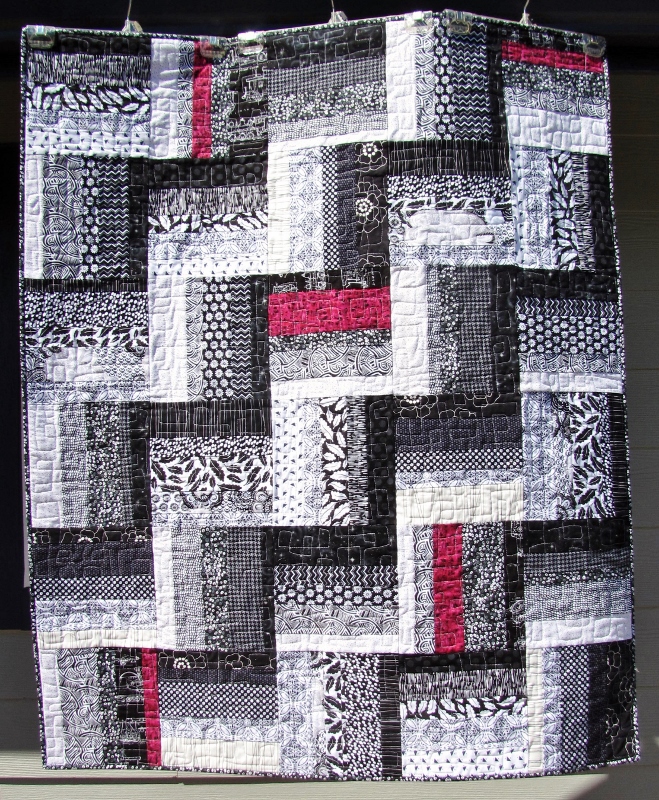
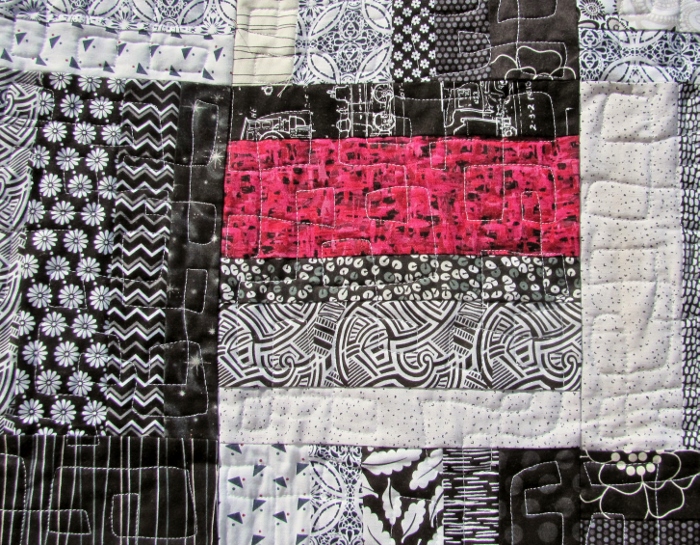
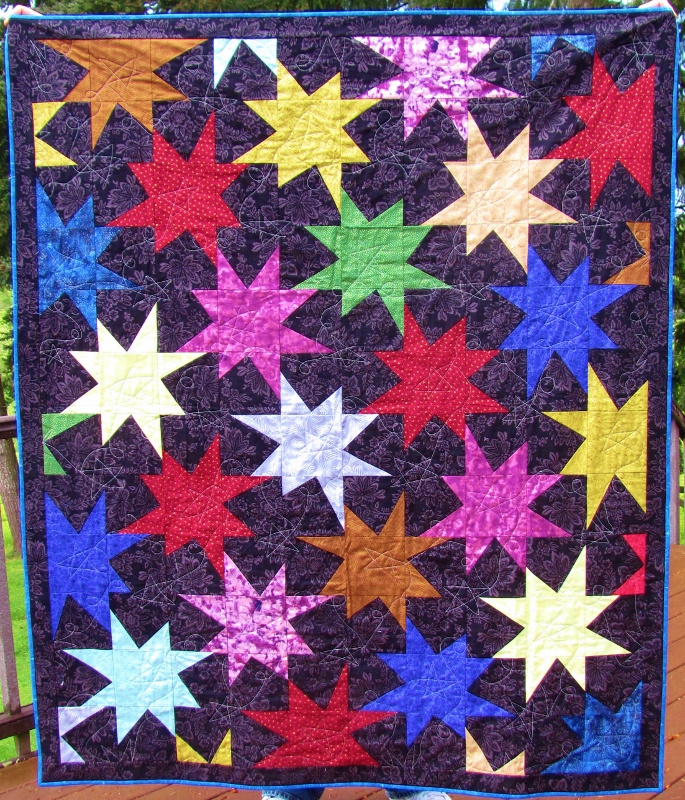
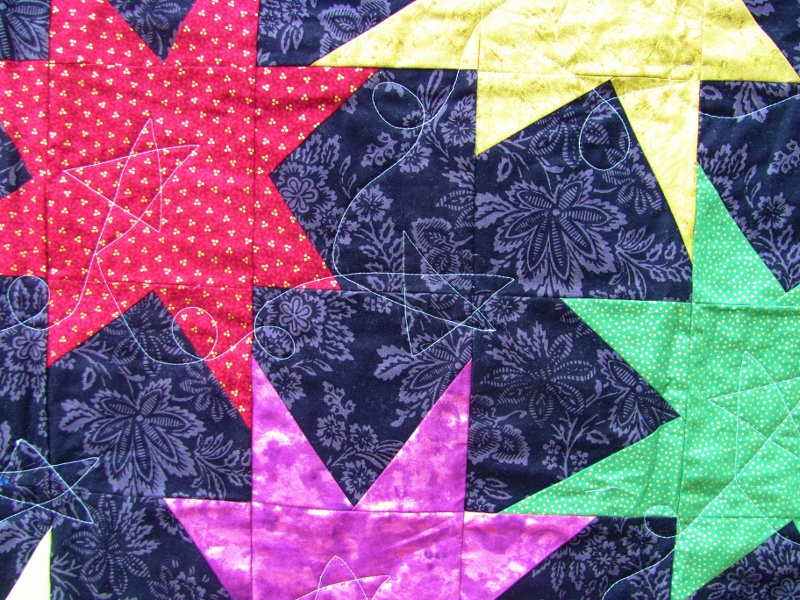
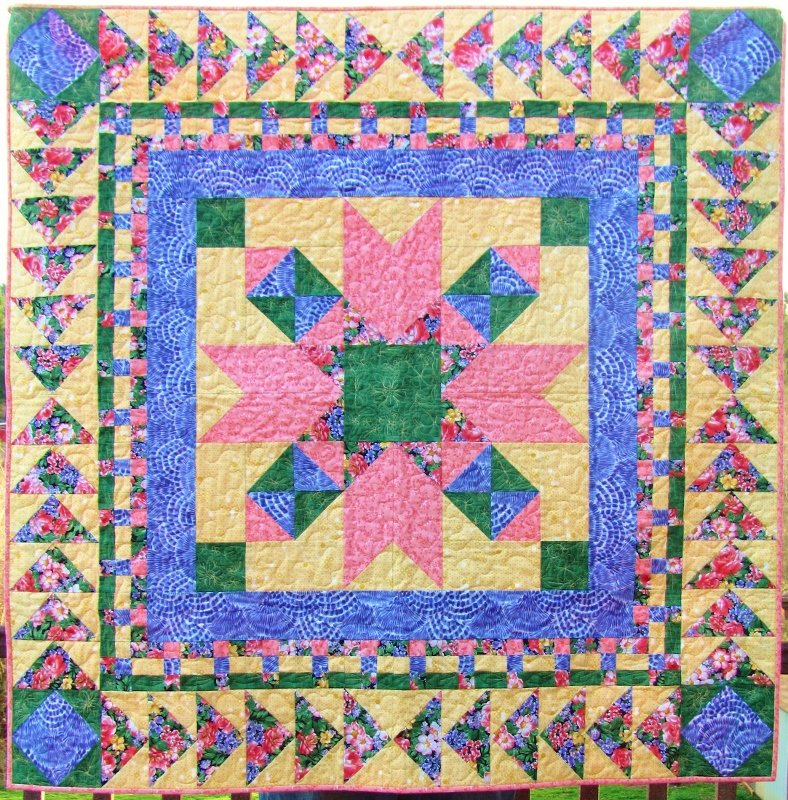
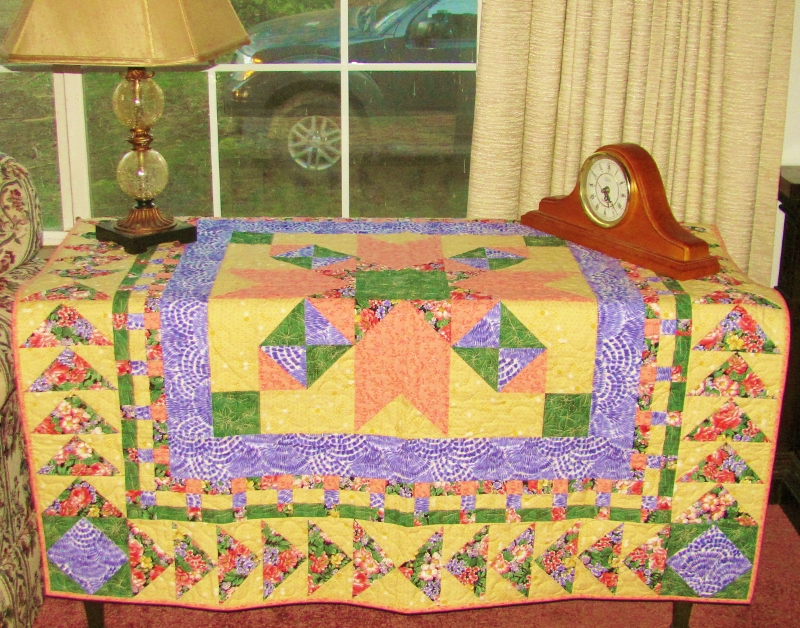
Finally, I got it all together and then this week I got to quilt it. I did this with loopy vines and leaves all over the top.


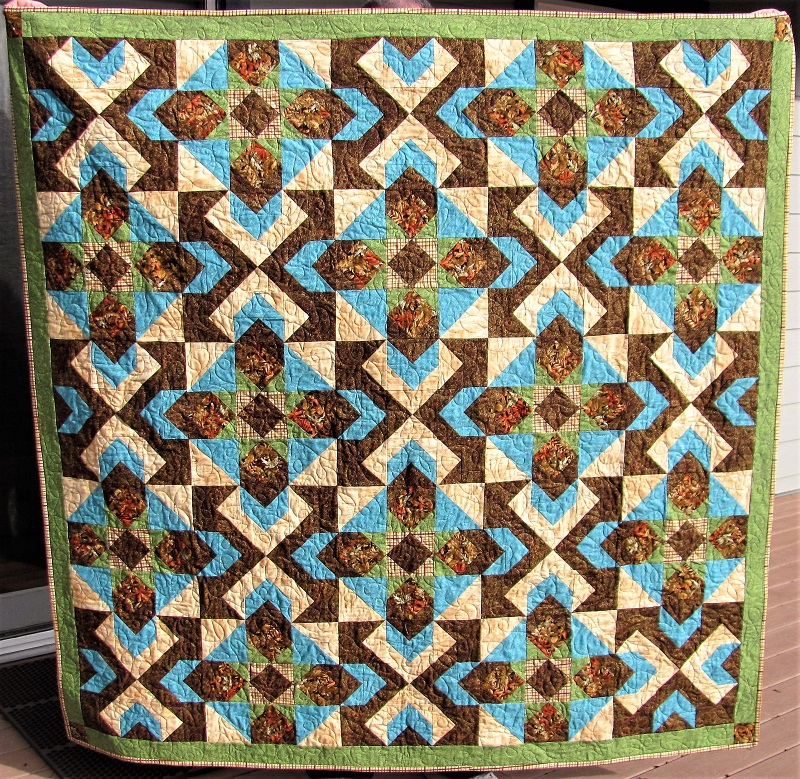
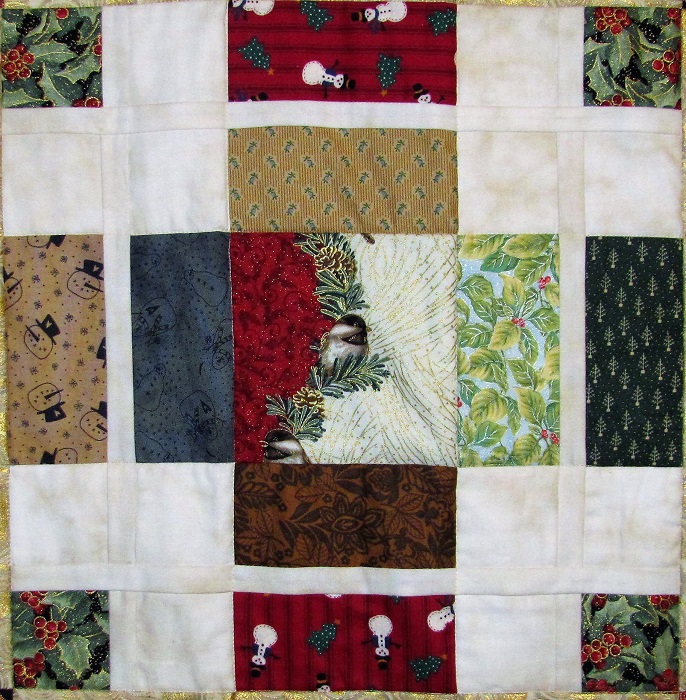
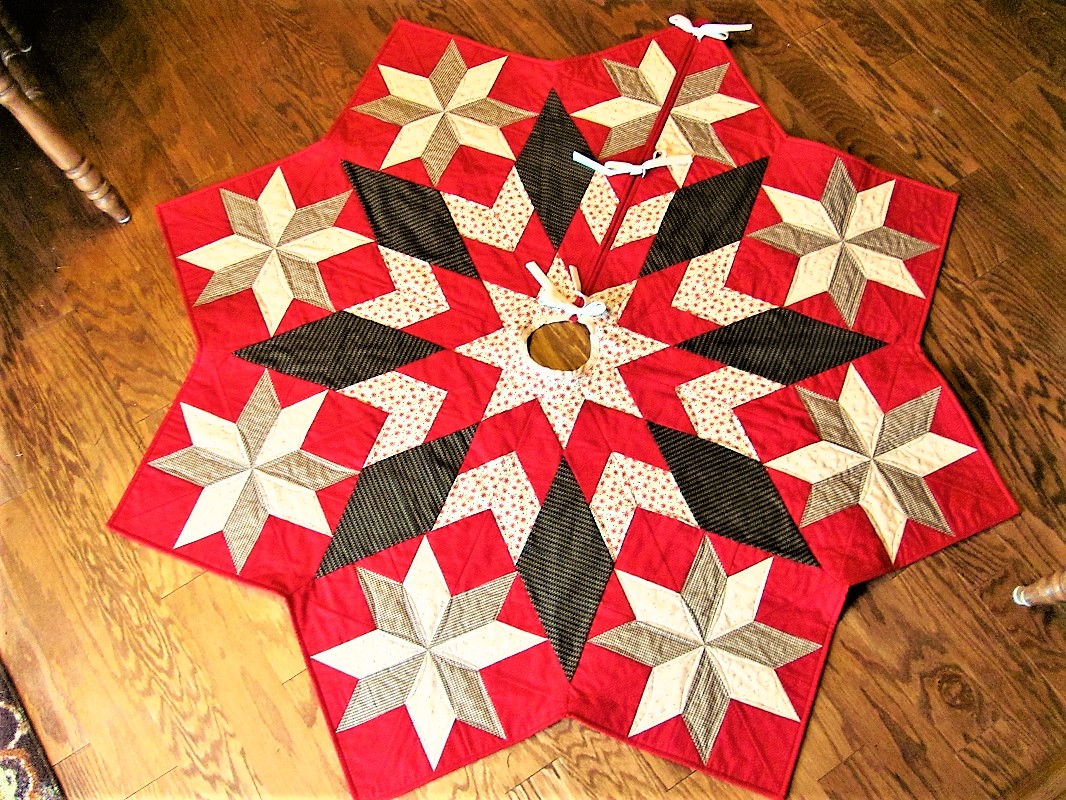
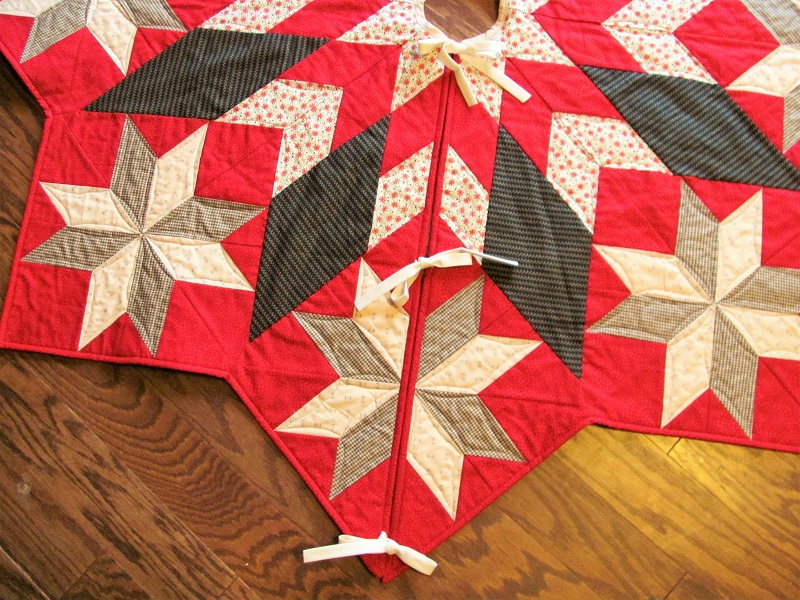
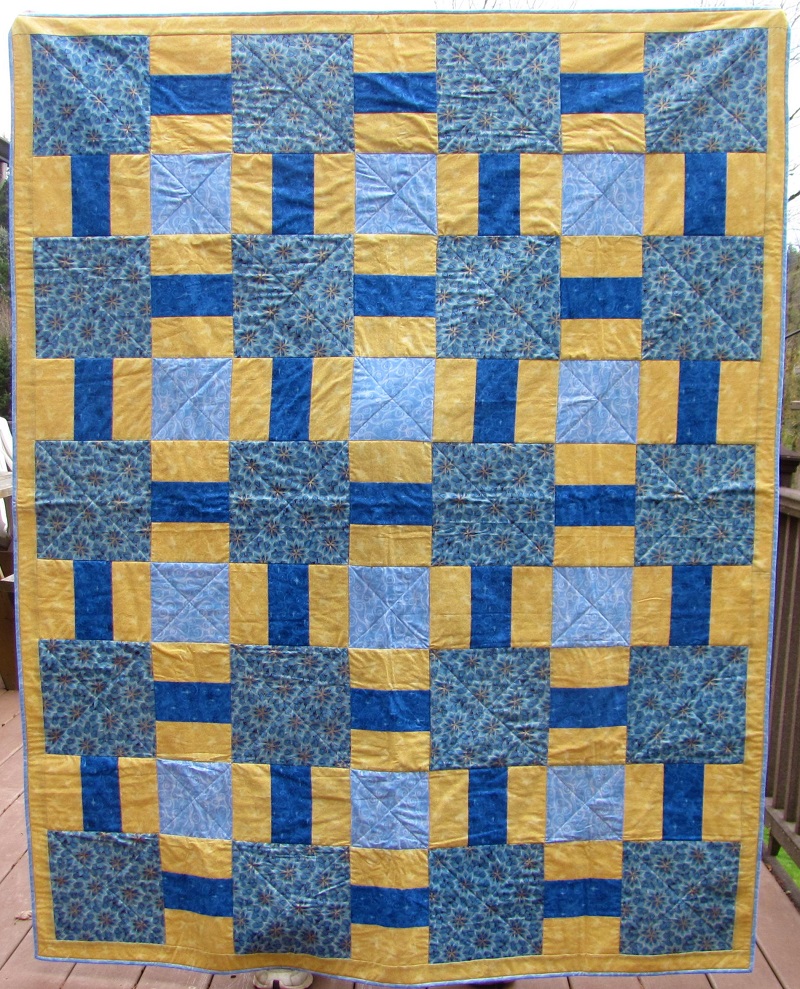
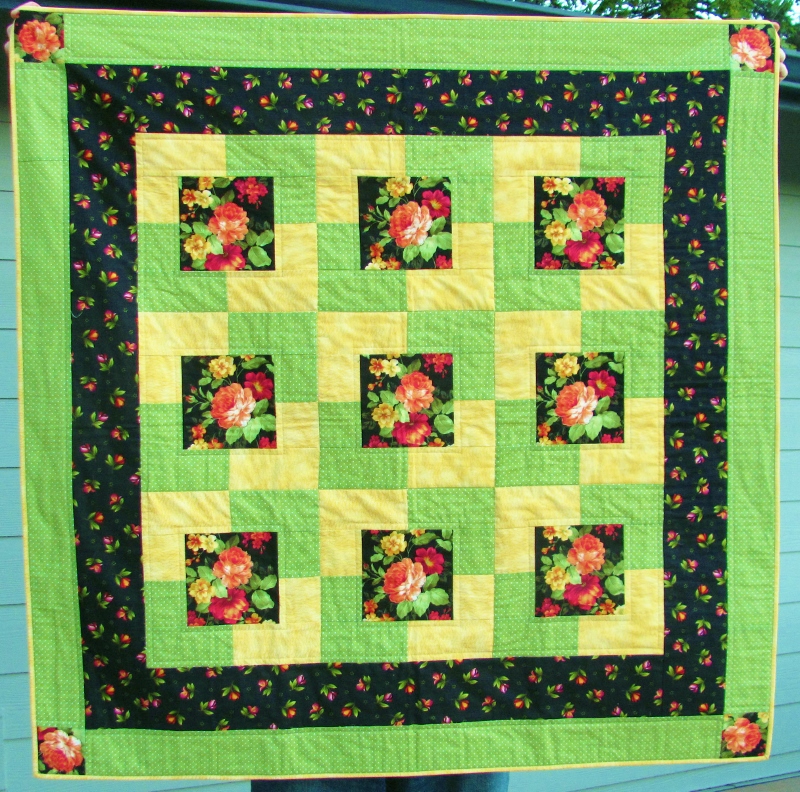
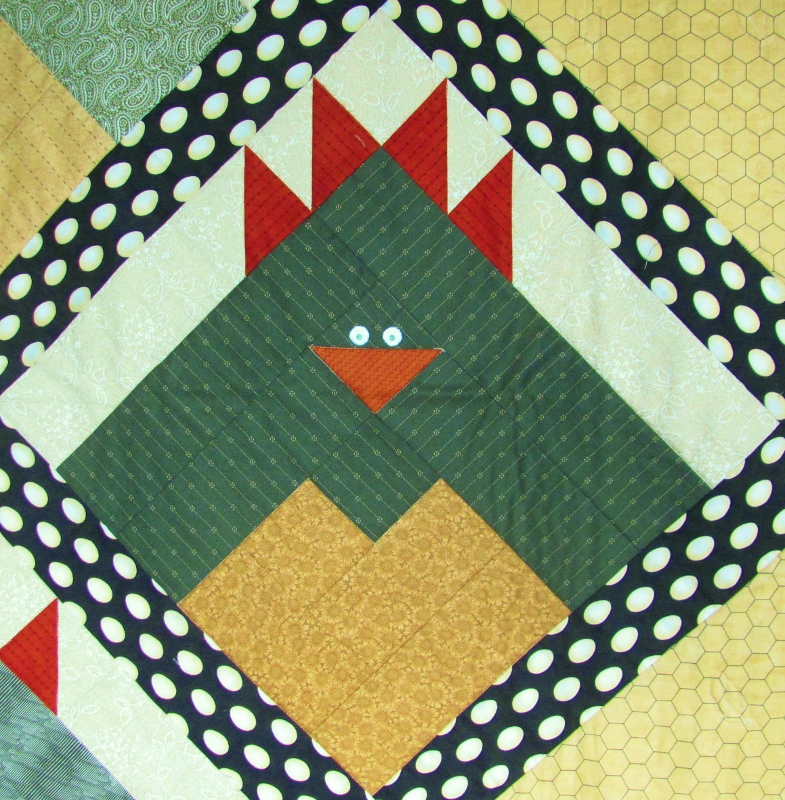
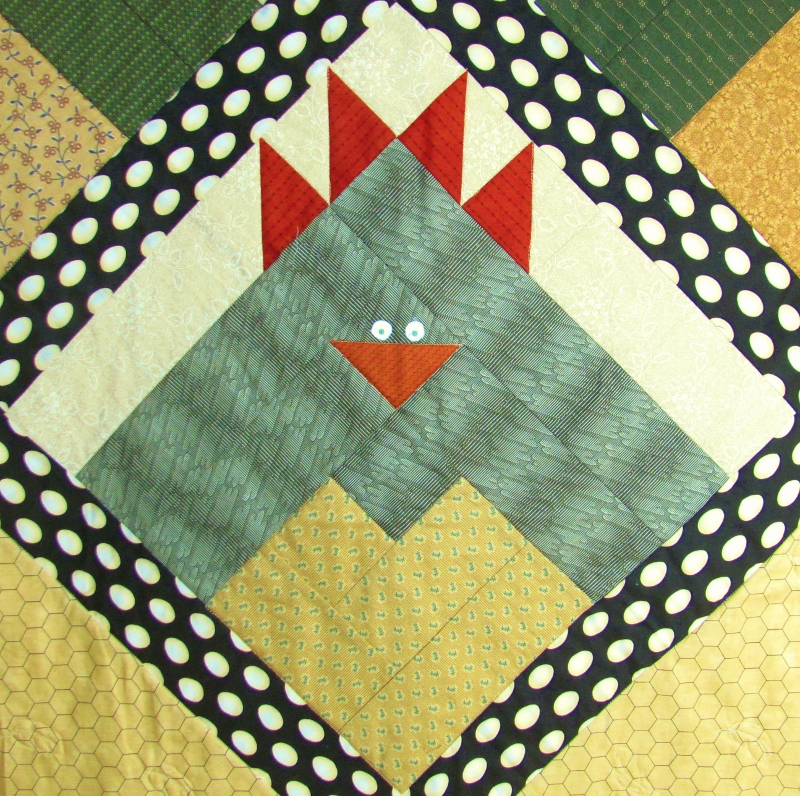
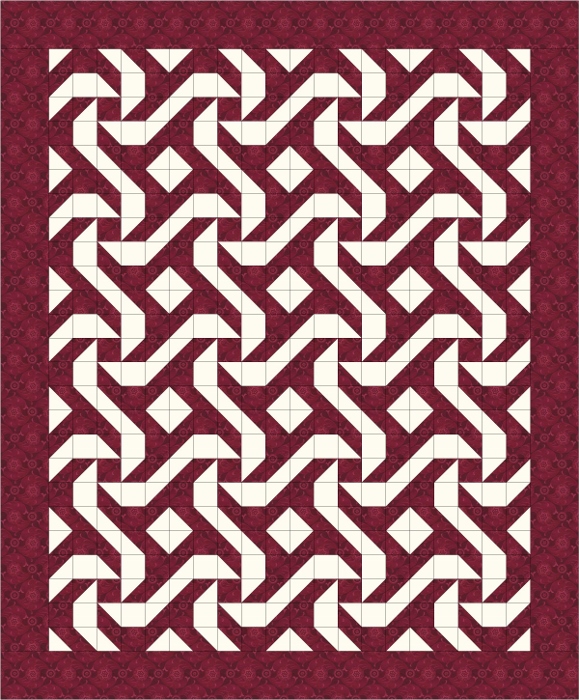
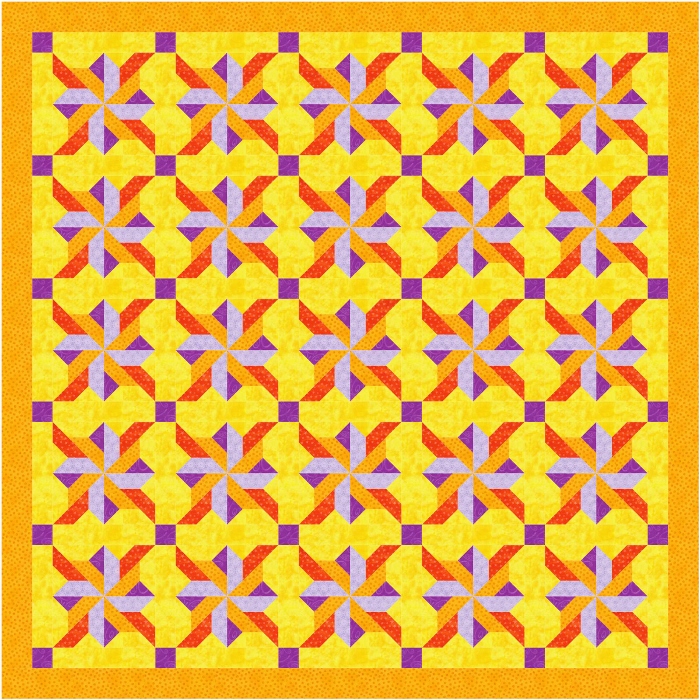
The name fo this quilt has a two-fold origin. One is the arrows pointing this way and that over the pattern. The other is the fabric selection.

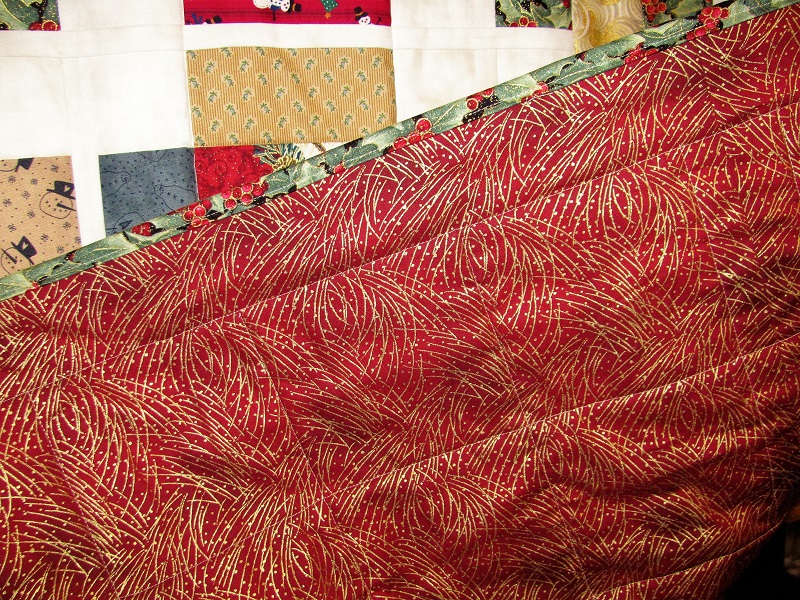
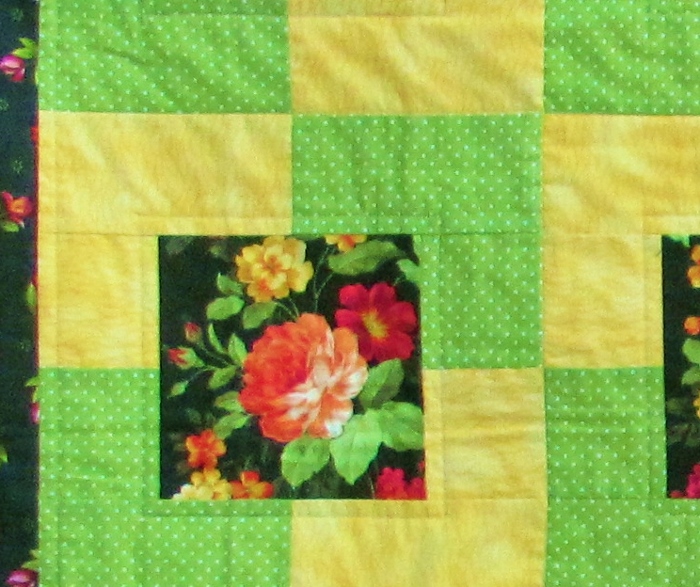
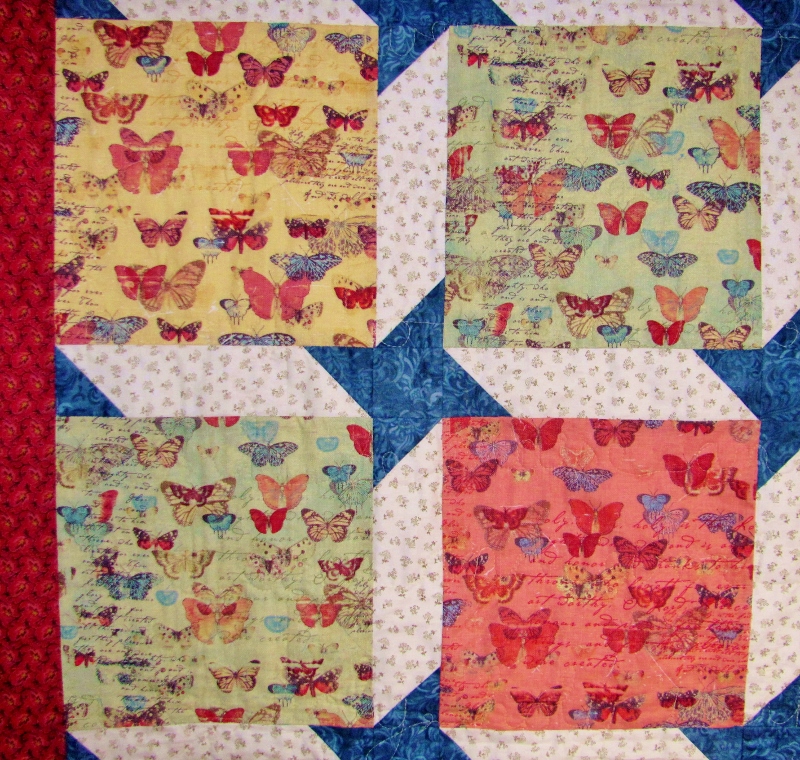
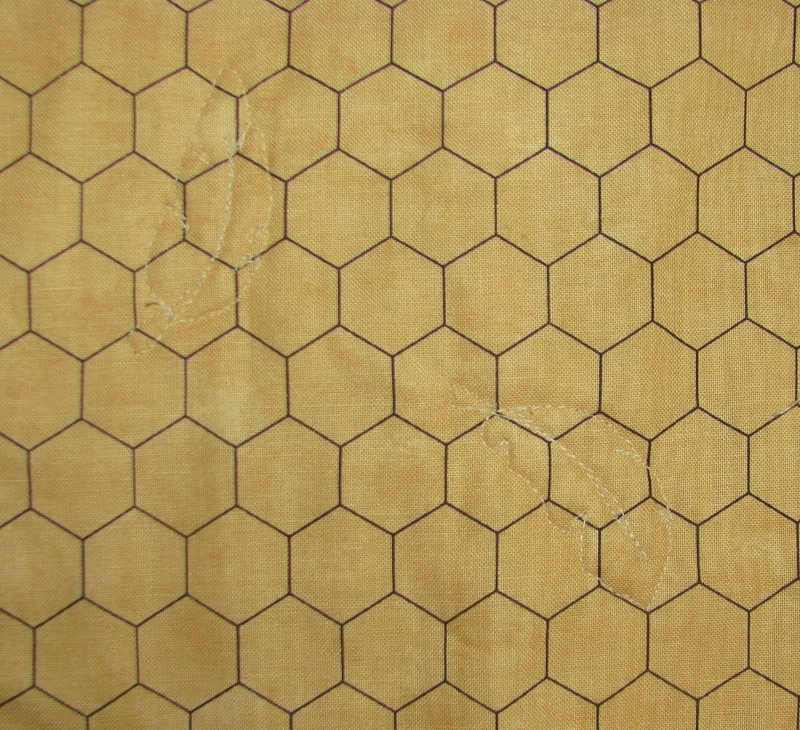
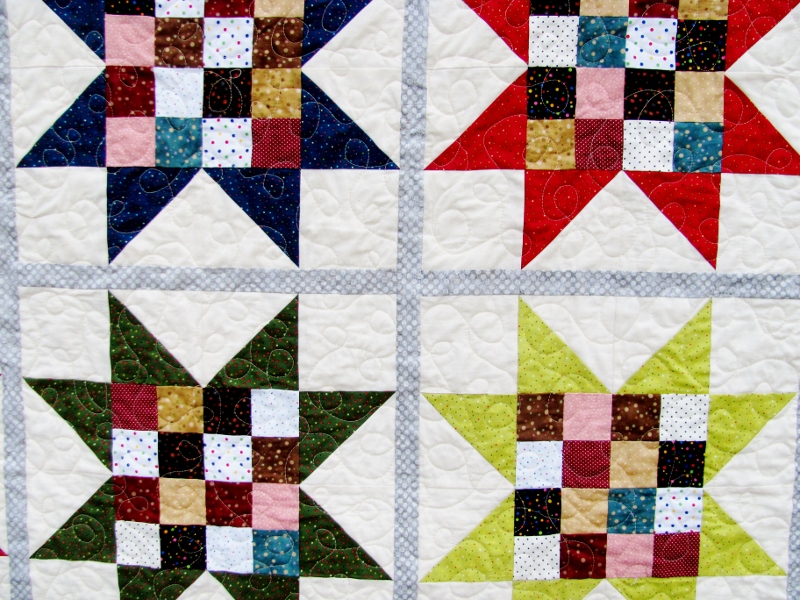
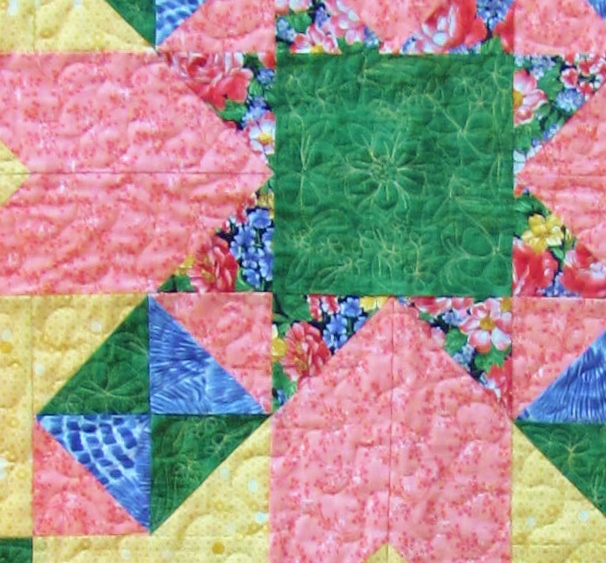
You can see in this close-up that there is a leafy forest floor, a wood grain and a sweet little country plaid. I also used a green and a blue as well as a dark brown with gold circles.


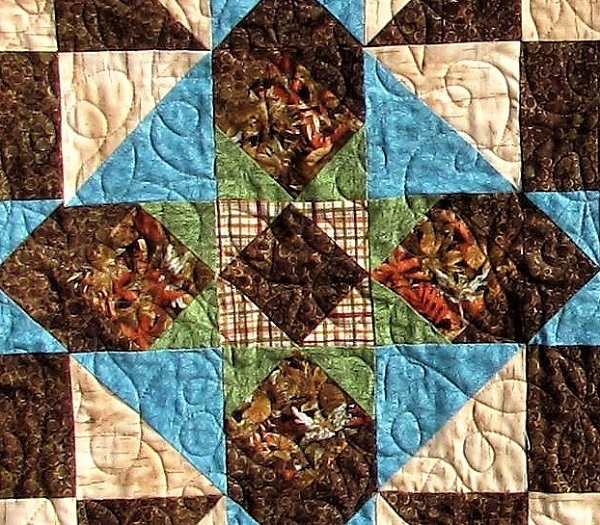
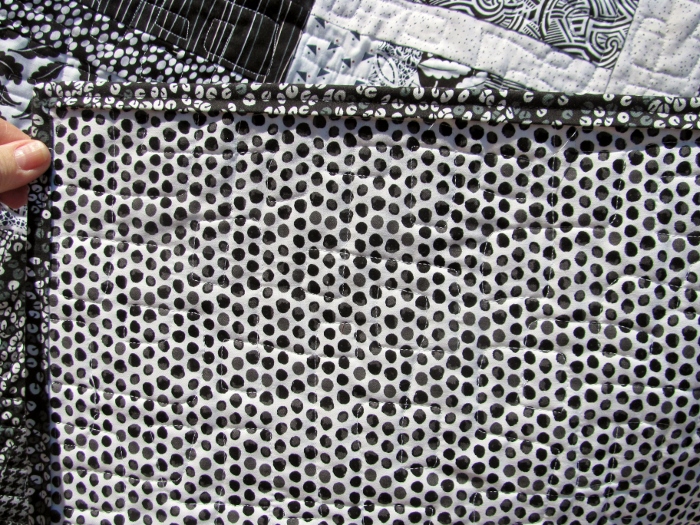
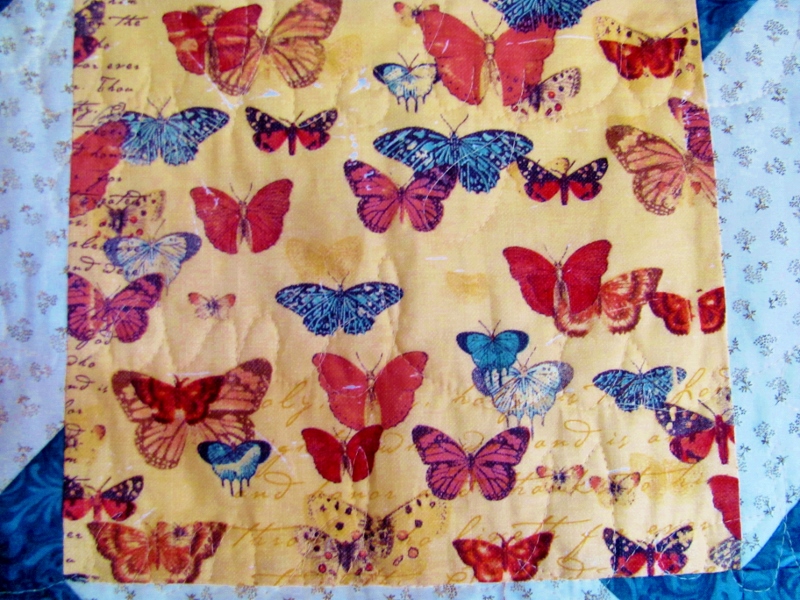
I used the dark brown for the backing and the little plaid for the binding.

On to the next.

Ddd


Posted by studio3d@ccgmail.net at 1:21 PM PST
Friday, 23 December 2016
Christmas Surprise
Topic: Quilting

With the best of intentions I selected an assortment of Christmas fabrics and cut 5-inch squares to follow a tutorial from Missouri Star Quilt Comapny.

I went off the rails on the very first step! We were supposed to construct a 9-patch like this (the colored patches are all different though):


Instead, I made ALL my 9-patches like this:


You gotta understand that the blocks are a variety of colors. On mine, though, the centers are all the same (I'll show you later why).

Then the instructions showed to slice the 9-patch blocks like this and swap the cut-off sides to antoher block:


I realized that with my four white corners, the swapping out of the cut-off sides would bring back more white corners. Shoot!

So I sliced mine all ther way to the sides in both directions like this:


When the tutorial swaps out the cut-off sides with another block they get this:


Mine was NOT going to work that way so I swapped out those white corners for 2 1/2 inch colored squares (using all the same ones) and then added 1/2 inch sashing between all the elements. Mine looks like this:


AWESOME!

Put 12 of their blocks together and you get this:


Here's a picture from the tutorial:


I decided mine needed 2 inch sashings and cornerstones so the layout became like this:


And here is the final result:


So, here's why I used the same center block in all the 9-patches. I had this adorable chickadee fabric:


Here's the block:


Beautiful gold metallic sashing with block corners and red cornerstones:


As I was working on the blocks I had every intention of finishing this off with cheery prairie points around the edges. But I put in that shiny gold sashing and it threw a little tantrum and declared itself much too sophisticated for those country-style trimmings.

So I added a gold over-printed red backing (it is of the same line as the featured chickadees).


Then I used the green holly from the block corners for the binding.

I call this quilt Christmas Surprise because it surprised me from the very first step where I went wrong.

I'll be keeping this one for myself.

Ddd


Posted by studio3d@ccgmail.net at 8:19 PM PST
Monday, 5 December 2016
It's Beginning to Look Like Christmas
Topic: Quilting

For a couple of years I have been wanting to make a quilted tree skirt but had to wait until I found just the right pattern. In the November/December 2015 issue of Fons and Porter's Love of Quilting magazine I found just what I wanted. Then this summer I chose a perfect range of fabrics in the outdoor sale at Fabric Depot.

Not a one of the fabrics are Christmas fabrics. One of them has a little red flower on a white field but it is more of a daisy-like shape. No trees, no hokly, no snowflakes, no snowmen or santas or reindeer. They are just red, green and toast in small geometric patterns.

The pattern uses a LeMoyne Star and lots of diamonds.


It also uses THIRTY-SIX 'Y' SEAMS! Holy moly, that's a lot! Special templates are used to trim the corners of the squares so they fit together at the edges and the LeMoyne Star was supposed to be trimmed with a special tool but I wasn't going to buy it just for this project so I developed my own trimming method. this caused my triangles in the stars to become paralellograms instead. (No mistakes - just creative choices).

AND if one is not an expert at binding corners they will be by the end of this - 9 outer corners and 8 inner corners. A circle at the center used bias binding which was a new process for me.

Here is the over-all view:


I added ties to the open edges to close the back:


I pieced the back so I wouldn't have to buy more yardage to make one large piece. This is where eight of the Y seams are (in those outer edges).


I like this project very much! time to trim the tree.

Ddd


Posted by studio3d@ccgmail.net at 7:24 PM PST
Thursday, 17 November 2016
Little Flower Burst
Topic: Quilting

This is the 56th quilt I have made for the Passages program at the hospital!

I started a couple of years ago by buying the pink floral fabric at the outdoor sale at the BIG fabric store. I had nothing to go with it and thought it looked like a little girl fabric so I set it aside.

Then I came across a pattern for an expanded pinwheel and decided to purchase fabric to use with the floral.

I bought a layer cake in teal in a line called Stonehenge. It has a marble look to it and is in five grades of intensity.

The construction is simple half-square triangles.

The yellow border is color pulled from some of the flowers in the pink print.

I only quilted in the ditch around the diamonds.

Ddd


Posted by studio3d@ccgmail.net at 12:01 AM PST
Wednesday, 16 November 2016
Birdcage Panel
Topic: Quilting

At the Sew and Stitchery Expo in March I picked up a panel print in the big bin of 'fabric by the pound' at one of the booths.

Having cut it apart I selected the center piece plus some of the outer border to use and combined these with coordinating colored borders from my stash.

I varied the width of the borders and just kept building and building. I did increase the width of the top and bottom on one border to make the quilt longer.


As far as quilting, I followed the lines of the print in the birdcage and along the first border of red hourglasses. I traced around the roses in the next border, added loop-the-loops in the border with tiny flowers.

The gray border was covered with a pattern of roses and leaves.


Then in the wide red border I made giant roses in cream thread.


I like this more than I expected to.

Ddd


Posted by studio3d@ccgmail.net at 12:01 AM PST
Tuesday, 15 November 2016
Waterlilies
Topic: Quilting

Another oversized lap quilt today.

The pattern for this was an online freebie that was designed to feature a specific line of fabric.

I had chosen the feature fabric without buying anything to go with it. I found coordinates in the stash, though.

I really didn't visualize how large this was going to be as it would have been just as well to remove one row and one column.


The quilting is simple stitch in the ditch beside the large and medium squares plus diagonals through them.

The back is yellow and the binding matches the medium blue squares.

Ddd


Posted by studio3d@ccgmail.net at 12:01 AM PST
Monday, 14 November 2016
Calico Windows
Topic: Quilting

The pattern for the quilt today is from a Fons & Porter Quick Quilts issue. I don't have a date as I tore the pages out of the magazine.

I had a number of small-print florals from donations as well as various fabrics that went with them from my stash. I made the elongated four-patch from lights and mediums and used darks for the window frames. The over-all tie-in factor is the orange dot fabric and the center cornerstone on which they turn.

This block does require some partial seaming and the block itself is huge (there are only 6 blocks in this quilt).


This is a larger lap quilt that will go to Passages.

Ddd


Posted by studio3d@ccgmail.net at 12:01 AM PST
Sunday, 13 November 2016
Twisted Ribbons
Topic: Quilting

I love the patterns found on Missouri Star Quilt Company. I think the pattern I used today is called Ribbon Stars. 

I picked up three disparate purples from full bolts being de-aquisitioned from the church costume closet - I think they were probably used for the three wise men. Several of us cut off a couple of yards to use.

When the purples were next to each other they really didn't go together. Then I went to a yard sale this summer and a lady was selling yardage left over from bridesmaid dressed - a black with flowers in all three of the purples! They also had some blue so I brought in that color in sashing.


The quilting is loop-the-loops in an overall coverage.

The backing was also in the costume closet - dark burgundy with a glitter on it.

Ddd0


Posted by studio3d@ccgmail.net at 12:01 AM PST
Saturday, 12 November 2016
All-Natural Pinwheels
Topic: Quilting

I found the pattern for today's quilt in a Fons & Porter Love Of Quilting magazine. Unfortunately, when I cut the templates out of the pages (which I had torn out of the magazine) it cut the magazine date off.

In any case, I went through my fabrics and pulled out the least attractive (I won't call them ugly) ones that I could find that went together.

Strangely, it didn't look too bad when it was all combined.

I did some straight-line quilting in the individual triangles and then some triangle loop-the-loops treating the four outer borders as one.

Ddd


Posted by studio3d@ccgmail.net at 12:01 AM PST
Friday, 11 November 2016
Northern Lights
Topic: Quilting

I was on a deadline for the day the Chaplain from the hospital was going to come and pick up the donation quilts for Passages. I've been very haphazardly working on getting several finished that I've been working on since I cut several kits in June.

For several days the last two weeks I've been quilting every day and finally finished up SEVEN of them!

I'll space these out over the next week.

Today it is a quilt I call Northern Lights. I picked up several mill-ends at the Sew and Stitchery Expo in February from a booth that has odd cuts in big bins. When I grabbed them I thought of them as Spirograph prints but in putting them together I started calling them Planetarium.

I cut all the pieces of the pattern I had selected but when I laid them out they were all too busy together.

I dropped in a 1/4 inch red sashing and BOOM!


Totally spectacular!

Ddd


Posted by studio3d@ccgmail.net at 4:48 PM PST
Sunday, 9 October 2016
Sea Shore Shells
Topic: Quilting

Serendipity!

That's what I call it when I FIND a gift card for fabric from three years ago that got misplaced... I fall in LOVE with a seashell themed jellyroll of fabric when I go with my gift card... I spy the PERFECT pattern to use with the jellyroll... and find out only days later that someone special is buying a BEACH HOUSE. Just like that, all the pieces come together for a wonderful housewarming gift!

I only had to add a few bits of fabric from my stash and they worked perfectly with the colors and theme: a tan with a print that looked like sand, a tan with a stone-like print, a white for the background that has a bright white dot that makes it look like bubbles or seafoam.

I even had a donated fabric for the back that is in the same shade of blue in a watery print with a bit of glitter in it.

I'm telling you, it's serendipity.

Here is the quilt - cut down considerably from the original pattern that takes it from a queen-size to a lap quilt:

Oh, yes - the border was from my stash as well.

I wanted to keep the quilting in the same theme so I downloaded line drawings of seven seashells and enlarged them to each fit on a sheet of 8 1/2 x 11 paper. These were cut out including cutting into them so I could trace all the inner bits of shaping. 

I did that tracing with a Frixion pen ON THE BACK of the quilt so that I would not be distracted by the pattern on the front. I made sure none of the quilting crossed into the dark border since I was going to use a cream thread for all of it. I twisted and turned to fit the shells in, traced a set, moved the patterns and traced some more. I made sure that there would be no two shells the same next to each other.

I stitched in continuous lines, stitching over some areas as needed for 'traveling'. Then the Frixion pen was heated with the iron and 'poof' it vanishes.

Here are each of the shell styles that I used:


I used the backing fabric for the binding. The effect of this is one that allows the quilt to look good from the front OR the back.

Off to deliver it!

Ddd


Posted by studio3d@ccgmail.net at 12:01 AM PDT
Sunday, 14 August 2016
One Bright Summer Day
Topic: Quilting

This is the last quilt that I had sandwiched back in June. All the rest will have to wait for layering until September.

I used a pattern shared by one of the ladies in our quilting group. Several of them had made one or more of their tops for the baby quilts using this and I had some fabril left from a previously cut project that I knew would look great.

The black floral started out life as a wide striped fabric. I just cut out full blocks as big as the stripe would allow and adjusted all the other parts to fit that. 

The black border is a rosebud print that I bought a few years back and put it away waiting for inspiration. It perfectly coordinated with the floral.

I used up the very last of the floral in making the corner blocks for the outer border.


I kept the quilting very simple on this. I did echo quilting 1/2 inch from all the black fabrics and then stitched in the ditch down the yellow/green thirds.

I also did free-motion quilting as an outline to all the peach colored roses - one in each block.


The backing is a tone-on-tone peach leafy print. I used yellow in making the 1/4" binding.

Ddd


Posted by studio3d@ccgmail.net at 9:38 PM PDT
Wednesday, 10 August 2016
Tuxedo Twist
Topic: Quilting

I haven't been sitting idly between blog posts. It's just that I've been working on many projects but not bringing them to completion. I don't often post 'in progress' items, so it leaves idle time here.

In fact, I have been working on SIXTEEN quilts which are a various stages from pieces cut to waiting for quilting. Many of them are ready for backing but, without the space to spread them out, I will have to wait until I go back to group at church to sandwich them.

I did finish one today that I had sandwiched back in June.

I used the block construction called Stack, Shuffle and Slide (I used this on two of the baby quilt tops last winter) and selected only black and white fabrics. These came mostly from the 'fabric-by-the-pound' bin at the Sew and Stitchery Expo, though a few were in my stash. The fabrics were sorted dark to light and, at the insistence of my hubby, I threw in a few fucshia.


I arranged it so the darks trace a zig-zag on the diagonal.

The backing is also black and white:


In keeping with the modern feel of this project, I quilted with meandering squares in white thread.


Back to the machine.

Ddd


Posted by studio3d@ccgmail.net at 7:49 PM PDT
Thursday, 7 July 2016
Angels' Song
Topic: Quilting

When at the BIG fabric store I fell in love with a particular print and actually bought it in three colors. Then I selected some other prints that echoed the colors that they had in common. It wash't until I got them home that I realized that the script printed in the background was scripture! Cool.

I wanted the butterfly fabric to be a true feature on a quilt and knew I had the right pattern when the Missouri Star Quilt Company tutorial for the Friendship Star Sashing came out. It was perfect - using huge blocks with all of the design work taking place in the sashing.

I arranged the blocks to create an off-center concentric diamond shape and used a medium blue for the stars and a dull red for the outer border.


Here you can see how the snowballed ends of the sashing combine with a matching cornerstone block to create the friendship stars.


The scriptures (Revelation 4: 8, 11, 5:13) are repeated over and over in different colors and sizes across the fabric.


Here you can see a little bit of the quilting. I quilted the scriptures in script across the surface. "Holy, holy, holy is the Lord God Almighty, who was, and is, and is to come. You are worthy, our Lord and God, to receive glory and honor and power, for you created all things, and by your will they were created and have their being. To him who sits on the throne and to the Lamb be praise and honor and glory and power, for ever and ever."


This will go as a gift for a departing pastor from our church staff.

Ddd


Posted by studio3d@ccgmail.net at 5:14 PM PDT
Saturday, 7 May 2016
Star Struck
Topic: Quilting

 I've seen several quilts with the wonky stars pattern but I was ezpecially drawn to those that interlock. I used the layout to draw up my own version based on a 5-inch block and pulled out all my scraps with shimmery, shiny, glittery and metallic finishes.

I chose a patterned black for the background fabric.


I did the quilting in loops and stars using glow-in-the-dark thread. There is a star in the center of each colored block and where each four black 'windmills' come together.


This 'shot-in-the-dark' from my camera just barely captures the light from the glowing thread.


This quilt will go to Passages - the 45th one I have donated to them.

Ddd


Posted by studio3d@ccgmail.net at 12:01 AM PDT
Friday, 6 May 2016
Home To Roost
Topic: Quilting

I found a cute pattern for a chicken block on Pintrest and used EQ7 to draw it up in a larger size (I used 3-inch strips). I made some other modifications, like removing the upper background strip and then made four blocks using greens for the backs, tans for the chests and rusts for the combs and beaks. The eyes are painted on using acrylics.


I set these together using sashing and borders of egg print fabric and then used a chicken wire print for the four setting triangles.


I quilted the chickens using stitch-in-the-ditch and then for the outer triangles I quilted from the back by outlining some of the chicken feathers on the backing print.

This quilt finished up at 60 inches.

This will go to our neighbors whose free-range chickens wander the neighborhood. When we go for a walk the chickens fall in line and join us for exercise.

They DO go "Home To Roost".

Ddd


Posted by studio3d@ccgmail.net at 12:01 AM PDT
Friday, 1 April 2016
Just a Short Hop
Topic: Quilting

I got an email notice that a small quilt shop nearby was participating in a shop hop. The way this works is that one goes to a quilt shop, collects the instructions and fabrics for a single block and then 'hops' on to the next store/stop. There is a folder to keep track of your visits and you get it stamped. Each store usually has a drawing and there is often a big drawing from those who complete all the stops.

Well, I went to the first shop and collected my folder and block kit. This shop is about 20 miles from me. A look at the folder showed me that there was a participating shop only 10 miles from home so that was our next stop.

This one was getting ready for some renovations so there was a large section of yardage on discount. I managed to stay away from those bolts but did get sucked into the four large bins of fat-quarters priced at $1.

I first found a print that had various background colors. I bought a total of four

Then I chose, to go with the prints, four goldens:


Four rusts:


and four greens:


So for $16 I have 4 yards of coordinating fabrics for some future project:


The followup to the shop hop story is that the rest of the participating stops are 30 to 50 miles away and in all directions. One could waste a LOT of gas driving all over for 'free' blocks.

So, we stopped with two. Sadly, the second block kit is truly lame - a faux red-work image and strips to border it twice. I would have been very upset if this was a block I traveled a great distance for.

I think I am done with shop hops.

Ddd


Posted by studio3d@ccgmail.net at 12:01 AM PDT
Saturday, 5 March 2016
Stars of the Polka
Topic: Quilting

I did not realize how many dotted fabrics I had used until I gathered up all the scraps to use in one quilt. I found a tutorial on the Missouri Star Quilt Company site that uses a 16-patch center in some traditional stars.

Along with my dots, I used muslin for the background fabric. I only needed to buy an additional dot for the sashings and for the backing and outer border.


I think there are 14 different dots in the 16-patches. The stars feature different colors of the same dotted print that I got in fat-quarters in a 'fabric-by-the-pound' bin.

Here you can see the quilting, which is loop-the-loop meandering using cream colored thread.


I am going to keep this one where it will live on the guest bed. It is the exact size of the queen mattress.


It's been nice to decide lately to keep some of these quilts for myself as, up to now, I have only made banners to keep. I now have spring, fall and Christmas quilts for decor as well as this guest throw. Hubby has the king dog quilt, too.

Hmmm, a blue winter quilt and a summer quilt for decor and I will be all set.

Ddd


Posted by studio3d@ccgmail.net at 12:01 AM PST
Saturday, 27 February 2016
Oh, The Possibilities
Topic: Quilting

OK, this is not technically quilting YET. What I have been doing is playing in Electric Quilt (EQ7) to design some quilt tops that I MAY turn into real quilts someday. They may look just like these or they may (more likely) be refined and edited when the fabrics are chosen.

I design quilts in several ways:

1) Find a pattern I like (free in a magazine or on the internet) and choose fabrics from my stash or purchase to make that quilt

2) Start with a pattern I like and change up the size of the blocks or the number of blocks (or both) before choosing fabrics

3) Choose a block I like and design a quilt layout around it

4) Design a block in EQ7 and then build a quilt using it

5) Grab some graph paper and start sketching patches until they form a block I like and then build a quilt around that

Here is one I started as a block on graph paper and later recreated in EQ7 so I could see what multiples would look like:


On this Pastel Plaid I recreated a single block I found in a magazine and used EQ7 to duplicate it so I could see what multiples would look like.


Once I went back to EQ7 AFTER I had made all the blocks to try out different layouts without having to keep moving them around on the design wall. I saved this layout to use some other time and did something else with the blocks I had on hand:


I had bought some fabrics that went together well and then started drawing and combining blocks in EQ7 to try for a layout I liked. As it turned out I used these fabrics for my last mystery quilt but I still have this nice design to use in the future:


This is one where I chose blocks I liked and then added fabrics and then worked on a layout that looked good to me:


I chose several paper-pieced blocks built in to EQ7 to create a possible garden layout:


And finally, I wanted to see what a paper-pieced sampler might look like if I changed them all to the same fabrics:


Oooh, I liked those corner block so much I created a layout using only them:


When I get ready to stitch one of these, EQ7 will tell me how much of each fabric I need, Give me instructions on paper-piecing, template patters and/or rotary cutting and finished sizes for the blocks and the quilt.

Can you tell I like EQ7?

Ddd


Posted by studio3d@ccgmail.net at 12:01 AM PST
Thursday, 25 February 2016
Super Bowl Winner? Me!
Topic: Quilting

I can't remember where I read that the quilting site on 'about.com' was going to have a mystery quilt sewing day on Super Bowl Sunday. I zipped right over to investigate and found that the designer has done this before and also does a New Years Day mystery quilt every year.

Well, I immediately selected some fabrics that I had purchased without a project in mind and cut up the pieces specified. The cutting instructions were issued over several days leading up to SBS.

We needed 5 fabrics: a dark, another dark or bright, two mediums and a light. All needed to contrast with each other. I chose a beautiful floral for my bright, and to match the colors in the print; a dark green from the color of the leaves, purple and coral from the flowers for the mediums and butter yellow for the light - also matching one of the flowers.

On Super Bowl Sunday the instructions started being posted early in the morning. I had to go to church and then prep food for guests so I didn't get to start my sewing until kickoff time (3:00 local time).

As I proceeded there were places where I wanted to use a different one of my fabrics for a border and these pieces had not been pre-cut so I was able to do so. I changed the inner border to the purple fabric and I changed the flying geese border to feature the floral.

Unfortunately, I misread the instructions and installed a set of corner blocks backwards but I liked the result so I left it that way.

Here is the wide view of this 48-inch quilt:


Can you say "Spring?"

I thought the solid green blocks were too bold so I did free-motion quilting over them in the style of the flowers in the print:


The rest of the quilt has free-motion meandering.

With a Christmas quilt and a Fall quilt now in my personal collection, I decided to keep this Spring one for the house.

In season, it will display in the living room, across a cedar chest in front of the window.


I guess I need to make Summer and Winter quilts so I have a full set for seasonal decor.

Ddd


Posted by studio3d@ccgmail.net at 12:01 AM PST

Newer | Latest | Older