« January 2013 »
S M T W T F S
1 2 3 4 5
6 7 8 9 10 11 12
13 14 15 16 17 18 19
20 21 22 23 24 25 26
27 28 29 30 31
You are not logged in. Log in
Entries by Topic
All topics  «
3D paperwork
A - Z challenge 5
A - Z challenge 7
A - Z challenge round 4
A to Z challenge round 3
A to Z round 2
A to Z round 6
A-Z round 1
Around the House
Art Challenges
Artist Trading Cards
Backgrounds
Beads
Bible Journaling
Books
Boxes
Collage
Color Challenge
Coloring
cookbook
Die Cuts
Digital Projects
Digital Stamps
Drawing
Dry Embossing
Fabric Stuff
Fantastic Folds
Field Trip
Home Decor
How Does Your Garden Grow?
Hymnal Art
In The Kitchen
In the studio
Jewelry
Lettering
Links
Multi-Technique
Music to Work By
Musings
Nail Art
New Work
Online Class
Other Hobbies
Other Projects
Painting
Paper Embroidery
Paper Piecing
Photo
Pretty Paper
Quilting
Random
reading
Scrap Recovery
scrapbooking
Sewing
Sketch Challenge
Some Backlog
Stamping
Stencils
Stickers
Supplies
Teabag Folding
Techniques
Testing
tips and tricks
Tutorial
Web resources
Welcome to my Blog
Work By My Friends
workflow
Writing
Blog Tools
Edit your Blog
Build a Blog
RSS Feed
View Profile
Group One
In & Out of Studio 3D
Tuesday, 1 January 2013
Birthday Bash
Topic: Stickers

Continuing on the challenge to create 20 cards for kids (OWH) I grabbed up a pack of 3D stickers that had been gifted to me some time ago. Some of them are puffy, some are multi-layered and some are thick acrylic. All came with foam tape on the back.

Well, this was an invitation to create a party scene so I grabbed up some dotted paper for the background and ran a piece of red cardstock through the Cuttlebug with a textured lines folder. This became the 'table' for my scene.

I used Copic marker to make shadow areas on the table and arranged the stickers.


The 'strings' on the balloons are actually fine wire and were originally dark blue. They did not show up against the black background so I used the gold Krylon paint pen to re-color them.

A yellow folded card base coordinates with one package and one balloon.

Ddd


Posted by studio3d@ccgmail.net at 12:01 AM PST
Updated: Saturday, 29 December 2012 7:49 PM PST
Monday, 31 December 2012
2012 Wrapup
Topic: Multi-Technique

It was too hard to choose only 12 projects to wrap up the year so I chose more. Hey, it's MY blog - I can do what I want... In fact, some of these are just representative of a larger pool of projects that I did this year.

So, with a retrospective of my favorite projects from 2012....

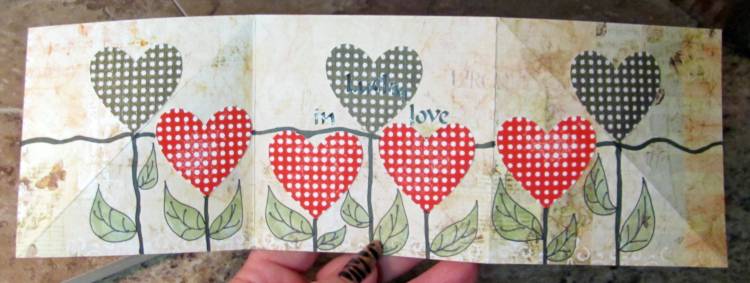
First is this Fantastic Folds card I dreamed up. It uses a stamp of a heart which is done in both green and red. When folded the card front shows a shamrock and the word 'lucky'. When extended (photo) it shows a field of heart flowers and says 'lucky in love'. I was so proud when the vision in my head worked exactly like I dreamed it!

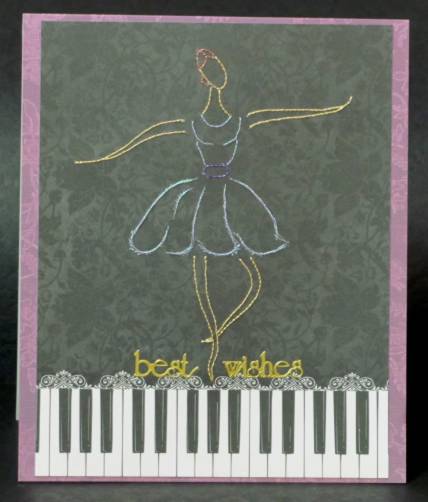
Next is this ballet dancer stitching pattern I designed for my granddaughter's ballet recital. I stitched her with shimmery threads on black and gave her a piano keyboard stage.

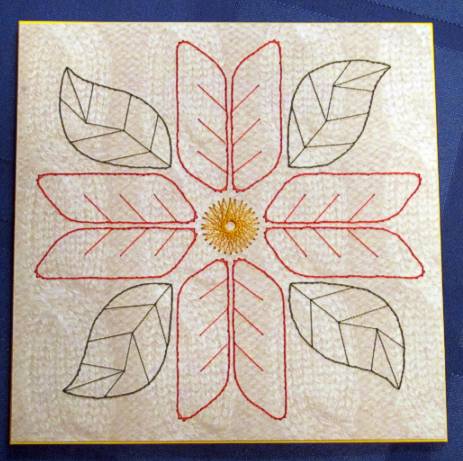
Another stitching pattern I designed this year is the poinsettia. This was based on a sketch of an entirely different type of project and I picked it out of my sketchbook several months later.

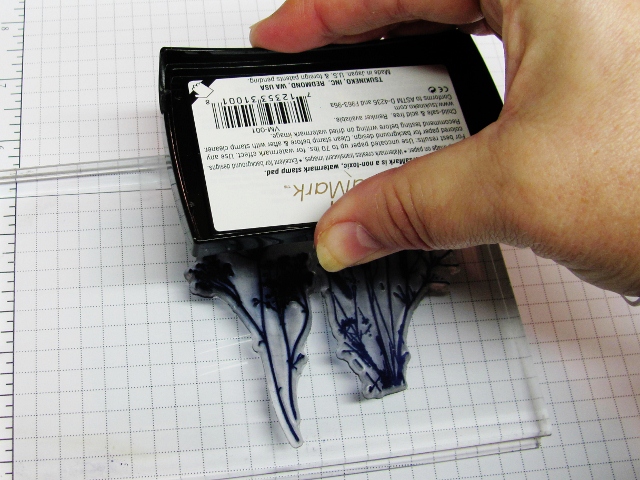
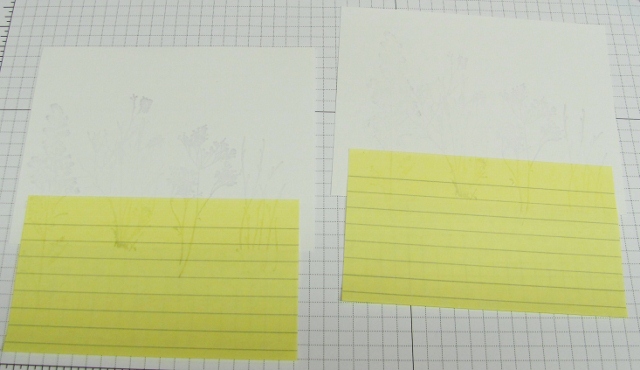
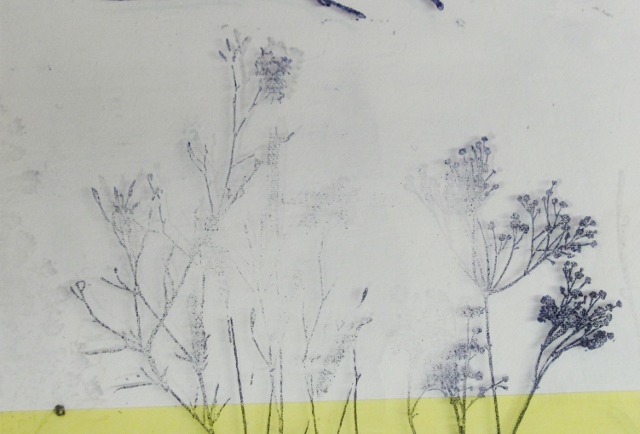
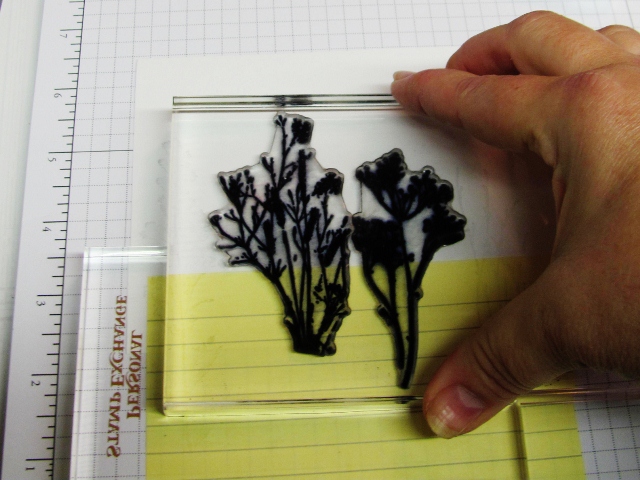
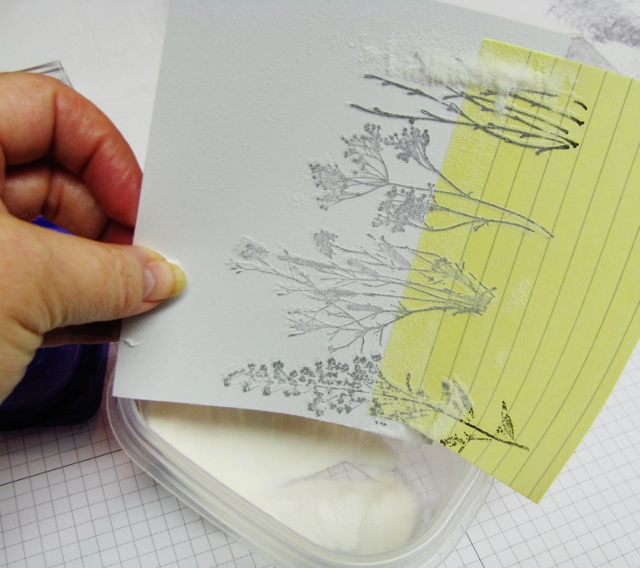
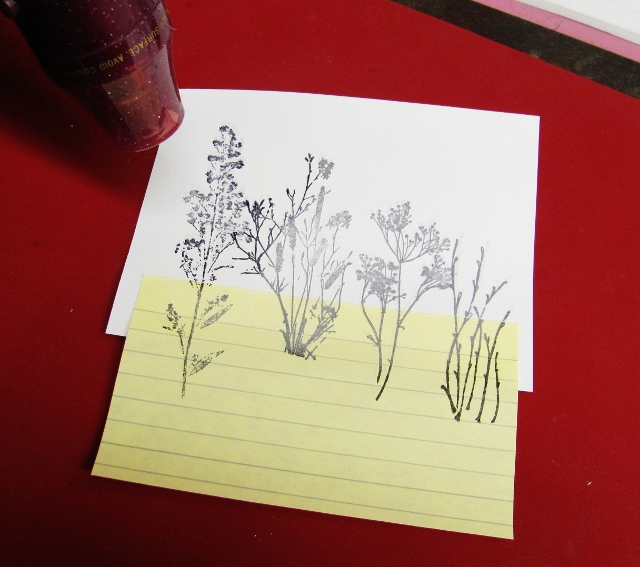
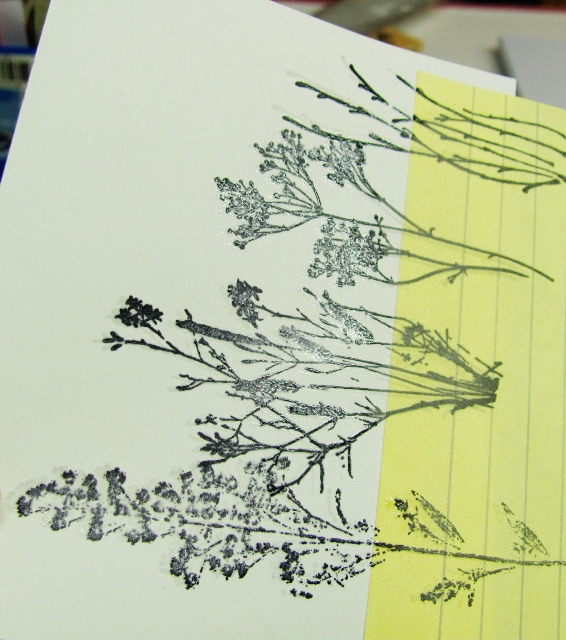
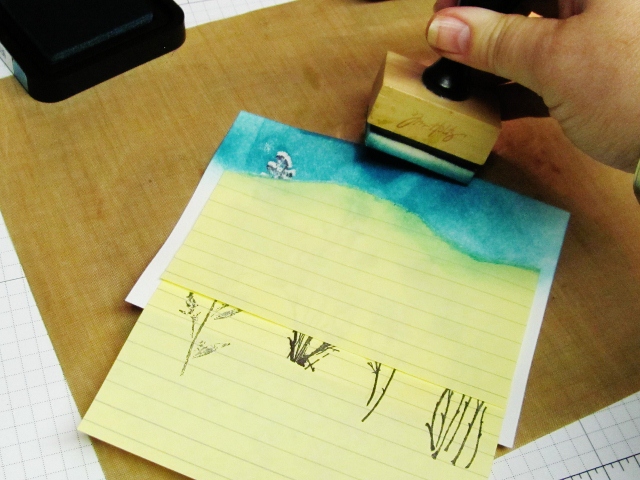
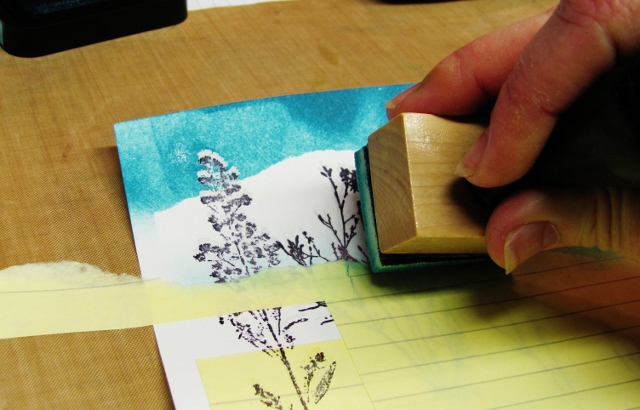
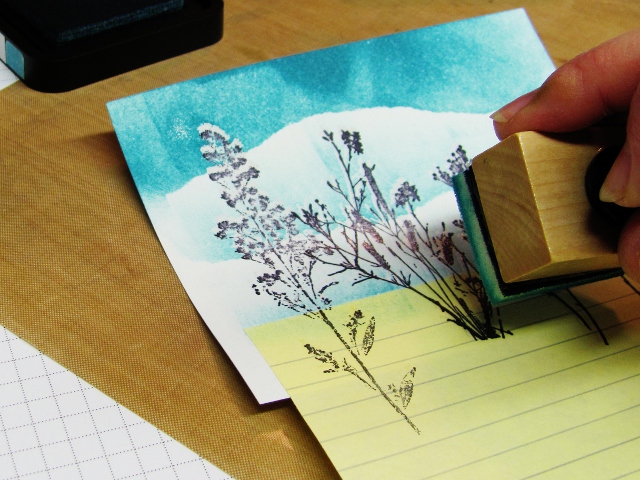
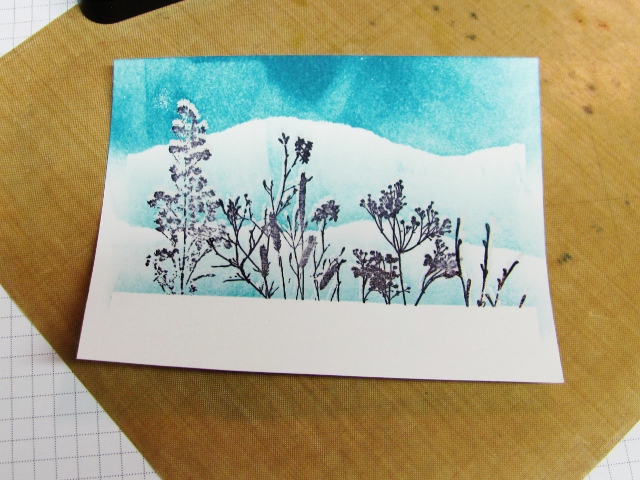
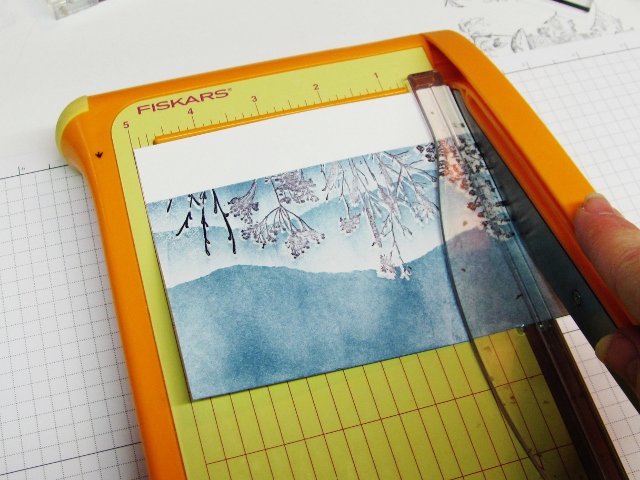
I had this idea of making birch trees by scraping with the side of an inkpad through masked stripes on cardstock. Success! I used marker ink as watercolors to paint the scenery in the background.


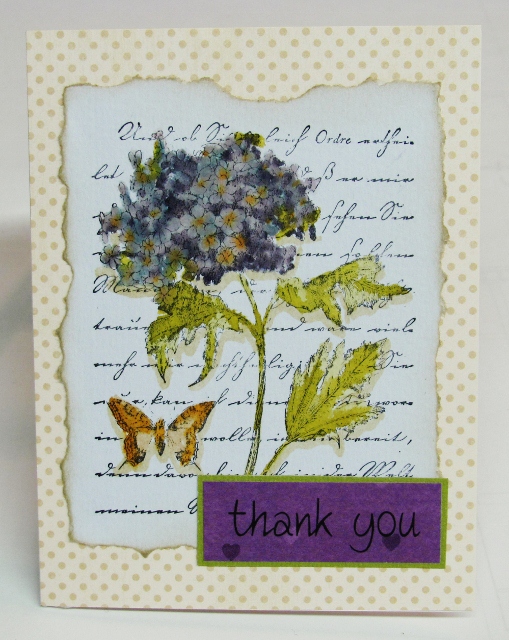
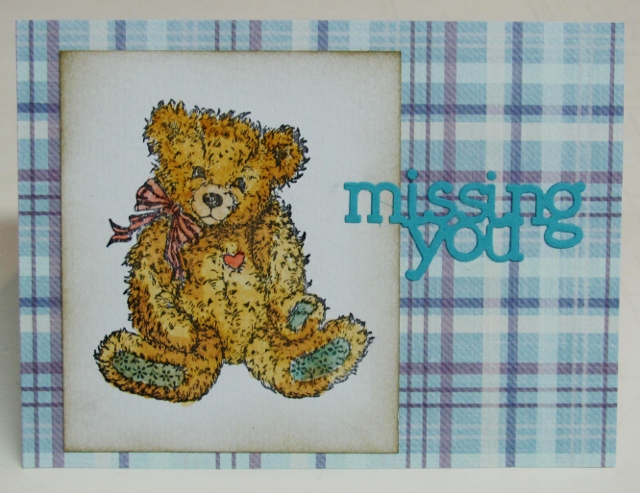
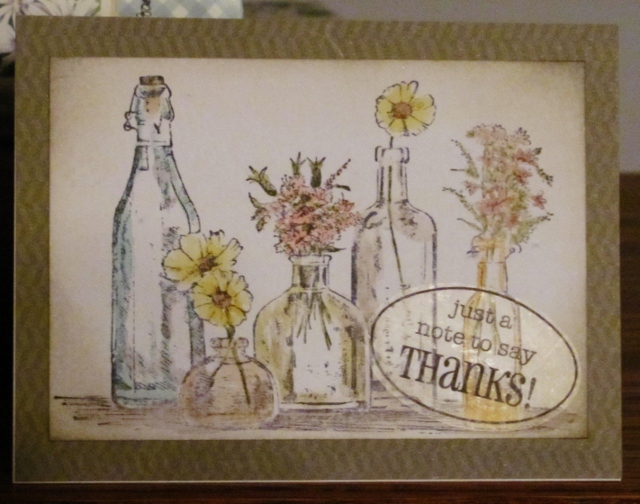
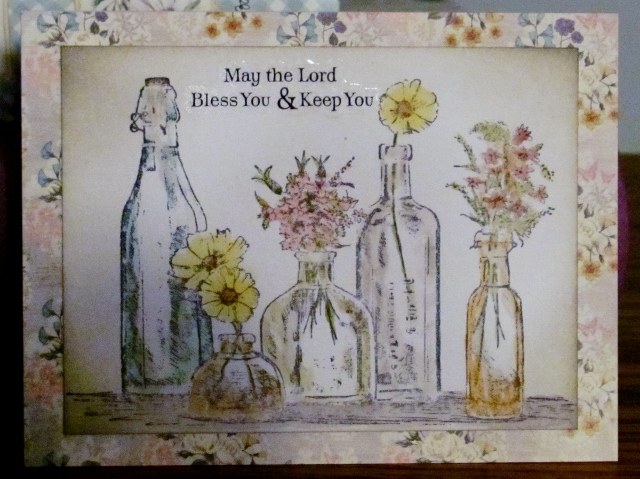
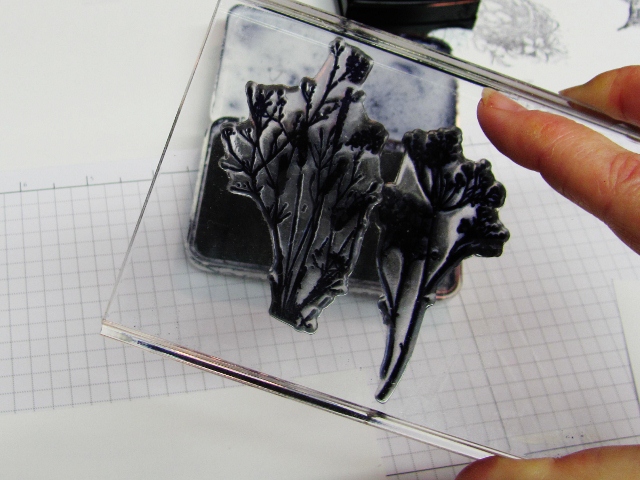
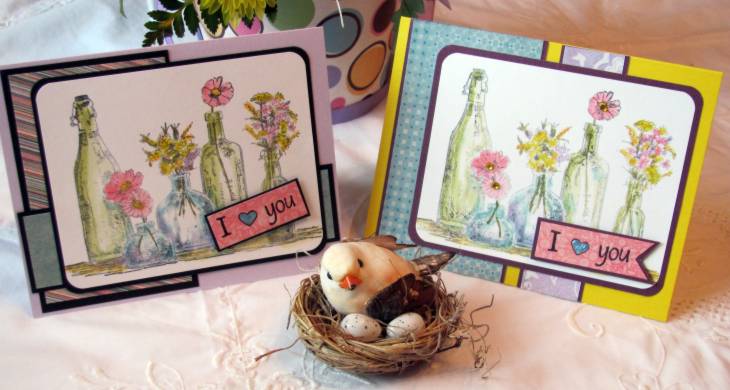
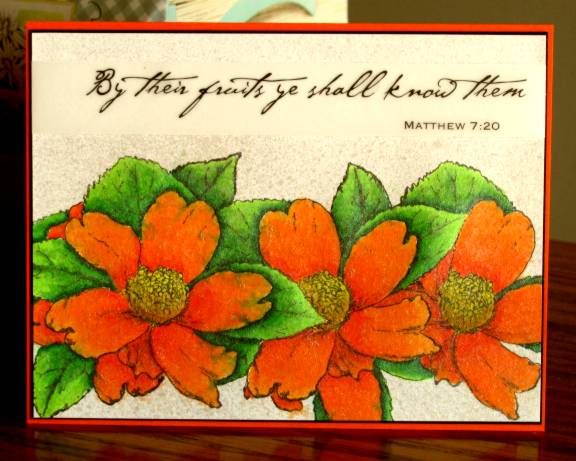
This new stamp I picked up lends itself perfectly to watercoloring. I just love it and made a stack of these cards in one sitting.


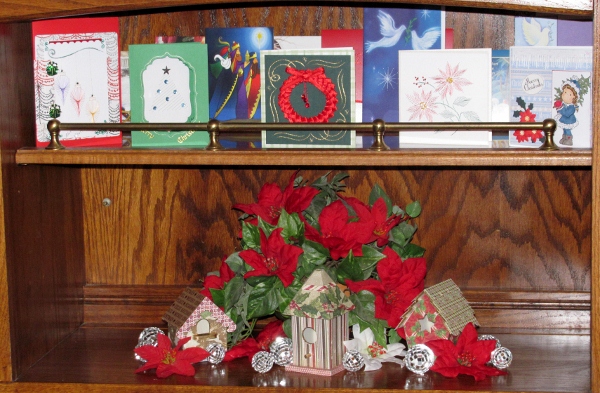
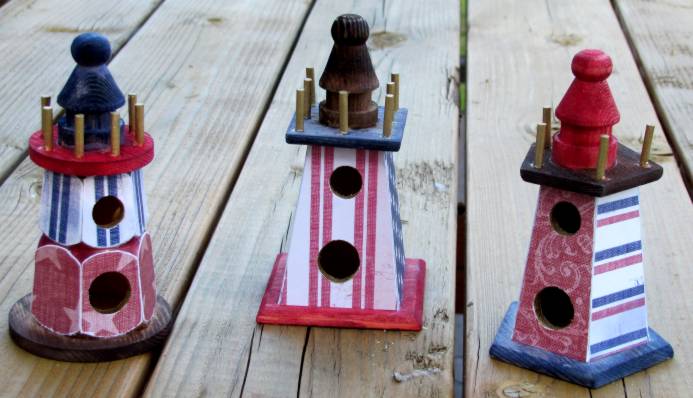
I used small wooden lighthouse birdhouses as a base for some patriotic papers to create some summer home decor.


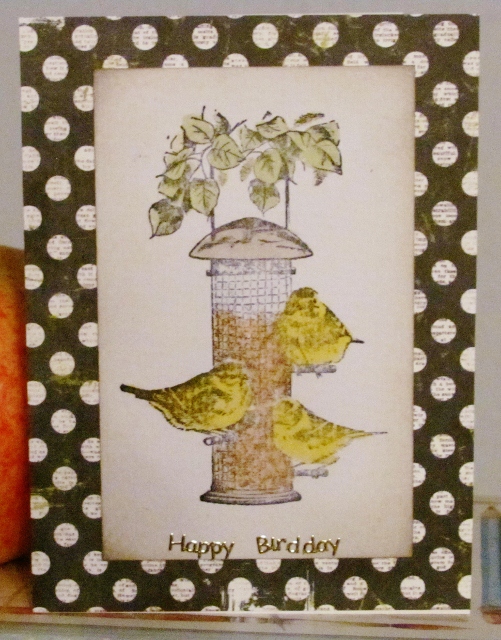
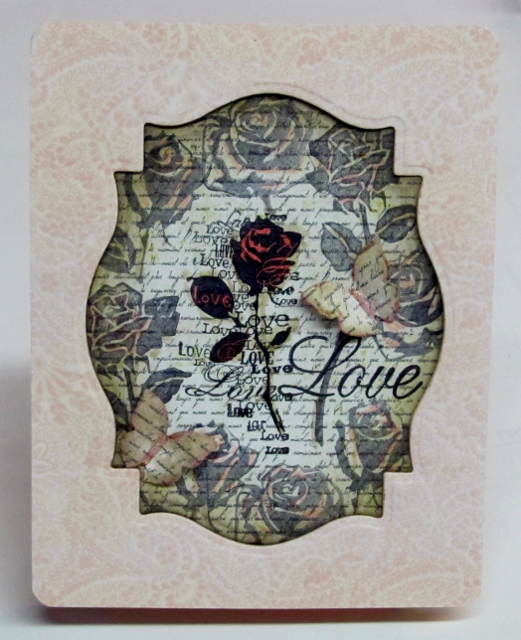
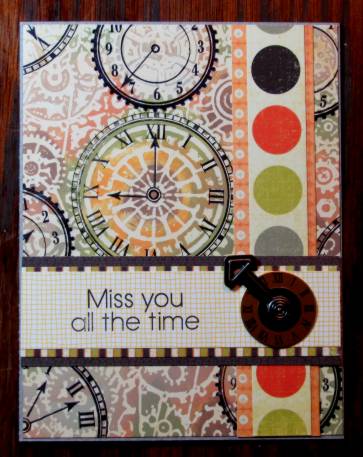
I did quite a few cards using a waxed paper technique that runs them through the Cuttlebug for embossing and ironing the pattern onto cardstock as an ink resist. This one using the gears folder and stamping with clock faces is one of my favorites.


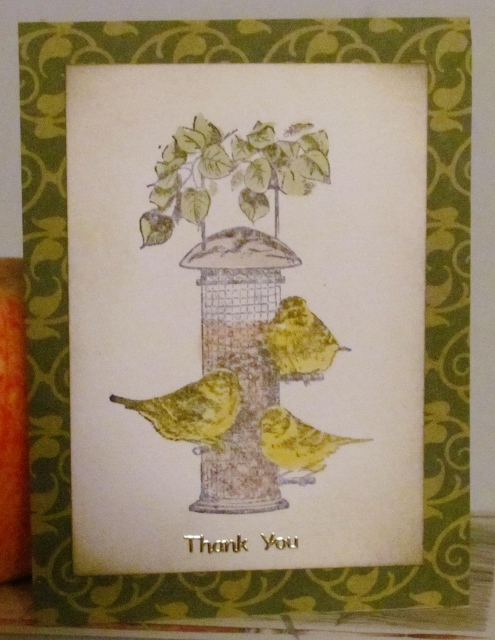
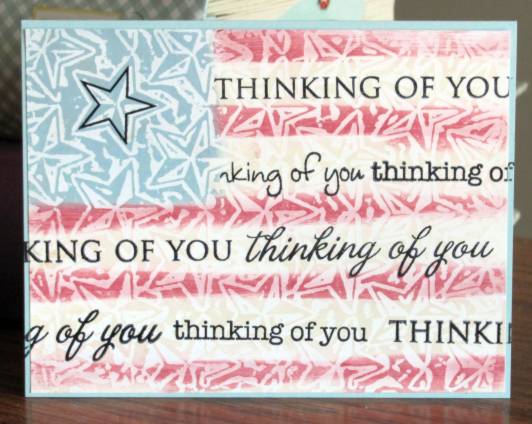
When I took the online class on Stretching Your Stamps I made use of another of the waxed paper backgrounds to feature sentiment stamps. The assignment was to use text as a background.


This card that uses alphabet stamps was another one done for the online class. I made several versions of this text layout, but this one with the banners is my favorite.


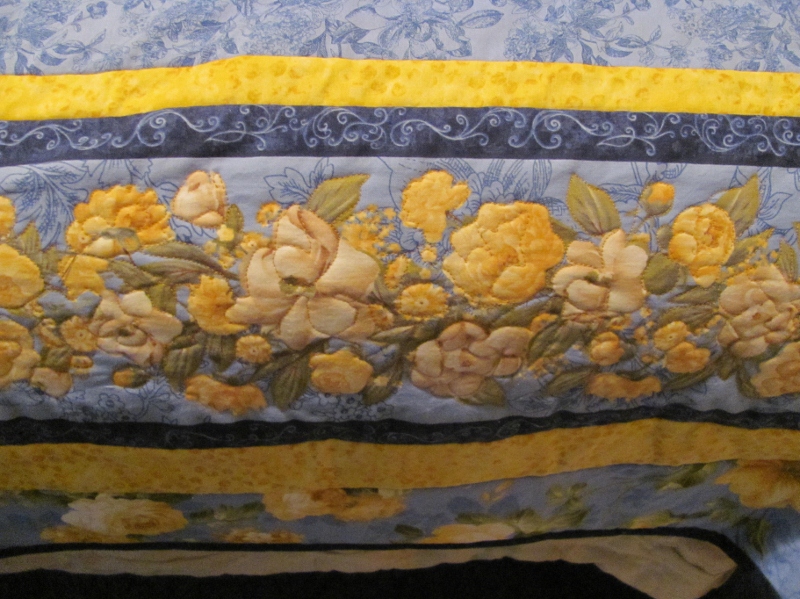
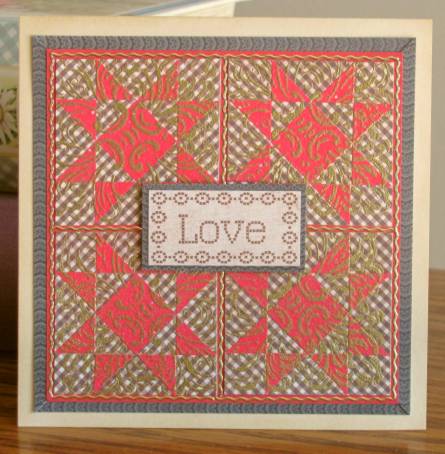
I like projects that combine my interests and this technique of double embossing to create the look of a quilt was right up my alley.


I did a lot more stamping this year and learned to work with alcohol markers. I combine brands (mostly Copic and Bic Mark-It) to get the colors I want. This use on shimmer cardstock really came out well.


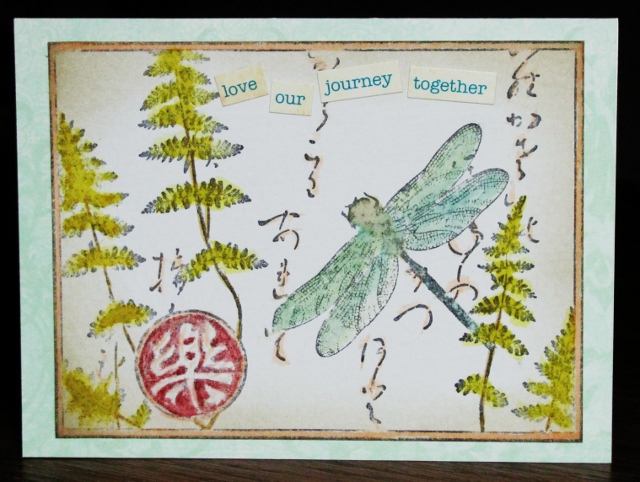
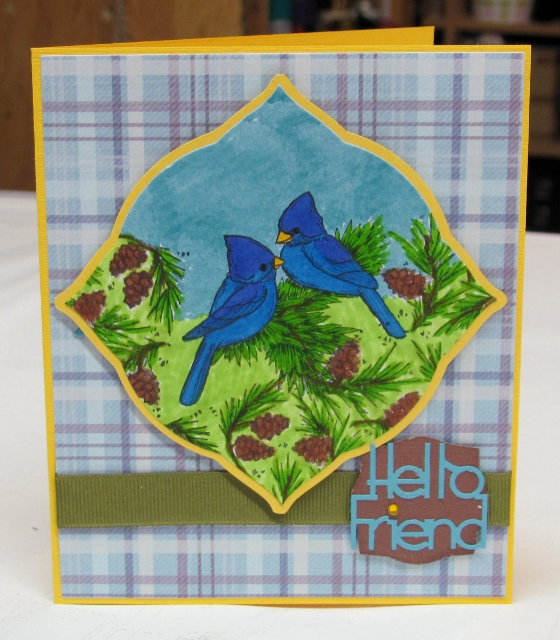
As a challenge to use a LOT of masking in rubber stamping to create a scene, I also combined it with watercoloring. Yummy!


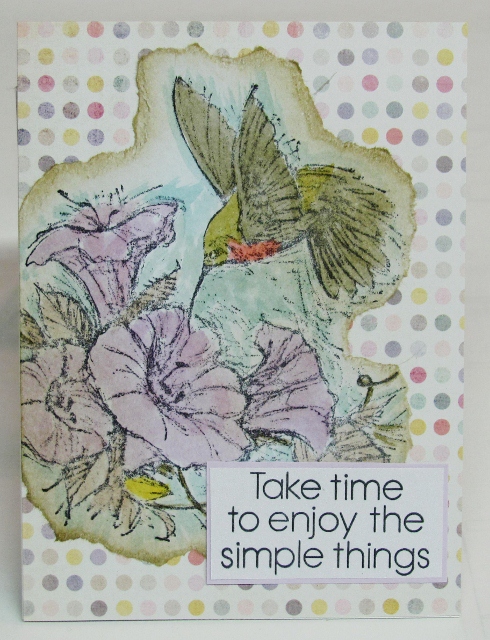
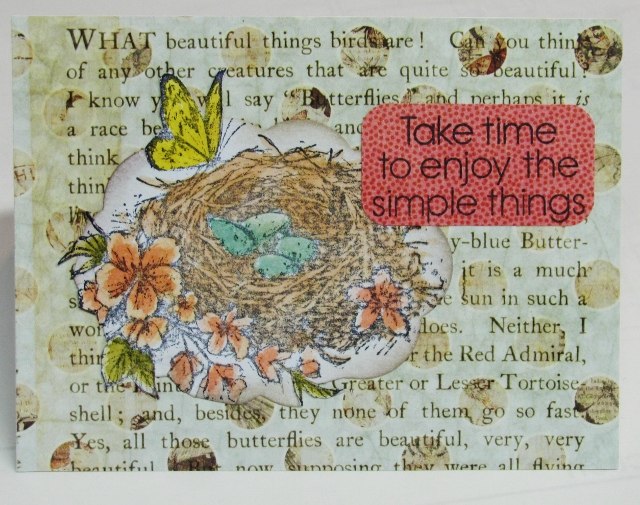
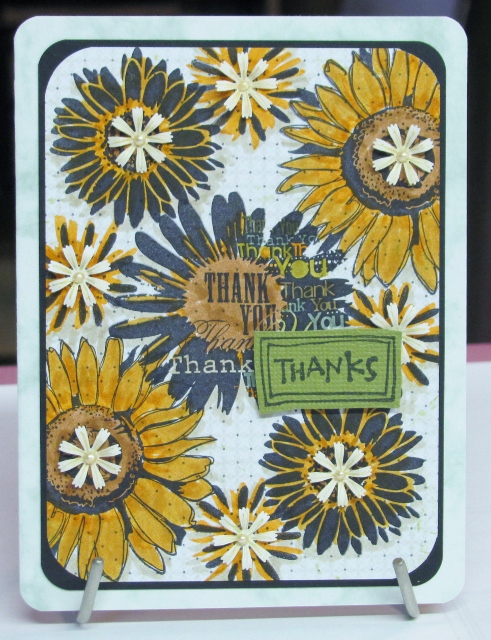
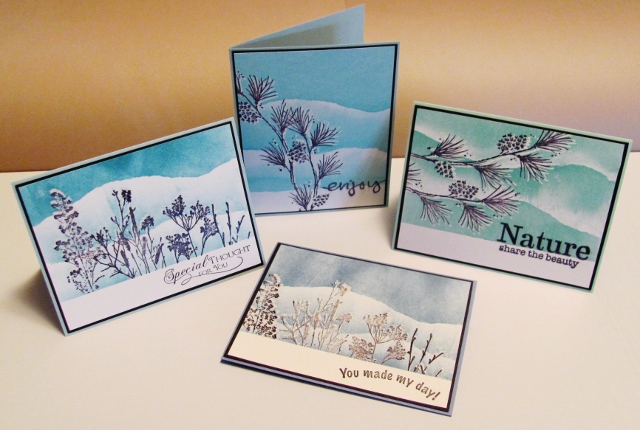
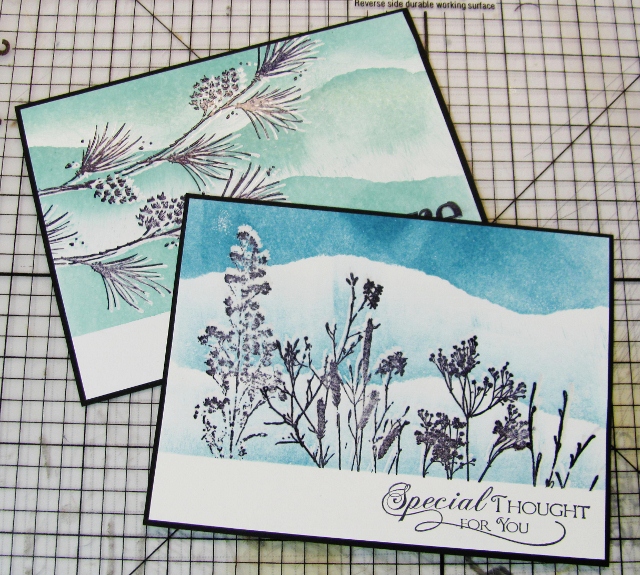
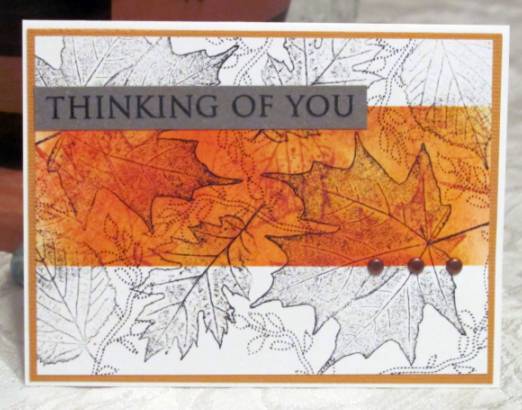
One of the blogs I follow does a lot of sponging of colored panels and combining them with stamping. This was one I tried in that style for fall.


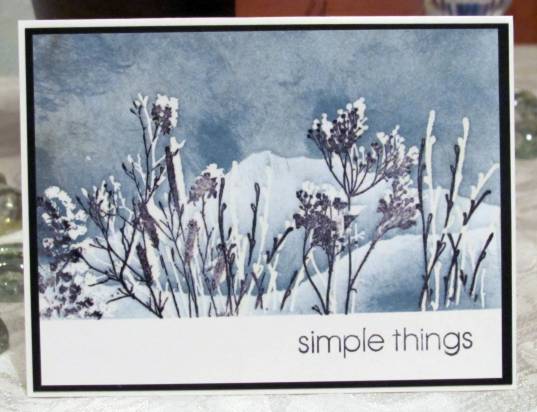
On that same blog she showed how to create a snowy scene with embossing and a slight shifting of the stamped image. Love this effect!


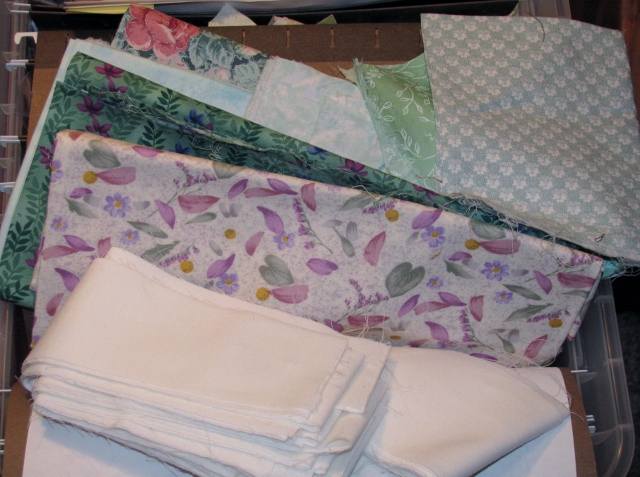
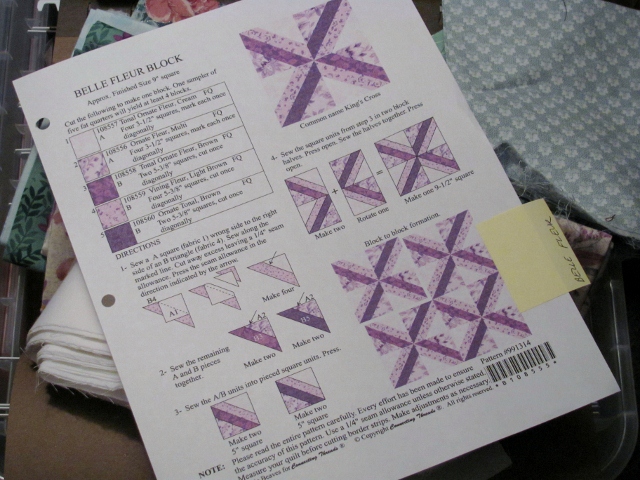
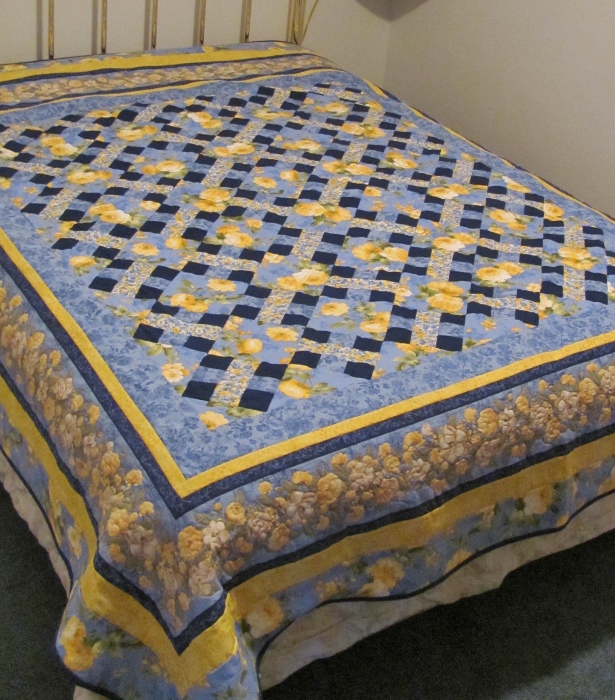
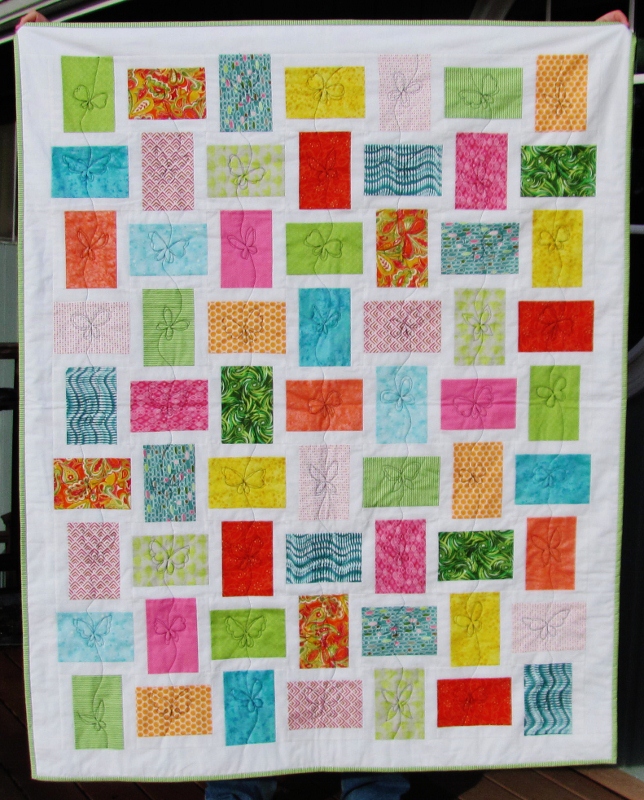
This quilt is just a representation of many I made this year. I chose this one because it combines many of the ways that I grew this year in quilting: original designs, modern quilting, making donation quilts, advanced free-motion quilting.


That's certainly not ALL my favorites, but they do represent the growth I have experienced in the arts this year through following other blogs, taking classes, lots of practice, letting my imagination take the lead, and making myself accountable to posting some artistic endeavor every single day.

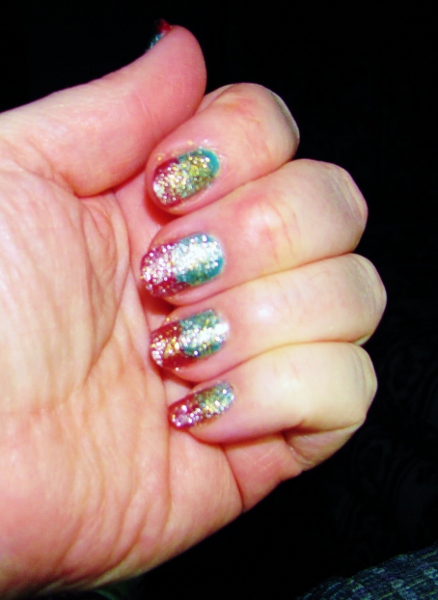
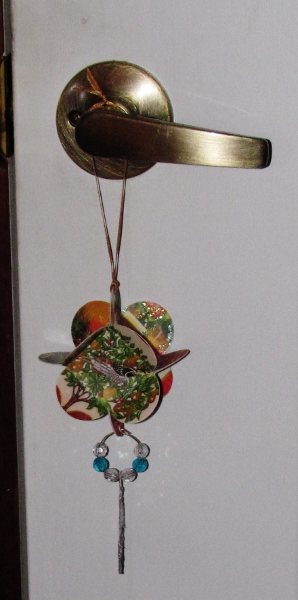
This year I have played in 48 challenges, participated 60 swaps, sent 550 cards to Operation Write Home, was one of the stops on a blog hop for World Card Making Day, made 16 quilts, grew a larger garden than usual, took one online class, won several online contests with my cards, created some awesome art on my fingernails (!), made some jewelry, made some home decor items, did a lot of bulk baking, and set up a new quilt studio.

The only thing I did not do this year that I wished I had was to enter projects in the County Fair. I guess that's a new goal for 2013!

Ddd


Posted by studio3d@ccgmail.net at 12:01 AM PST
Updated: Thursday, 27 December 2012 9:24 PM PST
Sunday, 30 December 2012
Home Bear
Topic: Stickers

OWH issued a challenge for each of us to create 20 cards suitable to be sent home to kids. We were to make them for any age and for any occasion. I chose to start with stickers for my cards since I have a lot of them and rarely make kid cards.

For today's card I started with a large bear sticker and some striped scrapbook paper. I masked off the upper portion of the paper and sponged color on the lower part to create a place for the bear to sit. His book said 'invitation to tea' so I used another sticker to place a bunny on the front instead.

The picture on the wall is a stamp on pink paper with black ink. I used Copic marker to color in the blue stripes and pink hearts. This is popped up on foam tape.


I used a blue folded card base to match the ribbon bow on the bear.

Ddd


Posted by studio3d@ccgmail.net at 12:01 AM PST
Saturday, 29 December 2012
Fab File
Topic: In the studio

Boy, it doesn't take long for fabric scraps to take over when you start a quilting hobby. After stashing and tucking and stuffing and piling I decided I really needed to get organized. So I came up with a plan...

First I sorted out all my fabrics, no matter how much or little there was, into complementary groups. Then I went through my binder of patterns and pulled out one for each collection.

I had two plastic file crates and some hanging file folders so I tucked a set of fabrics in each folder:

Placed the selected pattern in the front of the folder:


And filed them - in no particular older:

Some of these are projects I bought fabric for specific projects, but most are donated fabrics, leftovers from previous projects, or a combination of the two. Including a separate bin of nothing but strips in bags of color duos and another bin with all the fabrics for a king-sized quilt, I now have 'kits' for 18 quilting projects!

These will undoubtedly spawn more scrappy combinations when cut and stitched, but they are corraled in the interim and it will be easy to grab a file to start a project when the time comes to quilt.

Ddd


Posted by studio3d@ccgmail.net at 12:01 AM PST
Updated: Thursday, 20 December 2012 9:35 PM PST
Friday, 28 December 2012
Box on a Box
Topic: In the studio

From the time I bought my portable photo booth I've moved it from place to place trying to find the right spot - convenient and functional. Sometimes, I've folded it up and stored it because there was no good way to use it.

When I packed up the spare bedroom to create the quilt studio was one of those times that the photo booth got stored. Then I suddenly realized that a little bedside cabinet was still in the quilt studio and not being used for anything. So I hauled the cabinet out and shuffled it to the craft studio where it found a corner vacated by the sewing table in the big move.

The photo booth exactly fits on the top of the cabinet! The little lights on stands do NOT fit though so I rigged them up to shine from the top rim.


I have three types of stands to support objects for their pictures and a couple of fabrics to use as backdrops. These can live in the cabinet drawers, along with anything else I might want to use as photo props.

Ready for my close-up...

Ddd


Posted by studio3d@ccgmail.net at 12:01 AM PST
Thursday, 27 December 2012
Setting Myself Up to Succeed
Topic: Online Class

I found a link to an inspiring-looking month-long FREE online class series starting in January. Industry leading artists will be offering daily workshops on the topic of 'Creative Jumpstart'. Well, who couldn't use a little inspiration from the pros?

So I jetted right over to http://nathaliesstudio.com/2012/12/20/creative-jumpstart-2013/ and got myself signed up to play along. Join us! Lesson links come daily via email.

There are also prizes offered by the instructors and by the workshop sponsorers. Name-brand art products, too.

Last year over 4500 people participated! WOW! So many people seeking inspiration.

I'm ready to go... bring it on!

Ddd


Posted by studio3d@ccgmail.net at 12:01 AM PST
Wednesday, 26 December 2012
A Bed Of Roses
Topic: Quilting

The pattern for this quilt (Quiltmaker Magazine, September 2010) was one of the first I picked out when I started quilting and said "I'm going to make that one someday". As it usually does, 'someday' finally arrived and my mom chose this pattern for me to make for her and dad. YAY!

The original pattern is in greens with a pink multifloral print and a swag floral border on white. For this quilt we chose blue and yellow as the color pallette and off I went to find fabrics that would subsitute for the originals. I ended up with a blue background with yellow roses and cream magnolias as the feature fabric. I added in some dark blue, medium blue, yellow and white florals and a bright yellow. In setting the 9-patch pieces I rotated them so there was not the strong diagonal line as the original. I did not find any 'swag' fabric like the original so I selected a wide stripe and added multiple borders to make it the width needed for the drop. Oh, yeah - I cut one entire column off to cut the king-sized pattern down to queen-sized.

Here is the result:

The quilting on the main body is free-motion around every leaf and flower with a vine and leaves connecting through the yellow floral bars.

The borders are all added quilt-as-you-go so the only one with quilting on it is the wide floral border. It is free-motion quilted around every leaf and flower as well.

Yep, that's a LOT of quilting. But I certainly am getting better at free-motion!

Ddd


Posted by studio3d@ccgmail.net at 12:01 AM PST
Tuesday, 25 December 2012
A Show Of Hands
Topic: Nail Art

My fingernails grew out enough to go back to playing with artistic treatments - just in time for the Holiday!

Last summer I had bought some bold colored polish at the dollar store so I could do patriotic nails. While picking up the Red and Blue I also grabbed some Purple (for Easter) and some Green to use with the Red for Christmas.

For these nails I did two coats of green on the nail bed and two of red on the tips. When this was dry I used a makeup sponge to apply silver glitter over the whole nail, dried it, and added gold glitter over that.

Super sparkly with underlying seasonal colors. One nail for each letter... C-H-R-I-S-T-M-A-S-Y!

Ddd


Posted by studio3d@ccgmail.net at 12:01 AM PST
Monday, 24 December 2012
Almost There
Topic: Around the House

Can you even believe Christmas is almost here? Sort of snuck up on my - as usual. I thought I'd give you a little tour of this year's decorating. This has actuallyall been up for over a week but I had other things I wanted to get posted in the meantime. So, here we go...

As you enter the front door there is a wreath but I didn't photograph that. On the inside door handle I hung an oversized ornament:

Just inside the door we have a half-wall. I used crunched up wide plaid ribbons as a base and added a wooden reindeer and a basket sleigh. Last year the sleigh came with a fresh arrangement in it. I saved some sparkly swirly sticks which became the antlers for the reindeer and I filled the sleigh with silver and red shiny ornaments:

Turn right to go into the livingroom and you will first come upon the fireplace. I placed a nativity snowglobe on the lower left:

...and a cangle arrangement on the right. The boxes in this candle holder are hollow so I stuffed them full of gold tinsel:

Up on the mantle is the block calendar framed by 'peace' and 'joy' candles (from Avon - very old). I kept the lanterns that were living up there and added the candle holder from another room. The swag is cheesy plastic but I like it anyway. I placed a $1 runner underneath the whole thing:

In the entertainment center I filled the lower unit with a full nativity ('local' on the left, 'afar off' on the right) and then used the upper shelves and top to assemble an angel choir:

Here's a closer look at one side of the angel choir. Since they are all in golds and cream I added the gold miniature sheet music around them:

There is a corner of the room that is usually pretty blank but I added some decor here to pretty it up

On the complete opposite corner diagonally we have a stack of basket boxes where the answering machine lives. I added some holly, pinecones, and jingle bells to this. (Get it? 'the phone is ringing'):


And for the little corner lamp table, some Santa cheer. Santa is actuall a stack of three nesting boxes. I used my holiday block set here and added a Santa hat to the lamp:

As you leave the living room towards the dining room you pass by the tree. We've added so much furniture that we had to downsize to a shorter, narrower tree. This one is pre-lighted and I've filled it with our usual ornaments plus a couple of new ones we were given this year:

This sits right next to the roll-top desk which is hosting the 'new to me' Christmas Village. Mom gave me these from her collection. I surrounded them with poinsettia blooms, fake (duh) snow, tiny bottle brush trees and some tree candles. I love that these are in a place where the lights can be turned on. I have them plugged into the strip with the tree so they all light at the same time:

Next around the room is the dining table. I put on a crisp white tablecloth, two $1 table runners and a bowl of poinsettias:

Directly across from this is the china hutch. It has an open area that is perfect for seasonal decorating. I use the top shelf to display Christmas cards and the lower shelf sports a fake plant with poinsettia blooms tucked in around the leaves. the three new birdhouses live here along with some mirror balls:

In the kitchen, the only decor is a couple of tiny ceramic buildings up on the window sill (actually, I have since added a large pillar candle between them that is decorated with poinsettias):

Back down the hallway I hung a banner on one of the wooden doors to the linen closet:

Tuck into the main bathroom and you will find the counter top decorated with snowy tinsel from end to end. Then on the right I added a bowl of potpourri and more mirror balls:

The left of the counter got a cylinder vase filled with potpourri in which I placed $1 sprigs of frosted berries (and mirror balls):

The 'facilities' host another of the nesting boxes which, when stacked, create a snowman. He is surrounded by tiny votives


Both of the towel racks are decorated with the snowy tinsel:


Now, I hate to leave you here - hanging out in my bathroom - but this actually concludes the tour of Christmas decor. So, take a minute and when you're ready, come out and join us. We'll be in front of the fire sipping hot chocolate!

Merry Christmas!

Ddd


Posted by studio3d@ccgmail.net at 12:01 AM PST
Sunday, 23 December 2012
Journey Together
Topic: Stamping

This is the last of the 'stamp on watercolor paper' panels that I did. This asian collage stamp comes with the border wroung it so I used that as the cut mark. Blended colors in all of the areas and used distress ink around the sides.

The background is a teal with a subtle print. I used work stickers to create my own phrase.

Ddd


Posted by studio3d@ccgmail.net at 12:01 AM PST
Saturday, 22 December 2012
I Painted It Myself
Topic: Stamping

This collage stamp colors up well although the colors muddled a bit in the bloom. I used some light tan to add a drop-shadow as well and tore the edges all around. These edges were inked with Distress and mounted on a dotted background paper.

I staped the greeting on purple and banded with green before mounting to the card front.

Ddd


Posted by studio3d@ccgmail.net at 12:01 AM PST
Friday, 21 December 2012
Buzzing By to Say Hi
Topic: Stamping

Another of my favorite stamp images... I tore the image to soften it and used distress ink over the whole surface.

The first I colored with pink flowers and used a pink lace background. The text is stamped on pink and bordered with brown.

On the other one I made purple flowers and used a ulti-colored dot background. I stamped the greeting on shimmery paper and bordered in purple.

So soft.

Ddd


Posted by studio3d@ccgmail.net at 12:01 AM PST
Thursday, 20 December 2012
Can Hardly Bear It Without You
Topic: Stamping

Oh what a cozy card this one turned out to be!

I used a teddy bear stamp and did some shading to give him some dimension. In my stash I had this plaid background that matched the coloring I had put into his paws. Pinks for the heart and bow cobined with the blue background makes this a uni-sex card.

I pulled in more blue with the diecut text.

Ddd


Posted by studio3d@ccgmail.net at 12:01 AM PST
Wednesday, 19 December 2012
Nested Nestabilities
Topic: Stamping

With this set of cards I added another technique I had not tried before. In this you lay the diecut on the image and lightly mark where the image extends beyond the cutting edge. A craft knife is used to trim along the image up to that mark and then those portions are lifted on TOP of the die with the rest of the image under the die. Through the machine it goes and then all those extension areas are fully trimmed.

The first impression is one of those too-light ones. I mounted it on a green with a subtle pattern and added a die-cut greeting.

I used the same image and diecut technique, changed up the coloring a bit, and mounted to a text-print background. This one got a stamped sentiment on paper that matches the flowers.

Like the technique of cutting but need to use some better-stamped images to make it really work.

Ddd


Posted by studio3d@ccgmail.net at 12:01 AM PST
Tuesday, 18 December 2012
Hanging Around
Topic: Stamping

On with the stamping on watercolor paper...

This birdfeeder stamp is very detailed and does not stamp well on this type of paper. I resisted the urge to touch it up with fine-line marker as that so often goes horribly wrong. I settled for soft coloring and edge distressing.

First is a mounting on a leafy green print that draws attention to the leafy part of the image. I added a gold peel-off greeting at the bottom.


This one stamped a little better. I chose a dotted background with fine text for this one. Check out the greeting! I hacked apart some peel-off phrases to construct this alternate.

Oh, rats! I realized that the glare of the camera obscures part of it. It actually says Happy Birdday.

Ddd


Posted by studio3d@ccgmail.net at 12:01 AM PST
Monday, 17 December 2012
Water Bottles
Topic: Stamping

I decided to start a series of cards using stamping on watercolor paper and watercoloring the images with Distress Marker ink and an aquabrush.

So now that I've given away the whole process in one sentance we'll jump right in to the first two cards. For today's cards I used the image of colored bottles on a window sill with flowers. I've always thought this image looked best in watercolor. On both of them I used Old Paper Distress Ink on the edges for some dimension.

Both use the exact same coloring so the difference is all in the mounting and embellishment. On the first one I used a green chevron print background and added a clear sticker for the sentiment.

The next one uses a soft floral background and, again, a clear sentiment sticker - this time without a border.

Love this!

Ddd


Posted by studio3d@ccgmail.net at 12:01 AM PST
Sunday, 16 December 2012
Many Thanks
Topic: Stamping

I liked the way the rose stamping turned out yesterday so I decided to have another go at it with a different stamp. This thanks daisy stamp is from the same set as the love rose. I had three other daisy stamps in different sizes that complemented it and I stamped them all in full-strength ink on a minimally patterned paper. I used a variety of green, gold and brown Distress Markers for coloring. Each daisy, except the central feature bloom, got a punched daisy mounted in the center and a dot of pearl pen. I stamped a greeting on green cardstock, trimmed it out and mounted it on foam tape.

I rounded the corners, backed with black, rounded those corners, and added a folded card base (with rounded corners)

Ddd


Posted by studio3d@ccgmail.net at 12:01 AM PST
Saturday, 15 December 2012
Gotta Love It
Topic: Stamping

Here's a little bit of romance in a card. I set out to follow an idea from the Penny Black blog on using the 'frame' portion of a die cut. I started with the central stamp that has the wording embedded in it. I stamped it on a background with tiny script and then stamped all around it with other rose stamps but did those as second generation impressions.

Distress markers ere used to color the images. Then I diecut the image as well as two butterflies from its background scraps. These all got Distress ink to tone the edges and I stamped the large Love word.

I diecut and embossed the center of a pink lace print cardstock and mounted it with foam tape on a folded card base. Then I inset the stamped panel down inside it and mounted the two butterflies.

I rounded the corners to soften the look and then added some 'cotton candy' Stickles to be butterfly bodies.

Ddd


Posted by studio3d@ccgmail.net at 12:01 AM PST
Friday, 14 December 2012
These Birds Are Stellar
Topic: Stamping

This stamp is designed to be two Cardinals but we don't have those in Oregon and I needed to make an Oregon card. So I changed the coloring and made them Stellar Jays. On the stamp they just kinda hang there in space so I grabbed a pine stamp on a cube and stamped it a bunch of times to fill the lower area.

This is all colored with watercolor markers and then I also colored the background. I used a labels die to cut out the diamond shape and trimmed out a slightly larger shape to frame it in yellow.

I added with foam tape to a plaid background along with a green grosgrain ribbon. The text was diecut and glued over another diecut shape which is popped up on foam tape. I added a single yellow rhinestone.

A yellow folded card base echoes the colors in other parts of the card.

Ddd


Posted by studio3d@ccgmail.net at 12:01 AM PST
Thursday, 13 December 2012
Snowy Scene Tutorial
Topic: Tutorial

This is a tutorial on creating these snowy scene cards

THE SUPPLIES: 

You will select some stamps with folliage. I chose a mix of wood-mounted and acrylic stamps mounted on a clear block. 

You will need a stamp positioner to align (actually, to MISalign) your images.

You will need some clear embossing powder, Versamark ink, and a waterproof black ink pad.

You will need some blue blendable ink (I used Distress Inks) and a foam blending tool. You could also use foam daubers.

Get a large sticky-note pad and cut yourself some pieces of white cardstock. Smooth is good - glossy is not good.


THE PROCESS:

Use black ink to stamp each of your images onto the plate of your stamp positioner. Each one that will be stamped separately needs to be aligned in a separate corner of the plate. CLEAN YOUR STAMPS THOROUGHLY AFTERWARD - NO COLOR RESIDUE.

 Use a sticky note to mask off a band at the bottom of the card - I do a one-inch section.

 Ink up a stamp with Versamark ink.

Stamp onto white cardstock.

Place plate of stamp positioner over the stamped image so it is slightly mis-aligned down and to one side.

 Add your corner piece to the stamp positioner and carefully remove the plate. Ink the image with black ink.

Stamp over the Versamark image with the black image, aligning with the stamp positioner.

Repeat to complete the scene. WARNING: If you are using the same stamp more than once on the same scene, stamp all the Versamark versions before inking any with black.

Sprinkle with clear embossing powder.

Heat to melt the embossing powder.

You can barely see here that both the Versamark and black get embossed by this method and that they are slightly off register.


AND NOW, THE MAGIC:

Tear a sticky note to create a hill (make sure you leave some sticky on it) and put it on the card toward the top.


Working on a non-stick craft sheet, use the foam applicator to apply blue ink to the 'sky' where you have masked off. Work from the craft sheet towards the cardstock and this can be a fairly solid coloring.

Remove sky mask. Tear another mask to create a snow bank, Apply to card about 1/2 way down toward the straight-line mask. This time do the inking more lightly and work from the mask upwards. Add ink a little at a time so you don't get too dark.

Remove this mask and repeat the samy style of inking working upward from the straight-line mask.

Remove the bottom border mask

FINISHING: 

Trim the panel

Stamp sentiments in black ink into the white border.


Back with a thin black border.


Apply to white or colored folded card base and you're done!


My original intention to make a slideshow tutorial did not work out. But, this way, you can spend as long as you like on each picture!

Ddd


Posted by studio3d@ccgmail.net at 2:01 PM PST
Updated: Thursday, 13 December 2012 2:44 PM PST

Newer | Latest | Older