« October 2010 »
S M T W T F S
1 2
3 4 5 6 7 8 9
10 11 12 13 14 15 16
17 18 19 20 21 22 23
24 25 26 27 28 29 30
31
You are not logged in. Log in
Entries by Topic
All topics  «
3D paperwork
A - Z challenge 5
A - Z challenge 7
A - Z challenge round 4
A to Z challenge round 3
A to Z round 2
A to Z round 6
A-Z round 1
Around the House
Art Challenges
Artist Trading Cards
Backgrounds
Beads
Bible Journaling
Books
Boxes
Collage
Color Challenge
Coloring
cookbook
Die Cuts
Digital Projects
Digital Stamps
Drawing
Dry Embossing
Fabric Stuff
Fantastic Folds
Field Trip
Home Decor
How Does Your Garden Grow?
Hymnal Art
In The Kitchen
In the studio
Jewelry
Lettering
Links
Multi-Technique
Music to Work By
Musings
Nail Art
New Work
Online Class
Other Hobbies
Other Projects
Painting
Paper Embroidery
Paper Piecing
Photo
Pretty Paper
Quilting
Random
reading
Scrap Recovery
scrapbooking
Sewing
Sketch Challenge
Some Backlog
Stamping
Stencils
Stickers
Supplies
Teabag Folding
Techniques
Testing
tips and tricks
Tutorial
Web resources
Welcome to my Blog
Work By My Friends
workflow
Writing
Blog Tools
Edit your Blog
Build a Blog
RSS Feed
View Profile
Group One
In & Out of Studio 3D
Tuesday, 12 October 2010
Just Because...
Topic: Stamping

This little image was colored with watercolor pencils and blended with and aquabrush. Then I cut it out with a nestability die and layered on multiple cardstocks, one printed.

The ribbon is a faux bow tucked through two 1/8 inch punched holes. Then I stamped the text with a clear stamp.

Two gold peel-off butterflies were the final touch.

Ddd


Posted by studio3d@ccgmail.net at 6:00 AM PDT
Monday, 11 October 2010
A Relaxing Scene
Topic: Scrap Recovery

This scene is from a page-a-day calendar. I used a nestabilities die to cut out the image and then cut around the outside of the same die on black cardstock to create a thin mat.

I used a Cuttlebug border twice and then applied thin 'shadow' lines with a balck pen.

The text is a rub-on.

Ddd


Posted by studio3d@ccgmail.net at 6:00 AM PDT
Sunday, 10 October 2010
Chalked to Match
Topic: Scrap Recovery

I started today's entry with the illustration cut off of an advertising brochure. It was such a homey picture that I decided to go with that theme and create a housewarming card.

I used Colorbok chalk ink with an clear stamp (two parts arranged on an acrylic block) for the text. Then I applied the same ink to three of the paper flowers.


Layers of brown and cream cardstock bring this all together. I stuck on the flowers with glue dots and placed glittery dome stickers in their centers.

Ddd


Posted by studio3d@ccgmail.net at 6:00 AM PDT
Saturday, 9 October 2010
Assembly Line
Topic: Stamping

I recently had a commission to make 30 invitations and decided the fastest and easiest way to do them was with rubber stamping. The client likes hummingbirds so I pulled out my favorite stamp and used it on a speckled, folded cardstock with archival black ink.

They were then 'watercolored' using stamp inks on a non-stick craft sheet. Some were stamp pads pressed onto the surface and some were re-inkers with a few drops on the sheet. These were picked up with an aquabrush and applied to the stamped image. I did the shadows first then the highlights over the top.

The next step was to apply Stickles to the throat of the hummingbird and the ends of the stamens.

Here is the whole set:

Here you can see the shading close up as well as the glittered bird:

As a final step I tore a mask for the image and used my new airbrush system to spray the blue and yellow background.

Here is a closeup of the card:

I created a clear-lidded box to present the cards and envelopes:

Ddd


Posted by studio3d@ccgmail.net at 6:00 AM PDT
Friday, 8 October 2010
Chinese Lanterns
Topic: Paper Embroidery

I'm not sure if that is the right name for these flowers - just what we called them as kids. I stitched on brown 'natural' paper. When I went to put the card together I came up with the green dotted paper and orange cardstock. Then, lo and behold, I fond I had this orange and green plaid ribbon. Sweet!

The text is a rub-on.

Ddd


Posted by studio3d@ccgmail.net at 6:00 AM PDT
Thursday, 7 October 2010
Bold Bible
Topic: Stamping

This colored image was used as inspiration to add bold colors in a graphic layout. I had the right color of ribbon as well and added that to set off the stamped text at the bottom.

I used two colors of Stickles to add shine to to flowers, cross, and bookmark. You don't see it here, but gold paint is also on the Bible page edges.

Ddd


Posted by studio3d@ccgmail.net at 6:00 AM PDT
Wednesday, 6 October 2010
Tulips For My Heart
Topic: Stamping

OK, just a little stamping - the heart. The 'big picture' is fom a wall calendar and a ribbon is tied at the horizon line.

Two tones of pink cardstock frame the photo and silver peel-offs were colored with marker to make them pink before adding as corner brackets.

Ddd


Posted by studio3d@ccgmail.net at 6:00 AM PDT
Tuesday, 5 October 2010
Can't Stop Tinkering
Topic: Scrap Recovery

WAY too many layers on this card. It wouldn't be so bad if that brown was less intense. But here it is, for what it's worth...

Silver trims and a peel-off greeting contribute to the mix as well as the pen 'stitching' around some of the strips.

The starfish is from a page-a-day calendar cut with a nestability die. The next larger size of die was used for the mounting and it was raised on foam dots.

Ddd


Posted by studio3d@ccgmail.net at 6:00 AM PDT
Monday, 4 October 2010
The Old Mill
Topic: Stamping

I've never liked this stamp much - doesn't stamp cleanly and clearly. But I had stamped it out and decided to use it. After coloring it I did some 'fix-up work with a black pen to make it passable.

I chose background layers to echo the colors in the scene and dropped in three paper flowers with brad centers. I used markers on them as well.

The text and the two scrolls were stamped on the background to bring it together.

Ddd


Posted by studio3d@ccgmail.net at 6:00 AM PDT
Sunday, 3 October 2010
You Never Know
Topic: Stamping

Oh, that sketchy hummingbird is back. This time it is colored with copic markers and cut with a nextability die. I wanted a little band of color around so used the die to trace around and cut by hand. One little gold dot for the bird's eye.

The background was impressed with a Cuttlebug folder and colored with the copic markers. Then I used a dotted swiss folder and impressed it again. Torn edges make it more informal.

I added gold peel-off flowers to the background, a thick acrylic text sticker and popped the stamped panel up on foam dots.

Ddd


Posted by studio3d@ccgmail.net at 6:00 AM PDT
Saturday, 2 October 2010
Seasons of Life
Topic: Techniques

I had one scrap of paper weaving left from recent projects and put this together from it. The two label layers were from the leftovers pile as well. All these as well as the flowers, the checked paper and the green folded cardstock base were sponged with distress ink to equalize the tones.

The flowers were mounted with brads and folded loops of ribbons were added to the top and also as 'leaves' for the flowers.

The text is cut snippets of cardstock stickers.

Ddd


Posted by studio3d@ccgmail.net at 6:00 AM PDT
Friday, 1 October 2010
Farming Simplified
Topic: Stamping

Stamped and colored this image months ago and lost it in the pile! Looking for something else and there it was. So I used it!

Nestabilities used to cut the stamped panel and a larger green one to go underneath. A torn strip of text printed paper and a couple of pieces of ribbon - to pick up the color of the distant hills.

I did pen 'stitching' around several elements and added the metal tag with a brad thru the hole.

Ddd


Posted by studio3d@ccgmail.net at 6:00 AM PDT
Thursday, 30 September 2010
Early Christmas
Topic: Scrap Recovery

In the Sunday paper was an ad for Christmas figurines (buy this figure and we'll send you more on a regular basis and you'll never get off our list). I cut out the figures from the ad and did a simple mount over a scalloped edged blue cardstock to pick up the blue in the robes. Gold peel-off stickers were used for the text as well as the borders and corners.

Simple and elegant.

Ddd


Posted by studio3d@ccgmail.net at 6:00 AM PDT
Wednesday, 29 September 2010
Friends Love Hydrangeas
Topic: Stamping

I saw this beautiful layout on this blog (http://inkstainswithroni.blogspot.com/2010/08/dimensional-watercolor-hydrangea-card.html), took diligent notes on how it was done, and produced these two cards with the supplies that I had on hand.

The hydrangea was stamped three times along the left side and once running off the edges at the top and the bottom. I masked the blooms and stamped scrolls along the edges. Then on a separate piece I stamped three more blooms and all of them were colored with an aquabrush and ink including the green around the scrolls.

The extra blooms were cut out and mounted with 3D glue dots filling in the spaces. One of the blooms was cut in half and placed along the top and right edges.

I used a folded green cardstock base and then added golden Stickles to the centers of each florette. The text is a printed sticker which has some colors staining to coordinate with the rest of the card.

I made two of these and, since they are so similar, I am posting both today.


Ddd


Posted by studio3d@ccgmail.net at 6:00 AM PDT
Updated: Friday, 3 September 2010 4:58 PM PDT
Tuesday, 28 September 2010
Toast, Chocolate, Caramel and Coffee
Topic: Stamping

Yummy shades of brown! Three colors of distress ink (plus black), four shades of brown cardstock, five rubber stamps of leaves. The brown leaves were all stamped and cut out for layering. Then the black leaves were stamped to fill in. More leaves in gold peel-off frame out the card.

I added a band of grosgrain ribbon and two 'flags' hanging down. Over these I placed a thick acrylic clear text sticker mounted on cardstock that matches the background. It is mounted on foam dots.

Ddd


Posted by studio3d@ccgmail.net at 6:00 AM PDT
Monday, 27 September 2010
One Treat After Another
Topic: Paper Embroidery

I used verigated thread to stitch up this branch on textured metallic cardstock.  At the base of each leaf I added a sticky-backed glitter dot. Two strips of grosgrain ribbon frames the stamped text which was cut out with a nestabilities die and distressed with ink. I popped it up on foam dots.

Photo corners were used to attach the panel to golden folded card base.

Ddd


Posted by studio3d@ccgmail.net at 6:00 AM PDT
Sunday, 26 September 2010
Winter Blues
Topic: Dry Embossing

Can you find FOUR embossing plates used on this card?

1) Obviously, the background. This is a large-sized folder which was impressed onto white cardstock and colored using a 'denim' distress ink pad and a brayer to color the raised portions.

2) Little house and trees are a winter border.

3) Dotted swiss folder was impressed in the left upper portion.

4) Distressed stripes folder was used in a very small portion to carry the 'ground' area across from the house scene.

Folders 2-4 are used on a white-core blue cardstock and then the surface was sanded to expose the white. This panel was bordered with white cardstock and then mounted with foam dots for lift. 

I added a blue text sticker at the top and then places 5 clear snowflake stickers across the text and scene.

Ddd


Posted by studio3d@ccgmail.net at 6:00 AM PDT
Saturday, 25 September 2010
Kindred Kat
Topic: Stamping

Ha! Still using up these cats I stamped on yellow plaid paper. I stamped quite a few not knowing what I would be doing with them. In this case I cut one in full and one without the tail. When popped up on 3D glue dots it makes him stand away from the card surface. I also gave him glittery eyes and drew new whiskers as the originals are outside the face area and get cut away.

Three backing papers are scraps from an old scrapbook page-a-day calendar. I went a little crazy with the faux stitching: around the green checked paper, around the colorful patchwork, and around the cat! I added three holographic green sticker squares at the upper right as a space filler that would carry on the green and the square elements.

The text is a Cuttlebug die cut that started out orange. It didn't have enough contrast with the background so I did some faux stitching on it... wrong! So I colored it black with markers... looked flat and blah. So I traced it out with Stickles... YES!

A golden folded cardstock base echoes color from the patchwork layer.

Ddd


Posted by studio3d@ccgmail.net at 6:00 AM PDT
Friday, 24 September 2010
On The Surface
Topic: Books

Today I am presenting an unsolicited book review. I picked up this book at Barnes and Noble last month and I am enthralled with it:

Paper Transformed: A Handbook of Surface-Design Recipes and Creative Paper Projects by Julia Andrus, published by Quarry Books, 2007 (ISBN 1-59253-370-1).

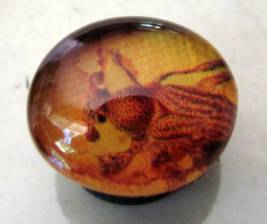
Beautiful photographs abound, beginning with the title page:

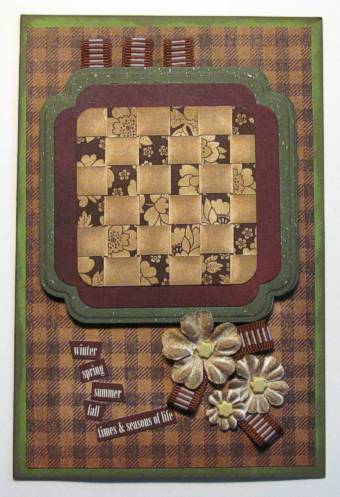
Chapters 1-7 are all about methods for getting color, texture and pattern onto your papers. These include products as well as techniques, and include step-by-step instructions using lots of photos. Each is demonstrated on a tag as a common frame of reference. This keeps the focus on learning the process rather than working toward a specific finished product:

Many of these processes have additional tips so that one may make educated choices in varying the technique for a different result:

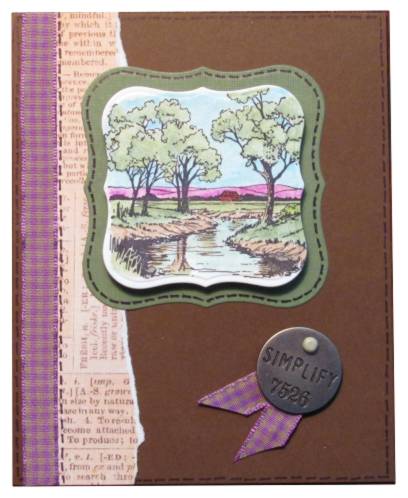
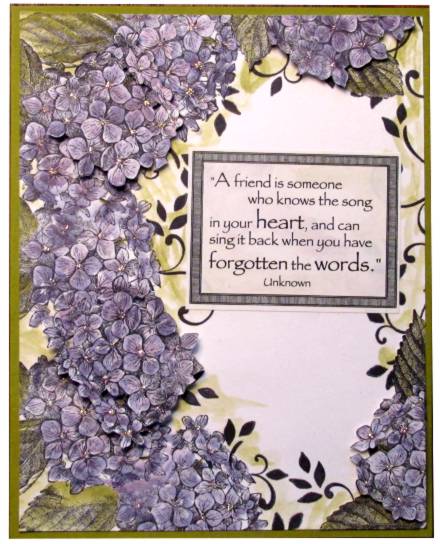
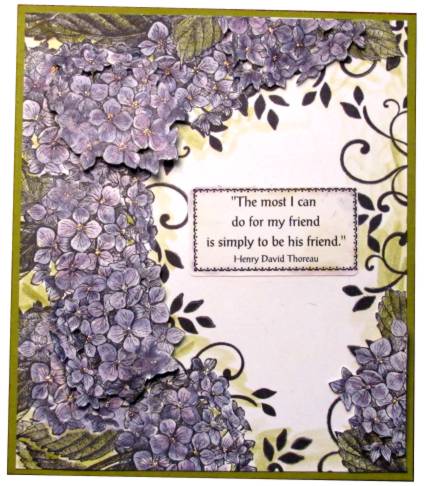
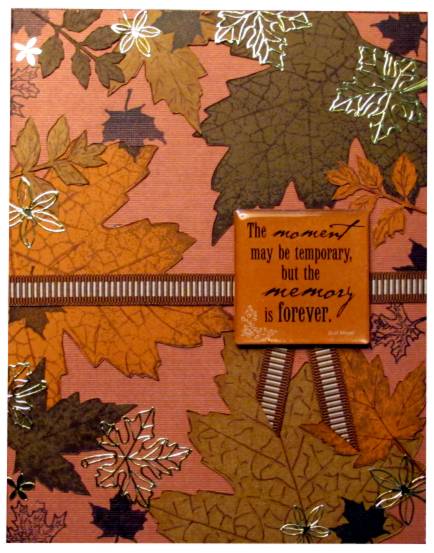
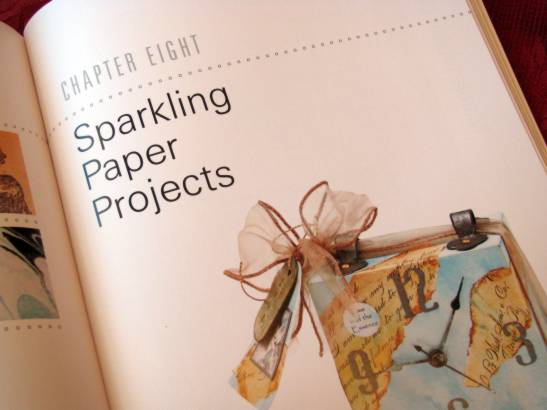
After teaching these techniques for transforming your papers, Chapter 8 presents twenty-four fabulous projects constructed from these papers, including full directions. These include game boards, journals, cards, containers, home decor, and more:

If you have any desire to take your papercrafts beyond cutting up and gluing together commercial designer papers, then this book is for you.

Highly recommended.

Ddd


Posted by studio3d@ccgmail.net at 6:00 AM PDT
Thursday, 23 September 2010
Dragonfly in Amber
Topic: Other Projects

Following up on yesterday's project, I had another idea - to make faux amber with embedded bugs.

For these I applied bug stickers to butterscotch colored cardstock and attached the flat-backed marbles with clear glue. After drying I cut around the base of the marbles and used 'butterscotch' and 'caramel' alcohol inks to color the marbles, allowing it to drip down and color the backing as well. Continuing to tap the glass with the ink on a felt pad makes lines that look like 'faults' in the amber. These were then mounted on round magnets using glue dots.

Here is the full set:


And the 6 individual magnets:


I will likely decorate a tin to enclose these so they can become a gift set.

Ddd


Posted by studio3d@ccgmail.net at 6:00 AM PDT

Newer | Latest | Older