« January 2016 »
S M T W T F S
1 2
3 4 5 6 7 8 9
10 11 12 13 14 15 16
17 18 19 20 21 22 23
24 25 26 27 28 29 30
31
You are not logged in. Log in
Entries by Topic
All topics
3D paperwork
A - Z challenge 5
A - Z challenge 7
A - Z challenge round 4
A to Z challenge round 3
A to Z round 2
A to Z round 6
A-Z round 1
Around the House
Art Challenges
Artist Trading Cards
Backgrounds
Beads
Bible Journaling
Books
Boxes
Collage
Color Challenge
Coloring
cookbook
Die Cuts
Digital Projects
Digital Stamps
Drawing
Dry Embossing
Fabric Stuff
Fantastic Folds
Field Trip
Home Decor
How Does Your Garden Grow?
Hymnal Art
In The Kitchen
In the studio
Jewelry
Lettering
Links
Multi-Technique  «
Music to Work By
Musings
Nail Art
New Work
Online Class
Other Hobbies
Other Projects
Painting
Paper Embroidery
Paper Piecing
Photo
Pretty Paper
Quilting
Random
reading
Scrap Recovery
scrapbooking
Sewing
Sketch Challenge
Some Backlog
Stamping
Stencils
Stickers
Supplies
Teabag Folding
Techniques
Testing
tips and tricks
Tutorial
Web resources
Welcome to my Blog
Work By My Friends
workflow
Writing
Blog Tools
Edit your Blog
Build a Blog
RSS Feed
View Profile
Group One
In & Out of Studio 3D
Thursday, 14 January 2016
12 Tags Of 2016 - January
Topic: Multi-Technique

Sure enough, Tim Holtz returned with a monthly tag challenge for 2016. Each month he will reprise two old tag techniques he has done in past years and combine them into one tag. I am joining in again - right on the heels of finishing my last tag of 2015!

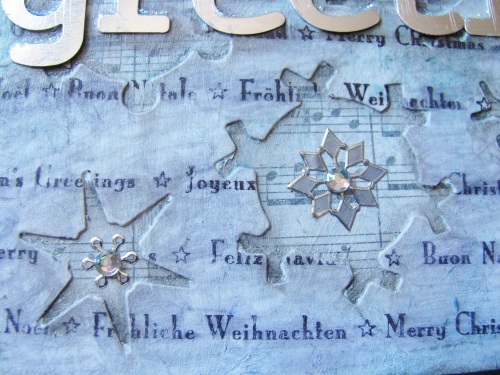
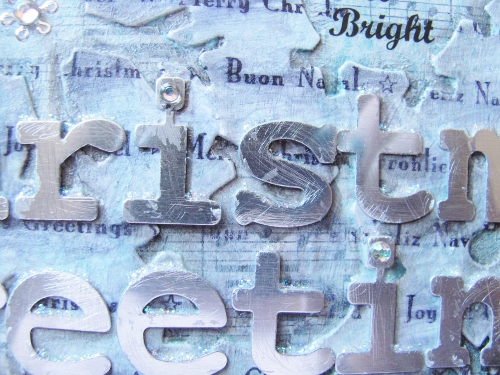
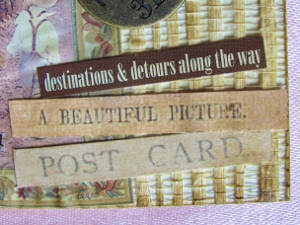
Here are the two tags Tim combined:


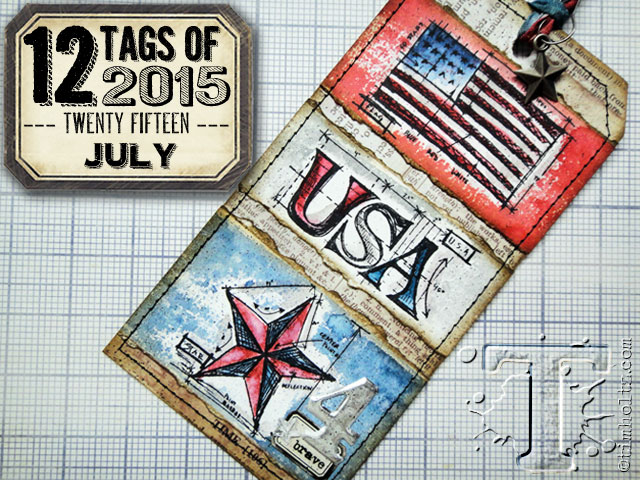
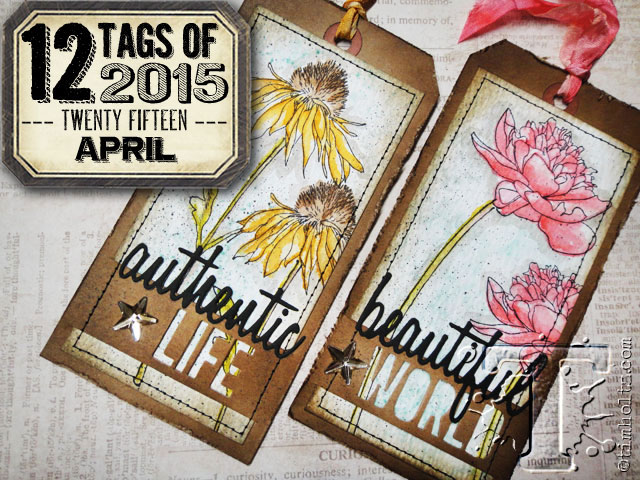
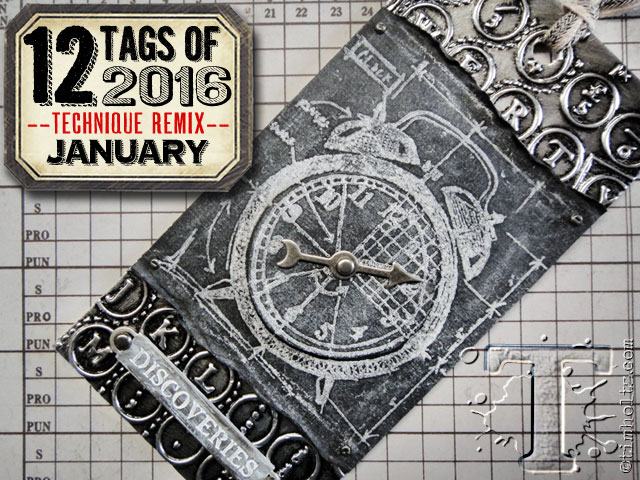
And here is the tag he made for January 2016:


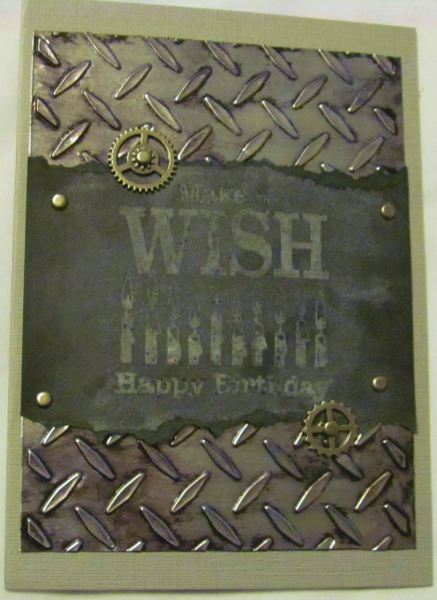
Here is the process I used to create my version:

- Choose a stamp for the chalkboard center of the card (I chose a birthday message)

- Select a cardstock and apply metal foil tape to the top and the bottom edges (I used card-sized rather than a tag)

- Emboss just the metal areas with an industrial look folder (I used diamond plate) 

- Use felt blending tool to apply black alcohol ink to metal areas (Tim  did his with black Distress Paint)

- Use soft cloth or paper towel to wipe away excess ink to reveal metal

- Dry with a heat tool

- On black cardstock, ink stamp with Distress Embossing ink and cover with Frosted Crystal Embossing Powder and heat with heat tool (I did not have these products so I inked my stamp and made the impression with a glue stamp pad. Then I ground some white chalk and tapped it into the glue and dried it with a heat gun)

- Scribble over the image with white chalk including background

- Use fingers to rub in chalk

- Tear top and bottom edges 

- Adhere chalk layer to metal layer using brads

- Trim sides of chalk image to fit on metal layer

- Adhere gear embellishments using brads

- Use strong adhesive to mount piece to a base card

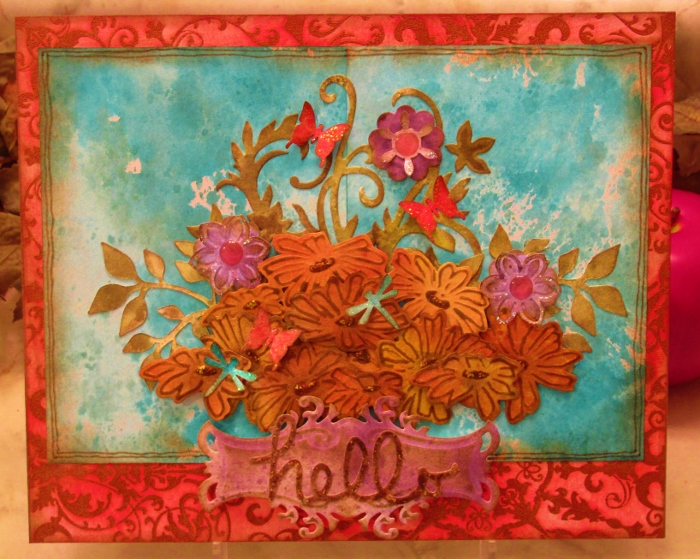
Here is my finished card:


What a great card for a guy - all that industrial look. We're off to a good start.

Ddd


Posted by studio3d@ccgmail.net at 12:01 AM PST
Thursday, 31 December 2015
15 Favorites of 2015
Topic: Multi-Technique

This year, for the year-end wrapup, I decided to match the year with the number of projects to feature.

These are my favorite items I produced this year:

This is a display piece based on techniques taught by Tim Holtz in his 12 tags of 2015 series. This was the February project.


I had wanted to make a quilt of a bookcase for some time. I designed this one and constructed it using paper piecing. It is one of the banners I hang on the fireplace wall.


In March, I designed this quilt of cats in the window.


This was made in May from another of Tim Holtz's tag tutorials.


One of my favorite cards working from the OWH sketches.


This July creation came from the Tim Holtz tag tutorials.


This stamped card was going to be an entry for the fair but I ended up not entering anything.


A card using the September tutorial from Tim Holtz.


I love this duffel bag I made in September.


October's display piece made from Tim Holtz's tutorial.


A mystery quilt that ended up donated to the hospital.


Paper embroidery for a Christmas Card.


The November Tim Holtz tag tutorial turned into this.


A gift for friends based on a piece we saw in a shop window at the beach.


A watercolored Christmas card inspired by an online tutorial.

And that's it - 15 for '15.

Ddd


Posted by studio3d@ccgmail.net at 12:01 AM PST
Monday, 19 October 2015
12 Tags of 2015 - October
Topic: Multi-Technique

I can't believe we're up to October already with this year-long challenge!

Here is the inspiration piece from Tim. He went with a distinctly Halloween tag, but I am NOT all about Haloween.


I went back to the very basic idea that Tim used and focused on 1) wrinkle-free distress backgrounds 2) layering diecuts made from those backgrounds 3) a word feature. Granted, I used diecuts that are nothing like Tim's and worked on a large showpiece instead of a tag, but the process is similar and led to a project I am proud of (much more than if I had made a Halloween tag).

Here are the steps I used:

- create wrinkle-free distress background in 6 color-ways

- diecut and punch various 'scene' parts from the backgrounds

- ink edges of each piece with Distress Ink using a foam blender

- attach a piece of copper ColorMe paper to a heavy base layer

- use Distress Ink and blending foam to color background

- ink edges using Distress Ink

- add large distressed background over the ColorMe background

- assemble diecut parts into a 'scene' using foam tape to raise in successive layers

- diecut a script word from distress background paper

- layer word over fancy diecut label


- attach to main piece using several layers of foam tape

- use various colors of Stickles to decorate elements of the scene


- add a double line around the main piece with the fine tip of a Distress marker

- present on a picture holder stand

Here is the finished piece:

Ummm, yeah. That is NOT a Zombie Head Tag!

Ddd


Posted by studio3d@ccgmail.net at 12:01 AM PDT
Tuesday, 29 September 2015
12 Tags of 2015 - September
Topic: Multi-Technique

It's time again for an art pieceinspired by Tim Holtz's 12 Tags of 2015. We're up to September now:


Here are the steps I used to create this

- on non-stick craft sheet scribble metallic mixatives from the alcohol ink line

- shake and scribble several colors of alcohol ink directly over mixative

- shake blending solution over top

- swipe glossy cardstock through inks

- set aside to dry

- on heavy cardstock use foam tool and distress inks to blend color to complement alcohol inked piece.

- mist with water and dry with heat tool

- trim alcohol piece to desired size

- select stamps for feature

- ink with Archivel black ink and stamp on alcohol piece. dry with heat tool

- place stencil over top

- use plastic card to squeege  clear mmatte medium through the stencil

- carefully remove stencil (wash it immediately)

- allow piece to dry naturally

- stamp the same stamps on heavy vellum using Archival black ink

- heat dry and cut out

- shape if desired

- over dried matte medium very lightly sponge with Archival black ink to show the texture

- use sponge to ink edges of piece with Archival black ink

- use sponge to also ink edges of the heavy cardstock piece with Archival black ink

- tear a piece of black cardstock the same width as alcohol piece

- pierce four corners

- cut label shape from metallic cardstock and add metallic text sticker

- string thin wire through ends of label

- place metallic brads into pierced holds

- wind wire ends around brads

- assemble piece: alcohol piece to heavy cardstock piece, black strip to bottom, stamped vellum over stamped alcohol piece

- spritz surface of piece with spritzer and Distress marker in black

Yes, I made another display piece instead of a tag like Tim does.

Ddd


Posted by studio3d@ccgmail.net at 12:01 AM PDT
Sunday, 30 August 2015
12 Tags of 2015 - August
Topic: Multi-Technique

I'm back with my creation based on Tim Holtz's 12 Tags of 2015 - August edition. Here is the original:


Once again, I created a display piece rather than a tag. I don't have much of an affinity for tags so creating something I can display is more to my liking.

You'll soon discover that my piece looks very little like the inspiration piece. I am pleased with this as I like mine better!

Since I did not follow the directions closely here are the steps that I used.

- Cut two pieces of heavy cardstock the same size (mine were 5.5 inches square)

- Use dies to cut shapes all over one of the pieces (I used 4 snowflake dies)

- On the second piece, use matte medium to adhere sheet music.

- Use matte medium to adhere the diecut piece over the music piece making sure all corners and edges are secure

- Seal the surface of the music with matte medium and dry with heat tool

- Paint white gesso over entire surface then wipe away excess gesso to allow music to show through. Dry.

- Smush three Distress ink pads onto surface (I used broken china, evergreen mough and shaded lilac)

- Immediately use thin layer of matte medium to blend the colors. While still wet, use paper towel to dab away excess ink. Dry.

- Stamp words on surface using Archival jet black.

- Use blending fluid to smudge and smear words on surface.

- Use black soot distress marker to draw inside snowflakes. Wipe away to create dimension.


- Adhere metal letters using matte medium. Dry.

- Use soot black distress marker to draw drop shadow around letters. Wipe away to create dimension

- Apply rubon words inside one snowflake


- Attach silver snowflake dazzles inside snowflakes

- Place rhinestones inside dazzles and to the dots on the 'i's

- Use stickles to add a snowcap to tops of letters

- Use black permanent marker to add a string to hold the dangling letter.


Here's the final product:


And there you have proof again that I cannot follow directions!

Ddd


Posted by studio3d@ccgmail.net at 12:01 AM PDT
Saturday, 11 July 2015
12 Tags of 2015 - July
Topic: Multi-Technique

Go big or go home! that was my dilemma when starting to replicate the July tag from Tim Holtz. Here is his creation:


Tim made HIS tag with the mini versions of the patriotic blueprint stamps which I do not have - I have the standard size of them.

The solution was to up-size the whole project into a 6 x 10 hanging wall piece.

Here are the steps and supplies I used to complete this project:

- adhered text-printed scrapbook paper to the surface of a chipboard cut to size.

- use sandpaper block to scuff all 4 edges.

- stamp patriotic blueprint stamps onto heavy watercolor paper using black Archival ink.

- use deckle-edge ruler to tear against at the top and the bottom of each image.

- use Distress marker ink as watercolors to color the images. include drop-shadows painted with Pumice Stone ink.

- smear Versamark across images to create a resist. (this didn't seem to have any effect so this step could easily be skipped)

- use a very wet brush to add Pumice Stone Distress Ink over the images. blot off excess ink to keep smearing of colored images to a minimum. dry with heat tool.

- trim sides off images to fit them on text background.

- distress the edges with Frayed Burlap Distress Ink. Wet with aquabrush. dry with heat tool.

- adhere centers only of the images to the text background.

- stitch around all 4 sides of all 3 images. (this is the reason the glue was only in the center in the last step - so the machine needle would not have to go through it)

- decorate flag panel with rhinestone 'stars'.


- add silver Dazzles 'celebrate' peel-off sticker at the top of the USA panel.


- add stickers, rub-ons, rhinestones to star panel.

- use spritzer to spray black soot Distress Marker ink on panels.


- punch holes on upper two corners of panel.

- color opposite edges of cream colored seam binding using a blue Distress Marker and a red one.

- spritz ribbon with mini-mister to start colors running. blot before colors run together in the middle.


- dry with heat tool, scrunching to wrinkle as it dries.

- tie ribbon to holes, attaching star charm by stringing through one end of the ribbon.


So, here is my completed hanging decorator piece which I used as a hostess gift for the neighbors who hosted our Independence Day get-together.


It's on a different scale than Tim's original but the general effect is the same.

I also covered the back of the chipboard piece with scrapbook paper to create an attractive finish.

Ddd


Posted by studio3d@ccgmail.net at 12:01 AM PDT
Saturday, 13 June 2015
12 Tags of 2015 - June
Topic: Multi-Technique

Back to some hands-on artwork for a while. It was time to do my version of the June edition of Tim Holtz's 12 Tags of 2015.

Here is his original:


I'm pretty sure I did not have a single item that Tim used so I went for more of a 'look and feel' interpretation.

I made a distress background to start with using scattered straw and gathered twig distress pads, a craft sheet and a mini-mister. This was dried and then I had to figure out how to get a distressed plaid over it.

I used a custom inked pad with adriondack reinkers. Then I got out a rubber brayer and wound twine on it until most was covered. This was inked on the pad and then run over the distress background, first one direction and then the other until the coverage was like I wanted. I cut this down to size and used the distress tool on all the edges then inked them with gathered twig. This was set aside.


I drew a pattern for a latte cup and cut various parts from printed paper, corrugated cardboard and clear transparency. I used a scoring tool to make some creases at the appropriate parts.


I cut down the transparency bubble to fit the top of the cup and attached it to the upper edge with scor-tape. I used Picket Fence distress stain on the back of the bubble and dried it with the heat gun.

I didn't have a straw so I got out a clear plastic pick and used alcohol ink to color it.

I used two sets of stamps to create a greeting and cut the strip down to a flag shape. this was distressed with the mini-tool and then inked with gathered twig. I cut a strip of grass cloth to go behind it.


The latte cup was adhered to the plaid piece using foam tape and leaving just the right abount of space for a gift card to slip behind. I then stapled the sentiment assemblage to the front.


The plaid unit with all these layers was adhered to a card front of the same material as the sentiment. It also matches the 'straw'.


With the addition of a 'real' gift card for a coffee stand and a hand-written thank you message inside, this is ready for gifting.

Ddd


Posted by studio3d@ccgmail.net at 12:01 AM PDT
Saturday, 30 May 2015
12 Tags of 2015 - May
Topic: Multi-Technique

Just squeaking this challenge tag in under the wire. In two days it will be time for another challenge!

Here is the original tag made by Tim Holtz:


As always, I read the original instructions (with photos) and made notes for myself. Then I went to the studio with just the written step-by-step and pulled supplies from my stash that were 'sorta like' the ones Tim used.

Here's my process:

-Use Xyron to adhere neutral-colored grasscloth wallpaper sample to stiff cardboard

-Cut into tag shape

-Place a letter stencil on upper left and use an old gift card to spread texture paste in a small section. Let this dry

-Select bits of small ephemera that look vintage and set aside

-When texture paste is dry, use foam tool and distress ink to tint the paste.

-Ink edges of tag with brown distress ink

-Select a small black and white photo

-Use distress markers to color the photo and follow up with immediate blending away excess ink with cotton swab

-Use matte medium to attach ephemera and photo

-Apply postal-type rubons to surfaces of ephemera and tinted photo

-Dye crinkle ribbon with distress ink and water. Scrunch and dry with heat tool

-Tie crinkle ribbon around tag

-Select word token and memo pin and attach to ribbon

-Use heavy glue dot to secure bottom of token

-Select small quote and cut into strips. Adhere with matte medium

-Attach tiny paper flowers with heavy glue dot

-Use brown distress ink to tint word strips

And here is the finished tag, very vintage with lots of texture.


Whew! Made it!

Ddd


Posted by studio3d@ccgmail.net at 12:01 AM PDT
Wednesday, 15 April 2015
Tribute to Patricia
Topic: Multi-Technique

Upon the news of the death of one of Operation Write Home's volunteers we were challenged to make a card cased from one she had made as a tribute to her.

I chose to make one based on this:


I actually had the same little workman as he is a digital that I downloaded from OWH some time back. I colored him with alcohol markers (three tones of each color) and I fussy cut him to use.

I embossed the background of silver cardstock with the diamond plate Cuttlebug folder and added two strips of 'masculine' papers.

After creating the text block I remembered these brads that look like phillips screws. So cute!


I gave the little guy some eyes inside his blank glasses and popped him up on foam tape.

Ddd


Posted by studio3d@ccgmail.net at 12:01 AM PDT
Monday, 13 April 2015
12 Tags of 2015 - April - version 3
Topic: Multi-Technique

We're still working on April in the projects inspired by Tim's 12 Tags of 2015.

As a reminder - this is Tim's version:

Here is the process for my third card:

-cut watercolor paper

-stamp flower heads and stems with Archival Ink in jet black

-mist paper with water

-use bulb sprayer to apply two colors of Distress Ink to background

-dry with heat tool

-use darker Distress Marker to draw partial outline on some of the petals

-use aquabrush to pull color into the petal

-dry

-scribble that color and another lighter one on acrylic block

-use aquabrush to color the petals with these inks

-use same process for stems

-dry

-use Pumice Stone distress marker scribbled on acrylic block to aquabrush a drop shadow around flowers and stems

-ink outer edges of paper with dark distress ink using a foam tool

-put black soot Distress Marker in bulb sprayer

-lightly speckle the background

-cut a backing piece

-ink edges with dark distress ink

-use die to cut out words

-cut a slit above and below the words

-feed the floral behind the diecut strip

-use sewing machine to stitch around all four edges of floral tag

-diecut another word from matching paper

-use very fine line marker to faintly outline the diecut areas and words to separate from the background

-use some of the floral marker ink to watercolor inside the cutout diecut area

-adhere whole to a card base coordinating with the florals

And here is the resulting third card:

So, these were the three versions I made from Tim's directions.

Ddd


Posted by studio3d@ccgmail.net at 12:01 AM PDT
Sunday, 12 April 2015
12 Tags of 2015 - April - version 2
Topic: Multi-Technique

Continung with my creations inspired by Tim's 12 Tags of 2015. We're working on April.

As a reminder - this is Tim's version:

Here is the process for my second version:

-cut watercolor paper

-stamp flower heads and stems with Archival Ink in jet black

-mist paper with water

-use bulb sprayer to apply two colors of Distress Ink to background

-dry with heat tool

-use darker Distress Marker to draw partial outline on some of the petals

-use aquabrush to pull color into the petal

-dry

-scribble that color and another lighter one on acrylic block

-use aquabrush to color the petals with these inks

-use same process for stems

-dry

-use Pumice Stone distress marker scribbled on acrylic block to aquabrush a drop shadow around flowers and stems

-ink outer edges of paper with dark distress ink using a foam tool

-put black soot Distress Marker in bulb sprayer

-lightly speckle the background

-cut a backing piece the size of the card front

-ink edges with dark distress ink

-use die to cut out word

-cut a slit above and below the word

-feed the floral behind the diecut strip

-use sewing machine to stitch around all four edges of floral tag

-diecut a word from matching paper

-attach rhinestones to front of diecut strip

-adhere whole to a card base

That being said, here is the resulting second card:

Version 3 will be up tomorrow.

Ddd


Posted by studio3d@ccgmail.net at 12:01 AM PDT
Saturday, 11 April 2015
12 Tags of 2015 - April - version 1
Topic: Multi-Technique

Time for another creation inspired by Tim's 12 Tags of 2015. We're now up to April.

This is Tim's version:

I made three cards from this inspiration but will only show one today (saving the others for the next couple of days). Here is the process:

-cut watercolor paper

-stamp flower heads and stems with Archival Ink in jet black

-mist paper with water

-use bulb sprayer to apply two colors of Distress Ink to background

-dry with heat tool

-use darker Distress Marker to draw partial outline on some of the petals

-use aquabrush to pull color into the petal

-dry

-scribble that color and another lighter one on acrylic block

-use aquabrush to color the petals with these inks

-use same process for stems

-dry

-use Pumice Stone distress marker scribbled on acrylic block to aquabrush a drop shadow around flowers and stems

-ink outer edges of paper with dark distress ink using a foam tool

-put black soot Distress Marker in bulb sprayer

-lightly speckle the background

-cut a backing piece

-use distress tool on edges

-ink edges with dark distress ink

-use die to cut out word

-cut a slit above and below the word

-feed the floral behind the diecut strip

-use sewing machine to stitch around all four edges of floral tag

-diecut a word from dark paper

-attach an embellishment to front of diecut strip

-adhere whole to a card base

That being said, here is the resulting first card:

Back tomorrow with version 2.

Ddd


Posted by studio3d@ccgmail.net at 12:01 AM PDT
Thursday, 2 January 2014
Still Ahead of the Game
Topic: Multi-Technique

More scraps laying on the table so I decided to make more of the very early Christmas cards.

For the first one I had used the front side for experimenting so I had to turn it over and play with the side where the pattern was indented instead of raised. This also put the border strip on the left. coloring was more challenging since I was coloring into the indented areas but it worked out fairly well. I couldn't stamp the text onto the background because it would have missed where there were sunk in dots. So I stamped on a buff paper, cut a fishtail and raised it up on foam tape. I liked black bordering for this.


I had one more of the embossed panels left but no more of the globes or diecut word. So I just colored it up and left off the ground line. I stamped the full greeting on the background and added a star in the sky which I colored with yellow.


This needed a bit of pizzaz so I used three different colors of Stickles to add over the snow ground and dots, colored background dots and the star.


Black bordering worked really well on this one, too.

Ddd


Posted by studio3d@ccgmail.net at 12:01 AM PST
Tuesday, 31 December 2013
Let's Wrap It Up, Folks!
Topic: Multi-Technique

WOW! Time for the year-end-review already? What a busy and fulfilling year it has been in my art world. I had a hard time choosing just one item from each month to showcase.

JANUARY

On January 22nd I posted this card made with peel-off stickers, pearl pen, shimmer cardstock trim, Martha Stewart paper, Tim Holtz distress paper, and Distress Ink.

FEBRUARY

On February 26nd I shared this card as part of a tutorial I wrote on 'hacking' acrylic stamps to make parts adjustable (the ears in this case). The card also features 'out of the box' diecutting and 'watercoloring' with Distress Marker ink.

MARCH

I shared this card I made on March 29th using a pattern designed for an applique quilt. I used patterned papers instead, carefully cut and layered.

APRIL

On April 14th it was a card I created using a waxed paper background, a stencil and Distress Inks. I want to go make more of these.

MAY

The project I chose from May was posted on the 9th. This necklace was constructed from store-bought wire stars, star buttons, an old bracelet and jump rings. This was a big hit with the 'jewery staff' on our cruise ship!

JUNE

On June 20th I shared some cards using formula cutting of 6 x 6 paper pads and mix-and-match assembly. I especially like this one with a butterfly sticker and three butterfly punches.

JULY

From July 2nd I just had to share again the awesome wall hanging I designed for my son-in-law. I also wrote a tutorial/pattern for this which is available on request.

AUGUST

August 25th was the post date for my largest quilt to date. The king size creation is a tribute to our late black lab - Chuck the Dog - and a gift to my hubby. Features include applique (center), original paper piecing (dog heads), fussy cutting (puppy blocks), and free-motion quilting.

SEPTEMBER

On September 1st I shared some cards using a black embossed background stamp and watercolor markers. I love the dramatic look of this.

OCTOBER

October's best share was on the 8th. I used my own hand-carved stamp on a fancy diecut and colored with blended alcohol markers. I employed a new-to-me background shading technique, too.

NOVEMBER

Narrowing down November to just one was the most difficult but I finally settled on the Birdhouse Neighborhood quilted wall hanging from the 21st. This was the most inventive quilt I have done and I absolutely love everything about it.

DECEMBER

And finally, the December 8 project which is another quilt! I made this with scraps from other quilts I have made (41 of them to date) and only had to buy for the border and backing. I love picking out the fabrics and remebering where they were used before.

So there you have it! My favorite cards, quilts and jewelry from 2013 and the techniques that make them special. Many more quilts this year in the review but I then made more quilts this year than in the past, too!

I will close out this year with a special wish for each of you to have a Happy New Year. Go forth and create!

Ddd


Posted by studio3d@ccgmail.net at 12:01 AM PST
Monday, 30 December 2013
Head Start
Topic: Multi-Technique

I had one more idea jump into my head while cleaning off some scraps off the desktop - specifically a word diecut and a punched white circle. The word was a Tim Holtz shaped cut of 'peace'. When it fell on top of the circle I was inspired to create the first two Christmas cards for NEXT year!

I dig out an old stamp of an antique map of two hemispheres and stamped it on the circle. I actually did this with two circles and different inks so I could do the coloring in watercolor markers and in alcohol markers to see which I would like better. I liked the both so made cards with each.

I added some black punched bits to create a globe stand then mounted the cut word on foam tape over top.

To create the background I used two embossing folders on white cardstock. The right side is a border folder and the main field is the swiss dots folder. I used the same style of markers to color the embossing and drew a ground line with black marker.

The globe was mounted and a coordinating border added to the card base. Then I stamped additional text at the bottom.

Here is a view of the raised word:


I wouldn't say I'm READY for next Christmas, but I do have a head start.

Ddd 


Posted by studio3d@ccgmail.net at 12:01 AM PST
Wednesday, 26 June 2013
6x6 Cut-Ups - Fourteenth Installment
Topic: Multi-Technique

...and the LAST installment, too!

This final group of cards uses a sheet of thick word stickers I was gifted in a swap.


for this one I 'joined' them with a stamped word

...and one punched butterfly.

So, there we are with 42 cards all in one 'style' of construction/design.


Ddd


Posted by studio3d@ccgmail.net at 12:01 AM PDT
Tuesday, 25 June 2013
6x6 Cut-Ups - Thirteenth Installment
Topic: Multi-Technique

Feeling a bit punchy today? Although I used punched butterflies on a few of the other cards in this series, for this card that is ALL I used. I glued down a solid colored one then 3D mounted a patterned one over the top.


I couldn't leave it at that so I added a cardstock sticker of text.

Ddd


Posted by studio3d@ccgmail.net at 12:01 AM PDT
Monday, 24 June 2013
6x6 Cut-Ups - Twelfth Installment
Topic: Multi-Technique

I had a sheet with just three vinyl stickers. Had I more of these I might have used them, but alas...

I mounted them on bordering materials to match the rest of the card and they are all popped up on foam tape.


This one got an extra strip of patterned paper.


This one had a large open space so I stamped a sentiment in it.


You can see why it would have been nice to have more of these.

Ddd


Posted by studio3d@ccgmail.net at 12:01 AM PDT
Sunday, 23 June 2013
6x6 Cut-Ups - Eleventh Installment
Topic: Multi-Technique

One lone card - that's all I have for today as it is all I made with a hard acrylic sticker. This was one left on an old sticker sheet.


What a romantic feel!

Ddd


Posted by studio3d@ccgmail.net at 12:01 AM PDT
Saturday, 22 June 2013
6x6 Cut-Ups - Tenth Installment
Topic: Multi-Technique

Another gift of supplies contained some black and white acrylic text stickers. YUMMY!


I didn't use very many of these because the high contrast was a bit much for most of the cards I had set up.

Ddd


Posted by studio3d@ccgmail.net at 12:01 AM PDT

Newer | Latest | Older