« February 2015 »
S M T W T F S
1 2 3 4 5 6 7
8 9 10 11 12 13 14
15 16 17 18 19 20 21
22 23 24 25 26 27 28
You are not logged in. Log in
Entries by Topic
All topics  «
3D paperwork
A - Z challenge 5
A - Z challenge 7
A - Z challenge round 4
A to Z challenge round 3
A to Z round 2
A to Z round 6
A-Z round 1
Around the House
Art Challenges
Artist Trading Cards
Backgrounds
Beads
Bible Journaling
Books
Boxes
Collage
Color Challenge
Coloring
cookbook
Die Cuts
Digital Projects
Digital Stamps
Drawing
Dry Embossing
Fabric Stuff
Fantastic Folds
Field Trip
Home Decor
How Does Your Garden Grow?
Hymnal Art
In The Kitchen
In the studio
Jewelry
Lettering
Links
Multi-Technique
Music to Work By
Musings
Nail Art
New Work
Online Class
Other Hobbies
Other Projects
Painting
Paper Embroidery
Paper Piecing
Photo
Pretty Paper
Quilting
Random
reading
Scrap Recovery
scrapbooking
Sewing
Sketch Challenge
Some Backlog
Stamping
Stencils
Stickers
Supplies
Teabag Folding
Techniques
Testing
tips and tricks
Tutorial
Web resources
Welcome to my Blog
Work By My Friends
workflow
Writing
Blog Tools
Edit your Blog
Build a Blog
RSS Feed
View Profile
Group One
In & Out of Studio 3D
Friday, 6 February 2015
Hello Cupcake
Topic: Paper Embroidery

Next up for a swap on a paper embroidery group is the theme 'cupcakes'. I have more than one pattern for them but this is one I have never used before.

I stitched it up on a textured blue cardstock using a verigated pink and a verigated purple. They ended up looking very much alike but I really don't mind.

I mounted this on a printed background cardstock and pricked out the text from another pattern. This got stitched in burgundy.

I added puffy acrylic heart stickers to be 'sprinkles' on the cupcake.


I selected a bright pink card base to go with the hearts.

Ddd


Posted by studio3d@ccgmail.net at 12:01 AM PST
Thursday, 5 February 2015
Operation Write Home - sketch 168
Topic: Sketch Challenge

Now here's a sketch I can get behind - OWH 168:

The illustration I had on hand was not the specified size but I decided to just go with the flow. I selected bordering and backing papers based on the stamped and colored image.

The assembly was pretty straightforward and I didn't even rotate the sketch. Woo-hoo! The image is popped up on foam tape.

I decided to add a sentiment and found one already stamped onto the same  green I had been using. Sweet, indeed! I bordered it with some of the dots from the background.

Ddd 


Posted by studio3d@ccgmail.net at 12:01 AM PST
Wednesday, 4 February 2015
Operation Write Home - sketch 167
Topic: Sketch Challenge

Today I have another OWH sketch that is awfully simplistic for my taste - OWH 167:


Unfortunately, this time I did not have a giant illustration to use. What I did have was a colored stamp that would work for the round element so I started by cutting that and embossing the edges with the Cuttlebug and a Spellbinders die.

I selected orange for the border and punched it with a scallop. Then I chose a printed background to coordinate with the doily under the teapot and a lavender card base to go with the table under the doily.

When these were all assembled there was not enough contrast between the layers so I did some sketchy drawing on the circle and the printed background.

I thought there was too much white space so I selected and bordered a stamped sentiment with a banner end.


I used the pen again to add lines to the sentiment and across the top of the table.

Ddd 


Posted by studio3d@ccgmail.net at 12:01 AM PST
Tuesday, 3 February 2015
Operation Write Home - sketch 166
Topic: Sketch Challenge

Simple Simon - that is OWH sketch 166:


Fortunately I had an image already colored that was large enough for the center panel.

I  selected color blocking and bordering papers based on the colors in the illustration - pink and blue from the hearts and brown from the bunny. I used a little of the brown border around the image even though it was not in the sketch.

To fit the picture I needed to rotate the sketch to a vertical format.

I cut apart a stamped sentiment and bordered the words separately. These took the place of the dots in the sketch and they are popped up on foam tape.

Then I covered the main heart with Glossy Accents. You can see the shine of it in the photo.

Ddd 


Posted by studio3d@ccgmail.net at 12:01 AM PST
Monday, 2 February 2015
Operation Write Home - sketch 165
Topic: Sketch Challenge

After a lengthy break I'm back with another OWH sketch for my self-challenge.

I did a few calculations trying to decide how long it might take me to finish up this project.

There are currently 247 regular sketches plus 36 bonus sketches - total 283. I finished have finished 164 leaving 116 to do. New sketches are being issued twice a month so there will be 22 more by the end of 2015. That is a new grand total of 138. Since I did 164 in 13 months, I should be able to finish up by the end of the year.

Now, on to OWH sketch 165:

I had an already colored floral that I wanted to use but it was vertical instead of horizontal. So I rotated the sketch to suit its use.

I drew colors for the background and scalloped borders from the flower and played it pretty straight on design.

The stamped piece was not as long as the sketch so I extended it with black at the ends.


In place of the ribbon and bow I used a sentiment strip and a punched butterfly.

Ddd


Posted by studio3d@ccgmail.net at 12:01 AM PST
Updated: Thursday, 15 January 2015 6:25 PM PST
Sunday, 1 February 2015
Dance...Where Music and the Feet Meet
Topic: Paper Embroidery

On challenge to create a paper embroideried card with the theme of 'music' I decided to use my pattern for a dancer. For this I used four metallic threads on a paper with music notations.

I used a stamp positioner to add a stamp of a musical score below her feet.


I backed the stitched panel with black and purple. Then I layered a purple butterfly with a black layer and balanced it on her upraised hand.

Ddd


Posted by studio3d@ccgmail.net at 12:01 AM PST
Saturday, 31 January 2015
Winter Scraps
Topic: Dry Embossing

I had a part of the dry embossing layers left over from yesterday's project and decided to use it right away instead of stashing it to work with later.

The treatment was very simple. I bordered the embossing with pink, selected a pre-stamped sentiment on blue and bordered that with pink as well.

I made a blue folded card base and overlaid it with a blue dotted paper.

I popped up the sentiment on foam tape and added two shimmery heart stickers.

Ddd


Posted by studio3d@ccgmail.net at 12:01 AM PST
Friday, 30 January 2015
Winter Embossed
Topic: Dry Embossing

One of my groups issued a challenge to make a 'winter' card. I immediately thought of the snowflake embossing folder but wanted to do something different with it.

I first laid out together on white cardstock the Swiss Dots folder and a border with a cabin in the woods. These were embossed using the Cuttlebug. 

I then used a foam dauber to color these raised parts in blue.

Then I ran the whole thing through with the Snowflake folder and used another foam dauber to color all the snowflakes - including those that covered the cabin border.

I then placed the cabin folder back over the blue coloring and ran it through the Cuttlebug again. This was colored again with blue to enhance its definition.

This was mounted on a pink card base, leaving a border all around it.

I embossed a frame on another piece of white and trimmed it to the widest border and removed the inside section. This was mounted over the colored piece using foam tape.


Exactly as I envisioned it!

Ddd


Posted by studio3d@ccgmail.net at 12:01 AM PST
Thursday, 29 January 2015
Tiny Squirrel
Topic: Around the House

We have a new little buddy at the squirrel feeder! I'm not sure what kind he is but he is smaller than a chipmunk.

The ones we have in spades are reddish brown on the back and white on the belly. They are about 7 inches. 

This guy is dark brown on the back and redish on the belly. He is about 3 1/2 inches tall.

He can't seem to figure out the other feeder that requires lifting a lid with the head to access the seeds. But he is all over the jar feeder. He pops inside, grabs a seed, scurries out to sit on top and eats the treat there.


Adorable, huh?

Ddd


Posted by studio3d@ccgmail.net at 12:01 AM PST
Wednesday, 28 January 2015
Colorblock Studio
Topic: In the studio

Sometimes you come across an idea that seems really neat even though it serves no earthly purpose. Such was the case when I surfed from one blog to another and came across this studio picture from www.madiganmade.com.


I guess it does serve the purpose of hiding all the junk stuff contained in the iris carts - and, besides that, it just looks cool.

I decided to spiff up my studio the same way and set to work selecting some colorways for my 'paint chips'. I have a LOT of iris carts in a variety of sizes and I also have some clear plastic bins that contain supplies.

Fortunately I had my bins marked with printed labels already so it was just a matter of measuring, cutting and installing. Each of the colored cardstock pieces is tacked to the inside front of the bin with doublestick tape.

Each drawer 'set' is in a separate colorway.


The stacked drawers on the far right are in sets of 4 drawers instead of only 3 so I had to expand the colorway by one step.

I did the two under-counter carts as well.

This cleans up the look of the studio so much. I really like it!

Ddd


Posted by studio3d@ccgmail.net at 12:01 AM PST
Tuesday, 27 January 2015
Round 'Em Up
Topic: Paper Embroidery

For the second paper embroidery group I belong to the second swap of the year is 'circles'.

I was intrigued with this pattern that overlaps a color run of threads to create a gradation. I stitched it out in five colors from purple to yellow and back to purple, using graph gridded cardstock as the base.

I mounted it on a purple folded card base and used a punch to round the corners.

Then I punched dots in three colors and mounted them over and under the edges and drew in stitching lines on them.

Two sizes of circle cutouts were traced onto the backgrounds and then clear bubble stickers in three sizes were used to decorate the front.


I believe there are enough circles to satisfy the theme.

Ddd


Posted by studio3d@ccgmail.net at 12:01 AM PST
Monday, 26 January 2015
Welcome to June-uary
Topic: Photo

For a day that started out with an extremely foggy sunrise...

...yesterday turned into a stunningly sunny and warm day. In fact, the weather is so unseasonably warm that one local station coined the term June-uary for it. Clever!

We took advantage of it for some outdoor recreation. First we went to a local park to feed the ducks...

...and the geese

and then took a stroll down by the river where we watched some band fishermen pull three large fish out. Good Job!

Some river views were too good to let pass without recording them


Now, this was the strangest thing we saw all day...


At this shelter in the park there must have been over a dozen individuals in cobbled together 'medevial' costumes: shields, wooden swords, a lance, a bow carrying arrowl that looked more like plungers, robes, capes, a variety of headdresses, and one guy with a beard down past his waist made out of bright pink yarn! When we first spotted them they were just assembling here but later, as we were leaving the park we spotted them out in the open area of the park having a battle. We laughed till our sides hurt!

On the way back to the car we stopped at the skate park and watched the youngsters doing tricks on razor skooters, skateboards, and bikes. Quite impressive, really.

After a trip to the library we trundled on home and finished the day with a barbeque of hamburgers on the grill.

Yep, it's January!

Ddd


Posted by studio3d@ccgmail.net at 12:01 AM PST
Sunday, 25 January 2015
Torn Paper Posies ATC
Topic: Artist Trading Cards

In a total departure from the three previous ATCs I did not begin this one with tissue paper. Instead I glued down a background of handmade paper with dried flower inclusions. To do this, I applied clear matte medium to the chipboard and the paper and pressed them together.

I used three other handmade papers and hand tore shaped bits to create flowers and buds. Each piece was glued on with the matte medium. This was all  built up one piece at a time, sealing the fronts and edges so there would be no loose bits.

After drying overnight I used a fine permanent marker to sketch in some outlining.


Silver Krylon paint pen was used to cover all the edges of the card.

So, now that I have done the required four ATCs you may expect to see some again...never. (well, maybe someday - but not soon)

Ddd


Posted by studio3d@ccgmail.net at 12:01 AM PST
Saturday, 24 January 2015
Rose in Bloom ATC
Topic: Artist Trading Cards

For the third ATC I required to fulfill my swap I again started with printed tissue over chipboard. In this case it was a multi-toned yellow with some black fine line swirls.

Over this I applied some rose stickers in the upper left and lower right corners. These were overlaid with vellum rose stickers to create a more dimensional effect.

I added torn bits of tissue tape to the top and bottom edges then used Glossy Accents to adhere two gold etched plaques.

I sealed the whole piece with clear matte medium and allowed it to dry overnight.

I used a black soot Distress Marker to outline the gold plaques and smeared the ink.

To finish it I used gold Krylon paint pen on all four edges.

Ddd


Posted by studio3d@ccgmail.net at 12:01 AM PST
Friday, 23 January 2015
ART ATC
Topic: Artist Trading Cards

I didn't mention mention in my post the other day how much I do not like making Artist Trading Cards. To me they are rather pointless as they are not a greeting card, are rather too small to work comfortably upon, and since their sole purpose is to trade them to someone I generally get back some art that I really do not care for.

That said, I discovered after I had committed to the ATC swap for florals that it was a 4-for-4 swap and that I had to make three more. Drat!

Since they will all go to the same person I really coudn't duplicate the one already done so I dragged out some supplies and set to work on new designs.

The first of these began with some brown printed tissue over chipboard. I used some distressed stripes black rub-ons to finish the background.

I arranged two layers of three vellum pansy stickers (two layers so the background would not show through) and added decorative vellum letter stickers at the top.

The whole piece was sealed with clear matte medium then the alpha letters were traced over with black permanent marker.

I finished this off by covering the edges with silver Krylon paint marker.

Finished size is 2.5 x 3.5 inches.

Ddd


Posted by studio3d@ccgmail.net at 12:01 AM PST
Thursday, 22 January 2015
I is for Insects
Topic: Paper Embroidery

I really laid back on the 'alphabet swaps' on a paper embroidery list last year. I'm jumping back in at the letter 'I' which is designated for 'insects'.

My favorite insect, as you probably know, is the dragonfly. I selected a bunch of stitching stickers and applied them to a subtle blue background. Then I stitched with a light aqua thread.

I used point-to-point stitches, french knots and a few chain stitches to enhance the bugs.

Ddd


Posted by studio3d@ccgmail.net at 12:01 AM PST
Wednesday, 21 January 2015
ATC In the Tag Style
Topic: Artist Trading Cards

I wanted to run through the techniques I learned in the making of the piece yesterday (12 Tags of 2015) but I needed an ATC card for a swap. The theme for the Artist Trading Card swap was 'flowers' so I started with a tissue with a floral print.

I made sure to use less of the acrylic paint at the beginning so as to not obscure the print on the tissue like I did on the last one. Otherwise, it is put together pretty much the same with all the spatters, spritzing, heat drying, layering, and adding words and charms.


I used the Krylon gold pen to color the charm and to color the edges of the card (which is made of 1/8" chipboard.)

Ddd


Posted by studio3d@ccgmail.net at 12:01 AM PST
Tuesday, 20 January 2015
Predictions, Wishes or Plans?
Topic: Techniques

For several years I have been following Tim Holtz’s posts and collecting his ideas for decorated tags. At first he did the ’12 tags of Christmas’ with step-by-step directions for each one. Then, last year, he switched to one tag per month – still doing 12 tags, but spreading them out over a year.

Amazingly, I have never played along, making a tag with the steps he has outlined. So this year I decided to challenge myself to recreate each of the 12 tags using the products I have on hand, even if they are not the same as what Tim uses.

The first of Tim’s 12 tags of 2015 is outlined here. In case yo want to follow along with HIS products and steps to see where I got my inspiration and where I made changes.

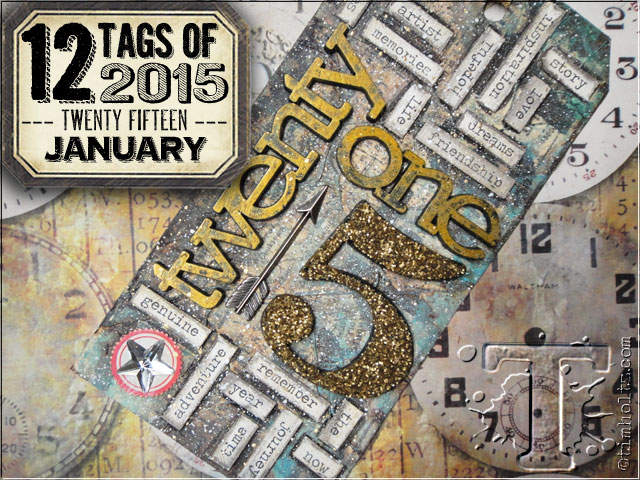
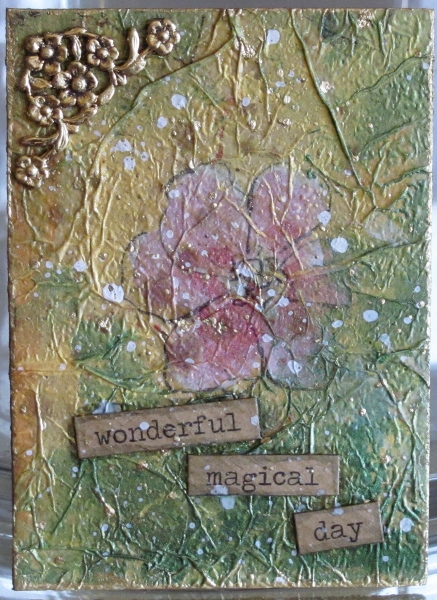
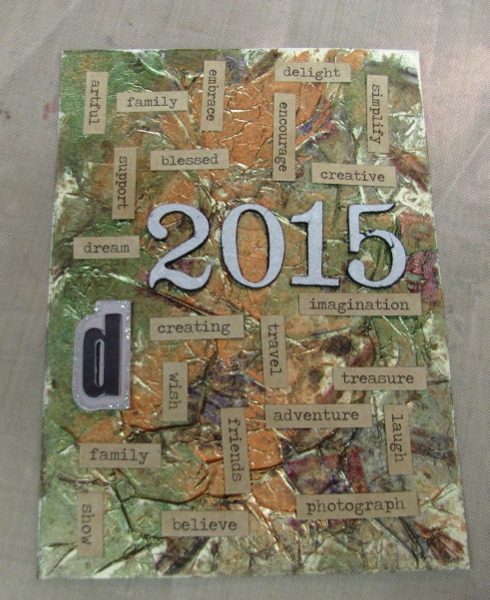
He put together a word collage for 2015 so I did the same. Also, he uses tags for his art but I really had no need of a tag so I did mine on a larger size to create a display piece.

So here we go...

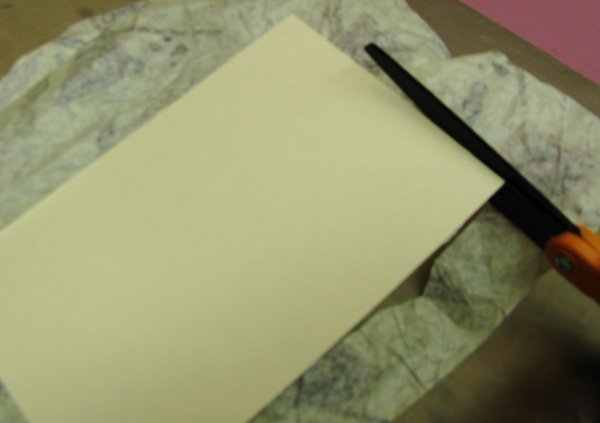
I cut a piece to work on from a manila file folder. I ran this through my Xyron to apply adhesive to one side of it.

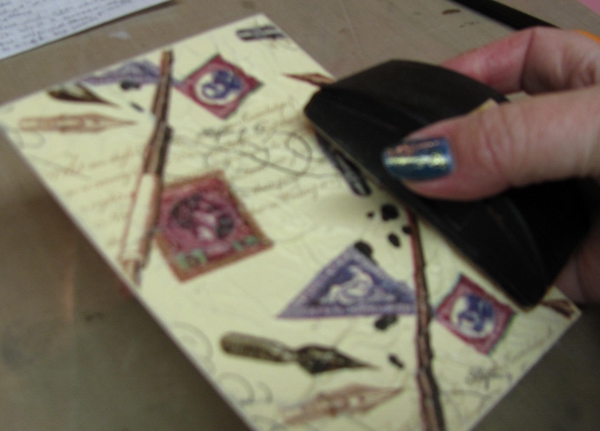
I scrunched up some printed tissue paper and applied it to the card with just a few wrinkles.

I trimmed the tissue even with the edges of the card.

I used a sanding block to scuff the edges of the card

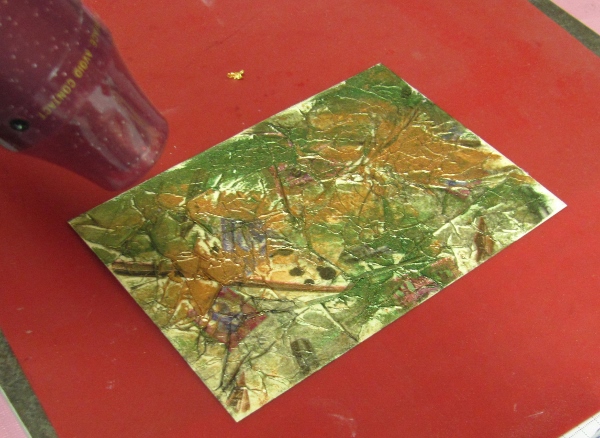
I used my fingers to apply various acrylic paints in a random manner:

While the paint was still wet, I misted it with water to make them blend.

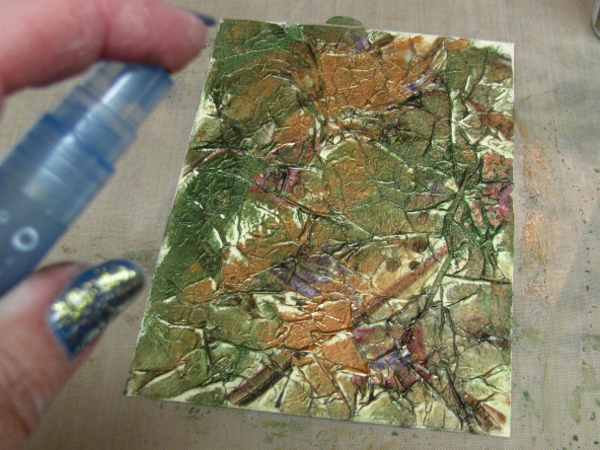
I blotted some of the paint away and then dried it partially with the heat gun.

I pressed a Walnut Distress Ink pad to an acrylic block.

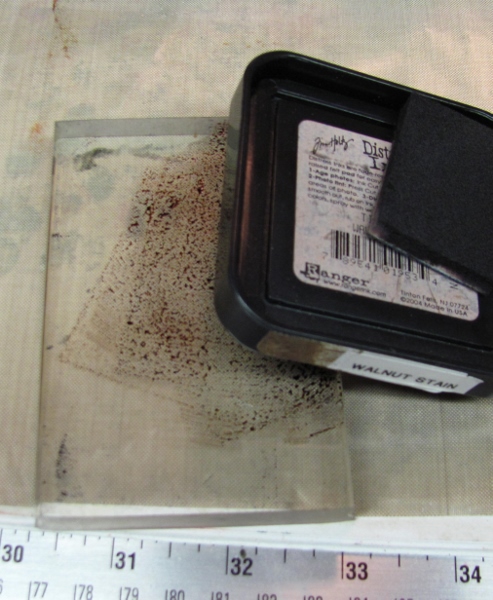
This was misted with water.

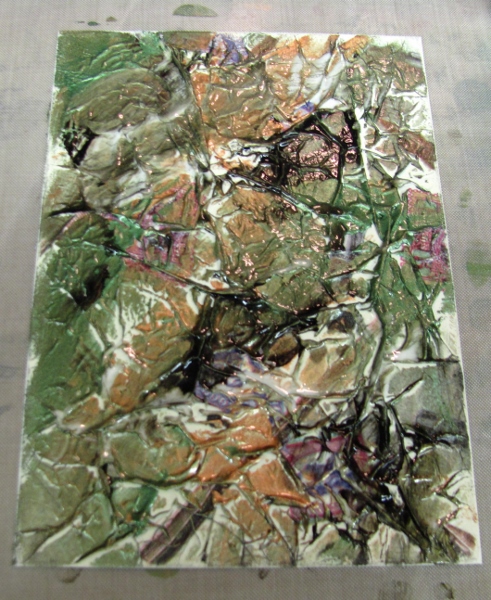
Then I used a paint brush to flick the ink over the edge of the block onto the card.

This imparted a spattered effect as shown here:

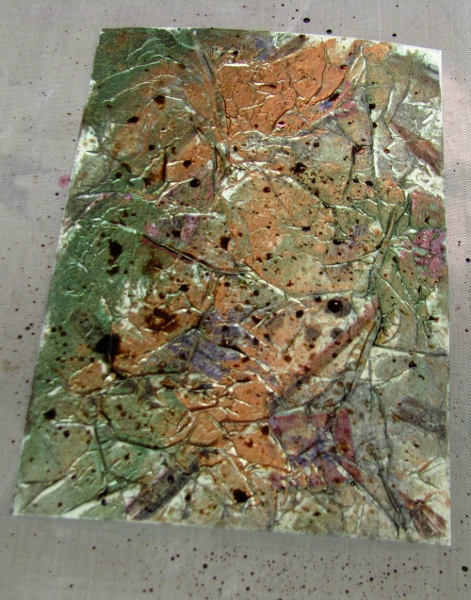
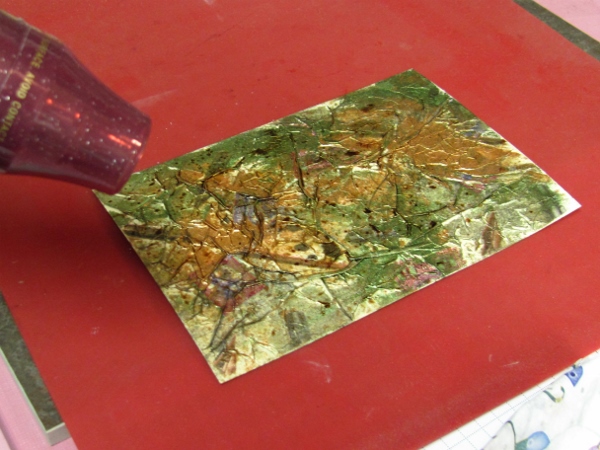
This was turned this way and that to get it to run into the creases on the surface. Then I dried it with the heat gun.


The card was set aside for a bit while I prepped some other pieces. I selected a sheet of 'grungeboard' numbers and cut out 2015.

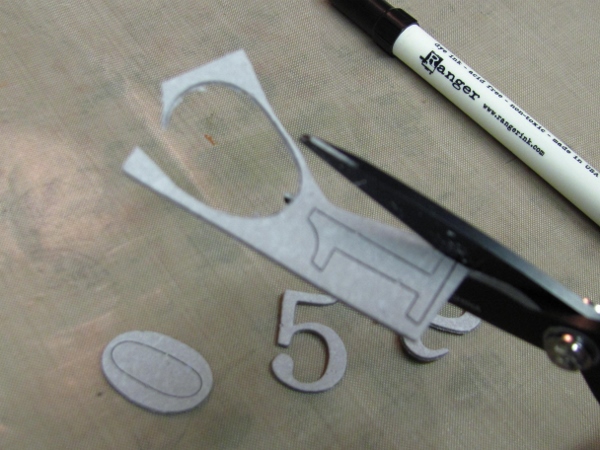
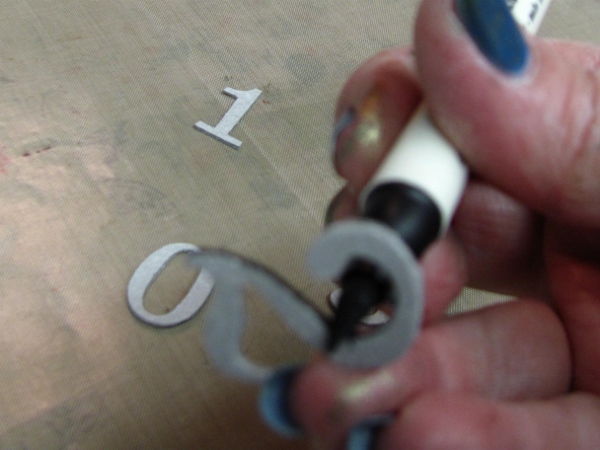
I used a black soot Distress Marker to color the edges of the numbers.

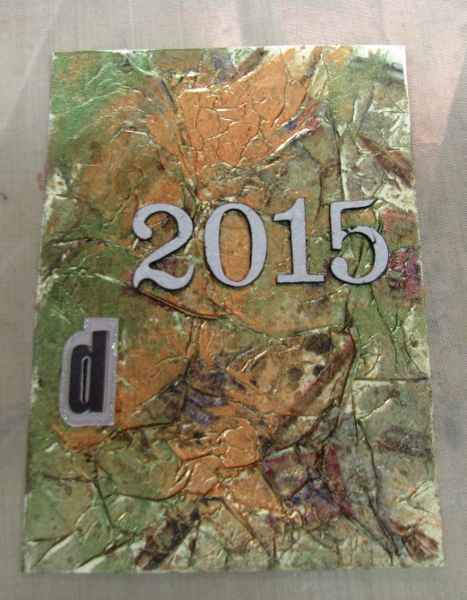
These numbers as well as a letter sticker were laid out temporarily on the card where they would eventually be adhered.

WOW! The next product was exactly the same used by Tim (unlike most of the other ones I used).


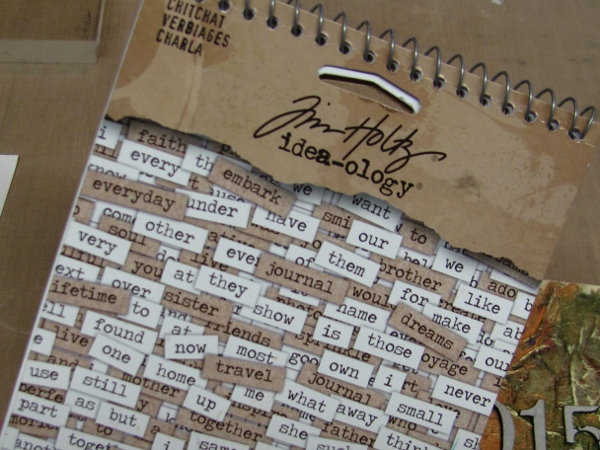
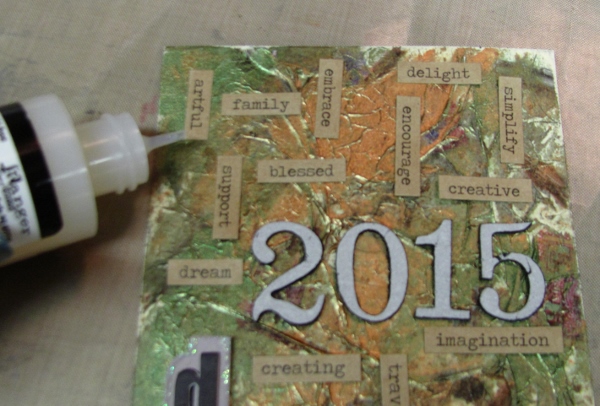
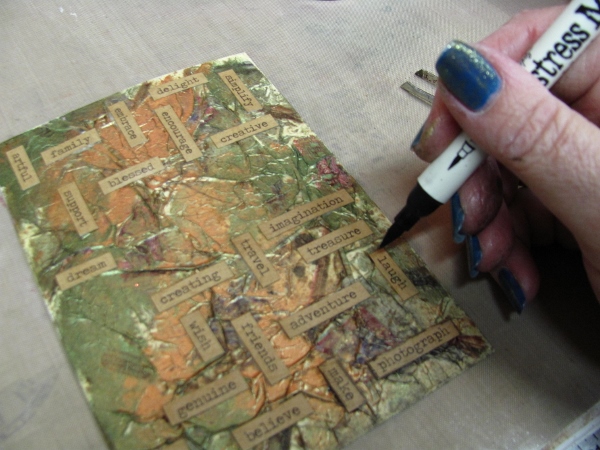
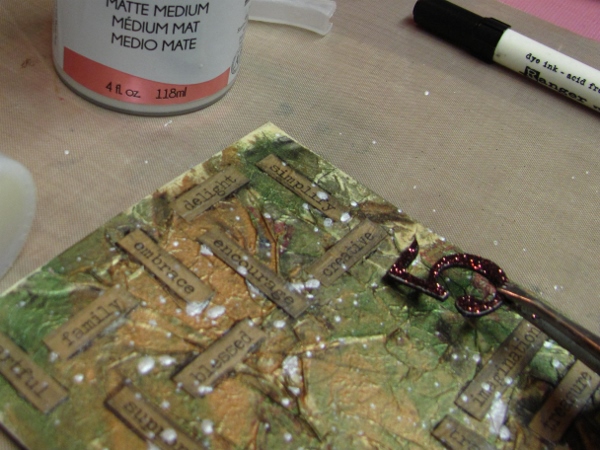
I chose, from the kraft pages, word stickers that described the things I plan and wish for myself for the year 2015. These were arranged around the numbers but not stuck down.

One by one the words were adhered with Glossy Accents.

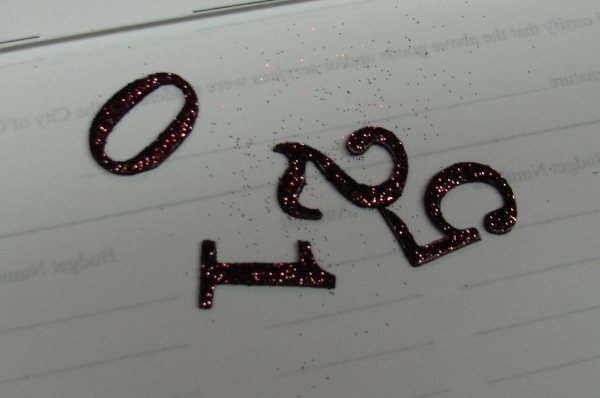
The numbers were moved over to scratch paper and covered with glossy accents.

The numbers were then sprinkled with glitter and set aside to dry.

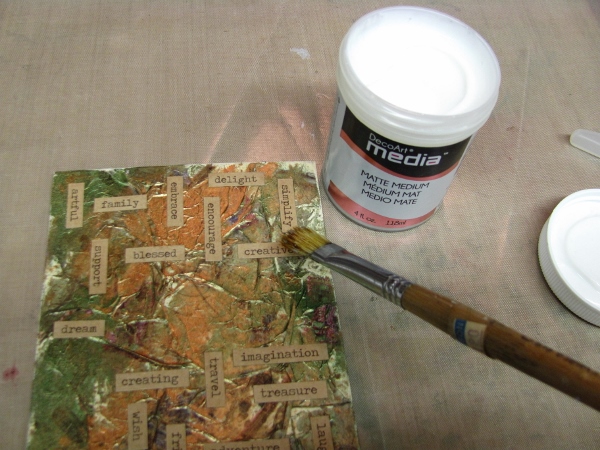
While these were drying, I brushed the main piece with a clear matte medium.

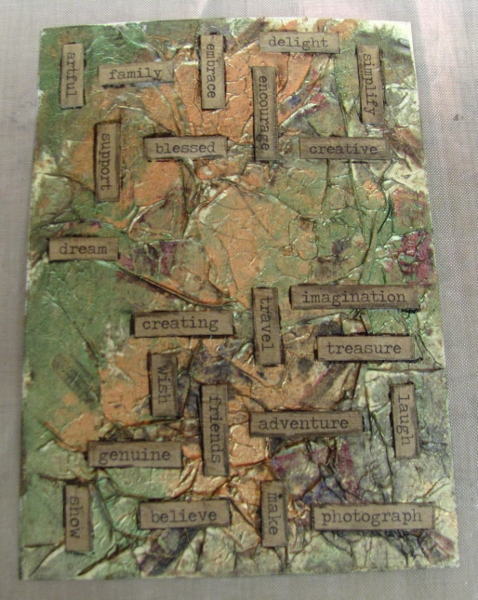
When this was dry, I used a black soot Distress Marker to trace around the word stickers and smeared the ink with my fingers.

So what do we have so far?

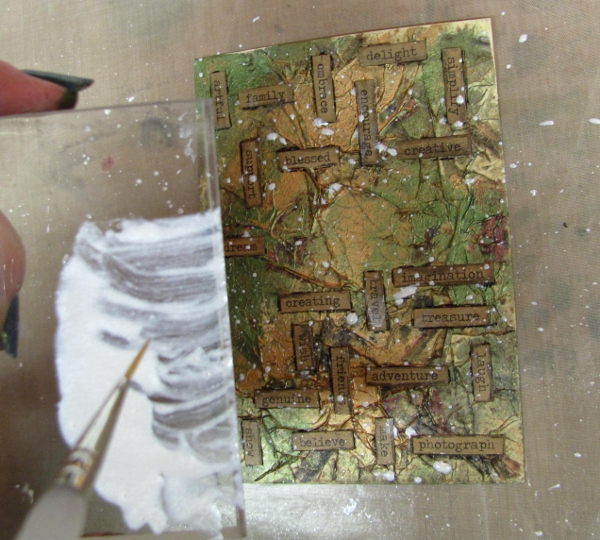
I put some white pearl acrylic paint on an acrylic block, thinned it with water and used a brush to flick it onto the card, rubbing it away where it obscured words.

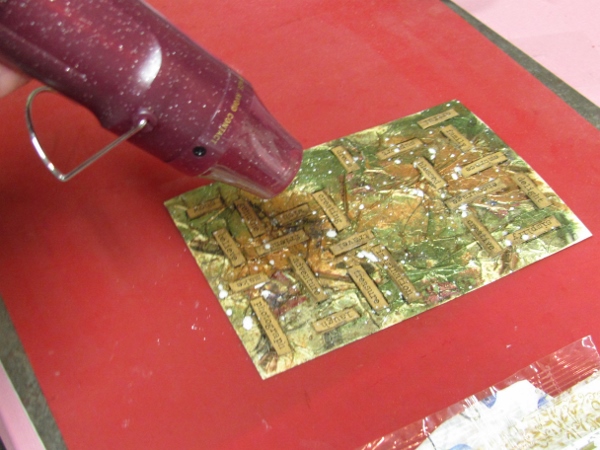
This was dried with the heat gun.

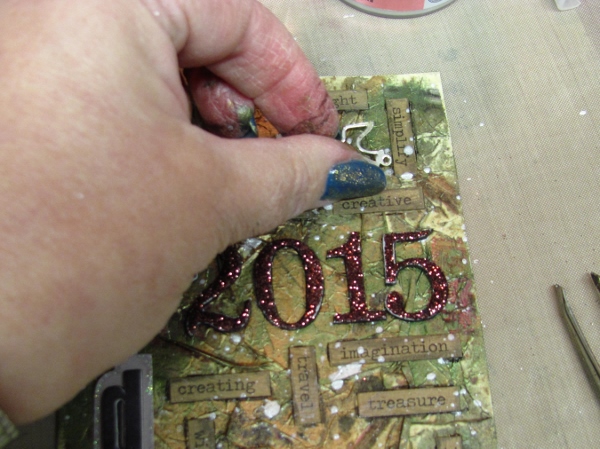
By now the glitter on the numbers was dry. I used glossy accents to glue them onto the card where they had initially been laid out in the arrangement.

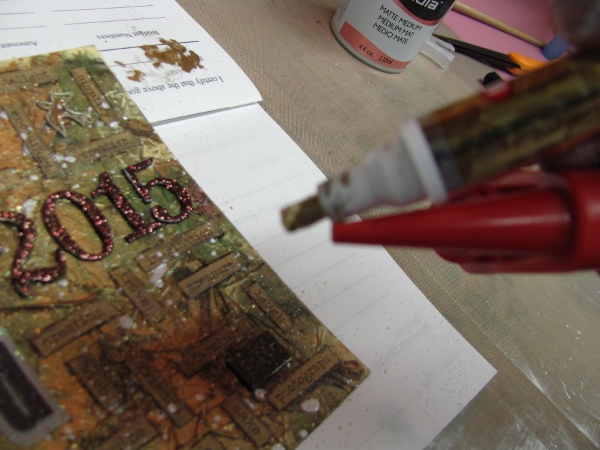
I used Glossy Accents to adhere a dove charm in an open area.

A metal word tag was adhered in the same way.

I used a bulb sprayer to make spatter from a Krylon gold metallic marker.

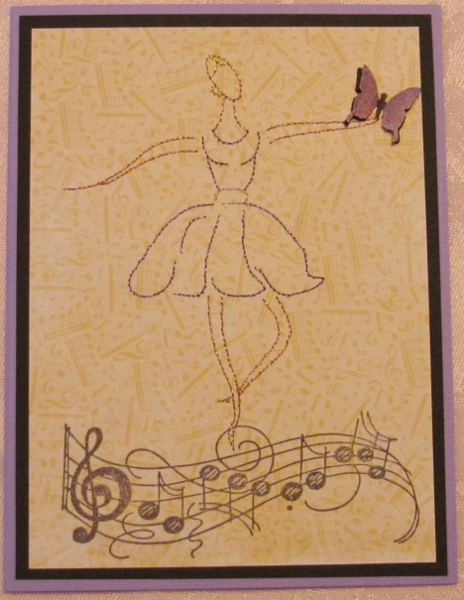
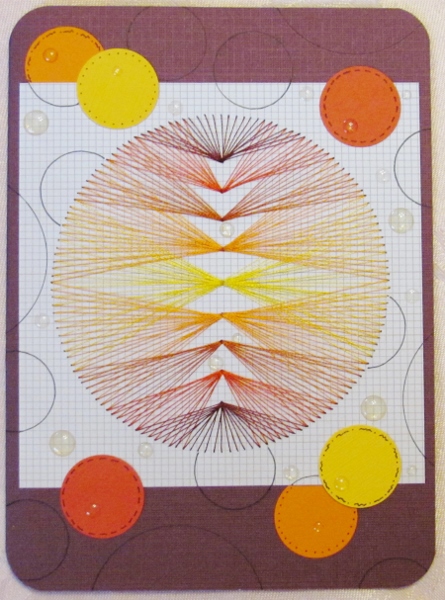
Here is my resulting art piece inspired by the first of Tim Holtz's 12 Tags of 2015.


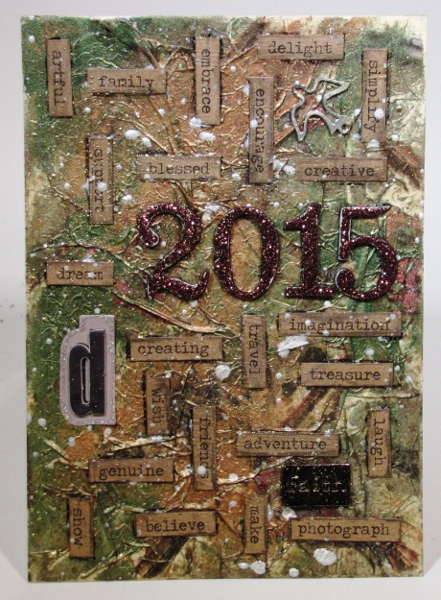
Only 111 more to go!

Ddd


Posted by studio3d@ccgmail.net at 12:01 AM PST
Monday, 19 January 2015
Rose Border
Topic: Scrap Recovery

When I needed a green for paper piecing the leaves on yesterday's card I got it from a piece that had a border print along the other edge. So it was no longer big enough for a full card face to use today.

I grabbed from the scrap bin a larger piece that had some overspray on it grom airbrushing. This I cut down to 4 x 5.25 and added a purple graphic border on the left. 

The border print was trimmed out along the major shapes and layered onto the right side border. Nice!


I used a pre-stamped sentiment and bordered it with a dard red to match the roses. This is popped up on foam tape.

I added some rhinestones and some 'dew drops' onto the florals and placed the whole piece on a white base card.

Ddd


Posted by studio3d@ccgmail.net at 12:01 AM PST
Sunday, 18 January 2015
Paper Pieced Magnolia
Topic: Scrap Recovery

In the scrap bin I found two strips with rhe remnants of a watercolored magnolia stamp and a text stamped background. The two halves did not match up so I separated them with a tone-on-tone golden dot paper.

I had a round pre-cut in the scrap bin, too, and decided to paper piece the same floral stamp on top of it. First I stamped the flower on the round, then stamped on a green pattern, a pink pattern and a yellow pattern. the colored portions were all cut out and layered over the round. I used old paper distress ink to tone the edges of the round.

The round and a pre-stamped sentiment with the edges toned are mounted on foam tape. Then the whole piece is mounted on a distressed pink background for framing.

Ddd


Posted by studio3d@ccgmail.net at 12:01 AM PST

Newer | Latest | Older